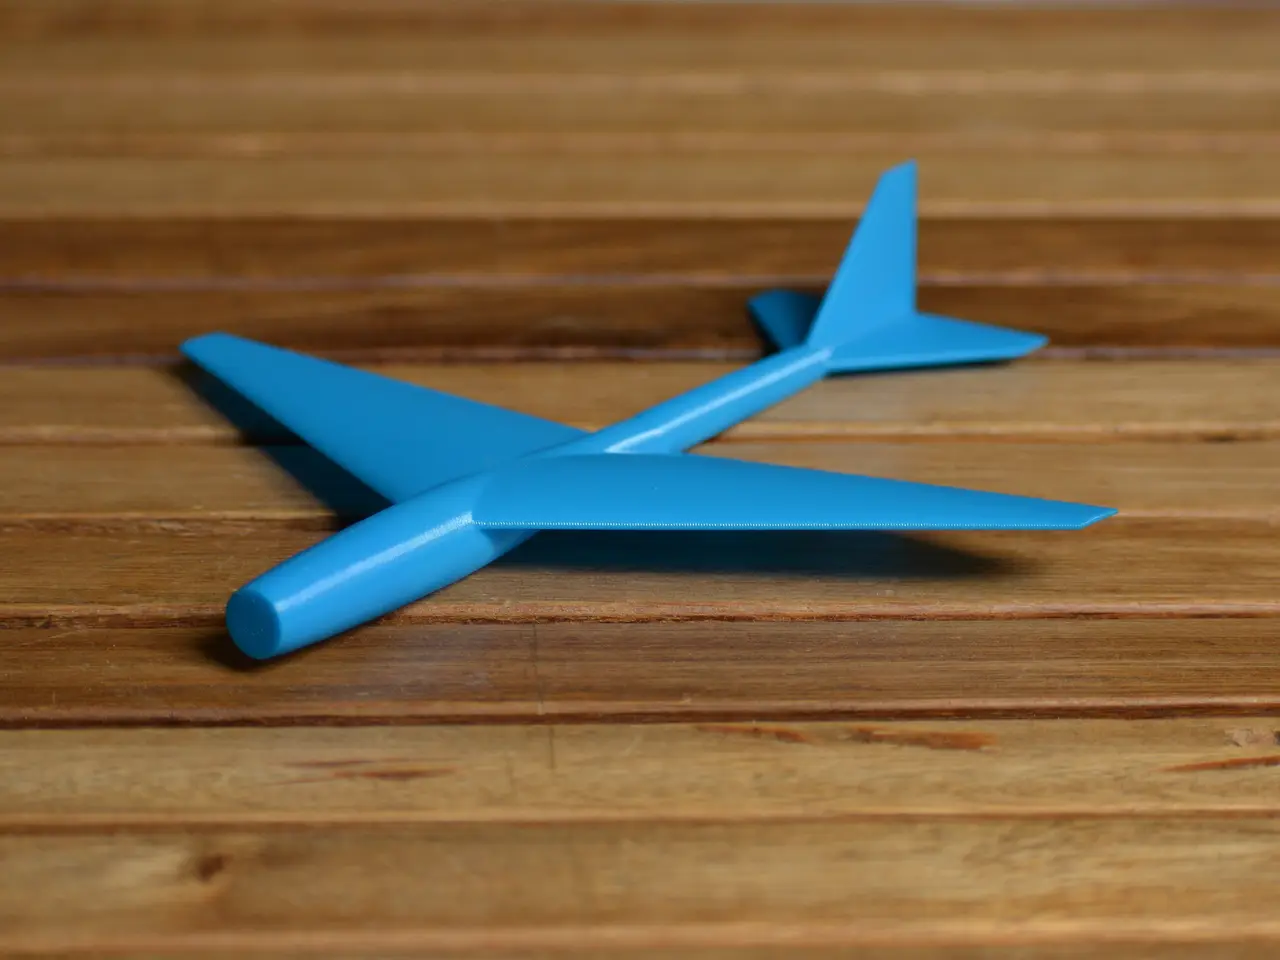
Vase mode glider (customizable) with rubber band hand launcher and tripod mounted catapult
por Tifn en Printables
This tiny glider prints in one piece in vase mode on its nose. And besides its aesthetic look, it can also fly !
Licencia
Uso comercial permitidoPuedes imprimirlo, modificarlo y venderlo dando crédito al autor.
Al descargar aceptas respetar la licencia y dar crédito a Tifn.
Archivos (18)
- planeur15_crochet.stl STL · 5,5 MB
- planeur20_crochet.stl STL · 5,6 MB
- planeur15.stl STL · 1,4 MB
- planeur20.stl STL · 1,4 MB
- planeur.stl STL · 1,4 MB
- lanceur.stl STL · 400 KB
- catapulte.stl STL · 137 KB
- rail.stl STL · 916 KB
- hook.stl STL · 19 KB
- trigger.stl STL · 74 KB
- trigger_box.stl STL · 84 KB
- poignee.stl STL · 542 KB
- catapulte.scad SCAD · 8 KB
- airfoil.scad SCAD · 8 KB
- planeur.scad SCAD · 6 KB
- bezier.scad SCAD · 12 KB
- lanceur.scad SCAD · 2 KB
- planeur_crochet.scad SCAD · 6 KB
- Categoría
- Juguetes y juegos
- Formatos
- STL, SCAD
- Descargas
- 964
- Publicado
Sobre este modelo
Quick howto - print planeur15_crochet.stl, preferably in PETG, in vase mode with 0.18 layer height, 30mm solid bottom at 20mm/s with cooling fan enabled at full speed. - print lanceur.stl normally in PLA (0.15 layer height, 2 perimeters, 10% infill, not too fast) - get one small and one large rubber bands for the launcher - have fun !
Overview The originality of this one piece glider is that it is designed to be printed in vase mode, the (flat) nose pointing to the build plate, with a high number of bottom layers for balance. This makes it possible to make wings with an aerodynamic profile, and most importantly a dihedral angle which is essential for flight stability. The leading edge is obviously a serious challenge, and requires printing a small feature with a 60° overhang angle, which corresponds to a 30° backward sweep angle. This constraint and the choice to print in vase mode (to achieve the smoothest surface finish) are the reason for opting for a truncated trapezoidal wing (almost a cropped delta). The smaller version has 15cm wingspan, weights 10 grams and takes 2 hours to print. I also made a larger 20cm version, weighting a little less than 20 grams, with 3 hours and a half of print time. I prefer the smaller one, which prints faster and can be launched at a higher speed for a given rubber band. Other than that, the conception tries to make use of aerodynamic theory to actually make it fly! And the hand launcher or the tripod-mounted catapult will provide the required impulsion… Design Everything is designed in OpenSCAD, relying on the bezier.scad library by Alexander R. Pruss which I am no longer able to retrieve on the web. The source code (in french) is largely customizable, which allows you to experiment with the shape. Some important parameters such as center of aerodynamic forces, lever arm, etc. are computed and displayed when rendering with OpenSCAD to help with the aerodynamic design. Wing profiles The main wing profile is based on a common “low Reynolds” airfoil profile : Eppler EP205 which is used in aircraft models. It is modified at the leading edge in a way that makes it more rounded when projected on a horizontal plane (when slicing), to mitigate the “sharp overhang” issue. The trailing edge is also modified to ensure it has a non-zero thickness (twice the line width). This profile modification is not constant across the wing span: it is much more pronunced at the tip (relatively). The tips are cropped for this reason. The tail airfoil profile is a symmetrical one : Selig/Donovan SD8020 with the same modifications. Other profiles can be tried by just changing the point list. Wing parameters The Wings have a 30° sweep angle (45° for the tail), a 5° incidence angle, and a 4° dihedral angle. The tail is positioned and sized in order to obtain sensible values for the lever arm and tail volume. Fuselage It is merely a cylindrical looking shape, with a larger radius at the front. In order to balance the glider, the first 30mm must be printed solid. The estimated aerodynamic center is marked by a small notch at the bottom of the fuselage ; the center of gravity should be located close to this position. Versions There are two variations of the model: with and without hook (crochet). Each versions comes in two sizes: 15 and 20cm wingspan. The hook is for use with the rubber band hand launcher. On the other hand the catapult is meant for use with with the 15cm version without hook (only). planeur.scad is the same as planeur15.scad (first published file kept for consistency). Printing I had the best success with PETG, a 0.18mm layer height (0.15 or 0.2 work almost as well), and the cooling fans running at full speed. Print in vase mode, with “smoothed contour”. The speed was limited to make each layer last 10s (with a minimum speed of 10mm/s). Maximum speed was 20mm/s. With a bottom thickness of 30mm (for balance), this takes about 2 hours to print. PLA should work too, but it may be easier to break, and I have heat creep issues with my printer when printing PLA at very low speed. ABS is a poor choice, because the shrinkage deforms the airfoil profile (and inter-layer adhesion is low). I didn't try nylon. It is possible to scale this model, though it is preferable to change the parameter “echelle” in the OpenSCAD model to avoid making the trailing edge of the airfoil profile thicker and to make its leading edge as close as possible to the “normal” profile. The base version (15cm) corresponds to the value 25 ; the larger version is obtained by changing the value to 33.33. In any case the number of bottom layers should not require the same scaling, because the tip surface is proportional to the square of the scale, as is the overall weight (in vase mode). This may need some adjustment though.
Make it fly ! Launching this glider by hand is challenging, because it needs a significant speed, and a straight trajectory at the same time. So, I also designed a simple rubber band hand launcher and a catapult which is meant to be mounted on a camera tripod (with a printed camera thread). The hand launcher is simpler to use while the catapult allows you to launch the glider with a precisely chosen direction and incidence angle (and pitch), with a repeatable speed, in order to compare different versions while tuning parameters. Hand launcher This is the easiest way to launch the glider. The version with the hook must be used. The handle is articulated so that it retracts during the launch to avoid being hit by the airplane. It uses this print-in-place hinge library and must be printed with the hinge in vertical position as in the STL file. It may require some force to free the two parts after printing, hopefully the tolerances are big enough to avoid breaking the hinge. Oiling can help the hinge to move more freely. The main rubber band should be inserted first, in the notch at the top of the handle. I used a 1mm thick, 3mm wide rubber band, with a total length (perimeter) of 20cm. A smaller rubber band (about 5-6cm perimeter length) goes between the two notches to close the hinge when the main one looses its tension. Catapult assembly The catapult works with the 15cm, no hook version of the glider. You need to print the following five parts: - rail - carriage - trigger box - trigger - hook
An additional handle part (poignee.stl) was intended as an alternative to the tripod, but the PLA printed camera screw is in fact too weak. Four rubber bands are needed: - two strong ones which link the back of carriage to the front of the rail (one on each side of the rail) - one that traverses the rail and whose ends are attached to the back of the carriage, to slow it down and prevent it from getting out of the rail - a last (short) one to push the trigger forward (it can work without)
You may need to sand/file some parts for smooth operation. The trigger assembly must be screwed bellow the rail using two M3x12 countersunk head screws. Flying tests I tried this glider and a few variations both indoor and outdoor. The hand launcher and the catapult (which could still be improved) are really convenient for launching. Indoor, the flight is quite straight, but I don't have room for a very long flight to analyze the behavior precisely. Outdoor, my tests were conducted under windy conditions so the trajectory is often curved, sometimes a u-turn (when launching against the wind direction with a high speed). I achieved flight distances up to 20 meters with the hand launcher on flat land. I still have to test this from a cliff… Due to its single layer thickness, the fuselage is quite fragile, and breaks easily when crashing on a hard ground. But landing on grass or on a beach is OK. Still, I suggest printing a few samples and having a tube of glue at hand ! To conclude, a last short video to demonstrate the glider flying above the grass…
Descripción original del autor, publicada en Printables.