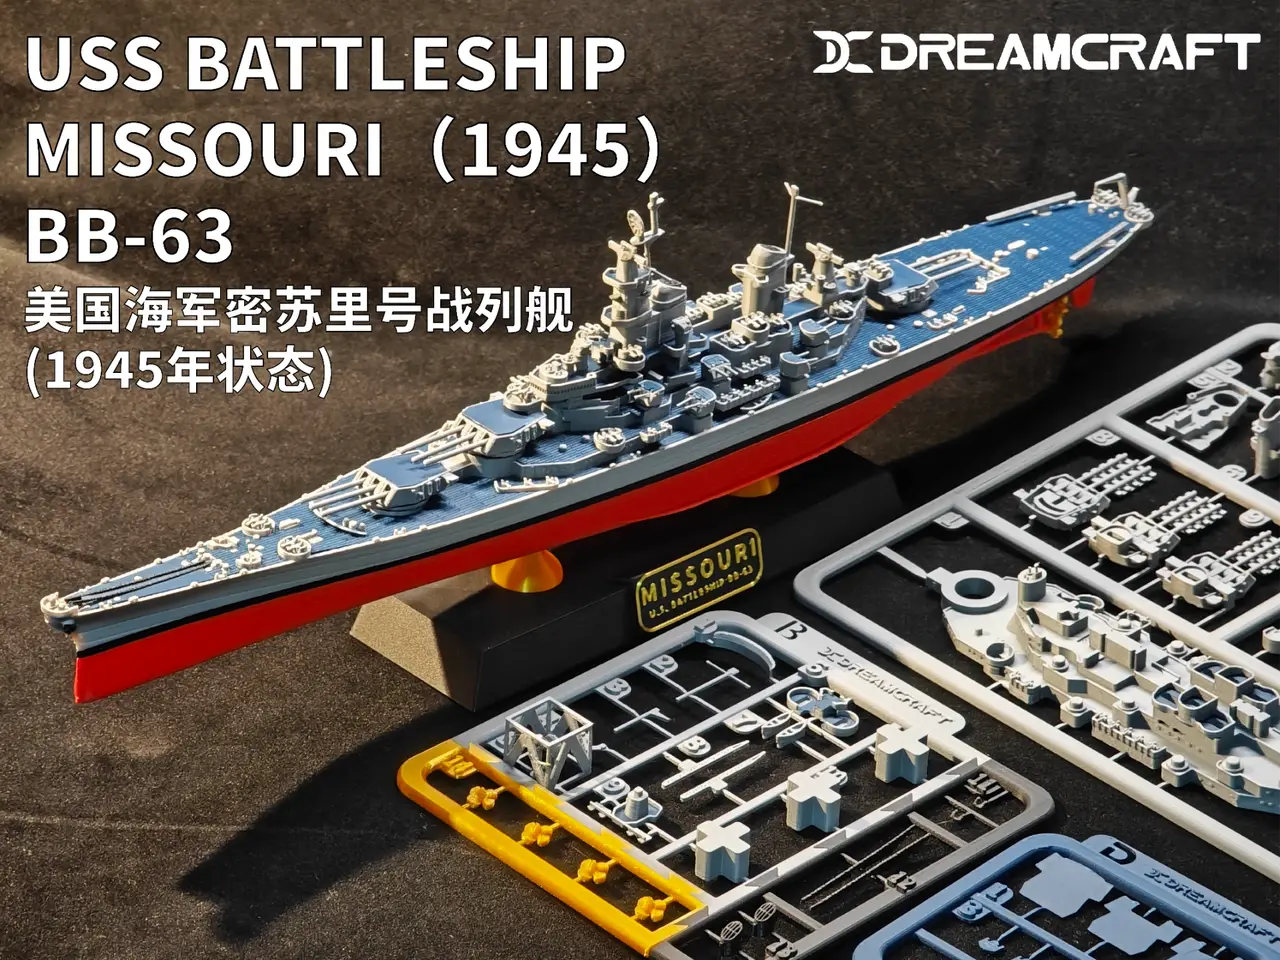
USS MISSOURI BB-63 Kit Card 1/700
por 梦创DreamCraft en MakerWorld
Read all the text below carefully before printing! Read every single word! This is critical to your print quality!
MakerWorld entrega los archivos a usuarios con cuenta gratuita
Licencia
Solo uso personalStandard Digital File License
Licencia estándar de archivos digitales: solo uso personal. No se permite compartir, revender ni subir el archivo a otros sitios, ni vender las impresiones.
Al descargar aceptas respetar la licencia y dar crédito a 梦创DreamCraft.
- Categoría
- Juguetes y juegos
- Descargas
- 1
- Publicado
Sobre este modelo
Read all the text below carefully before printing! Read every single word! This is critical to your print quality! I. Author's Note This is the most complex and challenging model I have designed and built so far. It took nearly two months from project initiation to completion. Figure 1 A great deal of time and effort went into designing this model. Meticulous attention has been paid to detail restoration, making it arguably the most refined 1/700 scale USS Missouri available on this site.
I hope you will support my work so that I can bring you more high-quality models. Boost MeI hope you will support my work so that I can bring you more high-quality models.II. Model Introduction The model is in 1/700 scale, with an overall length of approximately 386 mm and over 100 parts. The model strives to reproduce historical details. Developed based on the 1945 configuration of the USS Missouri and referencing numerous sources, it pushes the precision limits of FDM 3D printing. 2.1 Hull The hull has been redesigned several times. Extensive historical documentation was consulted to accurately recreate the weld lines on the hull armor plates, which can be seen in the modeling images below:
Figure 2 Modeling View (Side Elevation) Figure 3 Modeling View (Front Elevation) Figure 4 Modeling View (Rear Elevation) The weld details have undergone multiple rounds of optimization tailored for FDM printing. The original horizontal welds suffered severe jagged artifacts from layer lines where the bow curves upward. Targeted revisions have yielded smooth, continuous weld features:
Figure 5 Weld Optimization 2.2 Turrets Turrets are the soul of a battleship. The USS Missouri mounts nine 406 mm main guns housed in three main turrets. For this model, the turret and barrels are designed as a single print-in-place movable component. The three barrels can pivot independently, consolidating four separate parts into one. Figure 6 Integrated Movable Turret Figure 7 Independently Articulating Gun Barrels Figure 8 Independently Movable Gun Barrels 2.3 Fine Deck Textures The model reproduces the wooden deck planking of the USS Missouri. To achieve superior texture, ironing is enabled, and parameters have been adjusted iteratively across dozens of test prints to guarantee optimal deck finish. (Since different filaments are used by users, my ironing settings may not yield the best results. Please tune the parameters to suit your filament.)
Figure 9 Selected Test Samples Figure 10 Aft Deck Parameter Tuning Comparison III. Printing and Assembly Instructions 3.1 Alignment Jig This model adopts a jig-set layout. Given the large number of small parts, all components except major pieces such as the hull, deck and base are arranged on four jigs with assigned numbers for easier printing and identification.A jig-free version containing only individual parts is also provided. Exercise caution when printing this version. A single plate crowded with tiny parts is prone to detachment from the build plate due to poor adhesion. Before printing the jig-free version, apply adhesive to the build plate or manually distribute the parts across multiple plates for separate printing to improve success rates. 3.2 Hull Notes Owing to the considerable hull length (approx. 386 mm), standard 256×256 printers cannot print it in one piece. The hull is therefore split into two segments along weld lines, with a cover plate for each side. If you find segmented assembly cumbersome, you may download the single-piece hull 3MF file and split it into two sections using the slicer split tool. A one-piece hull file is also supplied; users with large-format printers such as the A2L and H2 series can print it as a single part to eliminate seams for a superior finish. 3.3 Support Notes Tree supports from the slicer are used only for the hull; supports for all other parts are manually modeled and included. Detailed guidance is provided in the instructions for reference. If you prefer slicer-generated supports instead of the built-in support blocks, right-click the corresponding part, select "Split" → "To Parts", then delete the support blocks. 3.4 Printing Guidelines The model is designed for a standard 0.4 mm nozzle. Set the outer wall line width to 0.3 mm for full detail reproduction. Certain panels support multi-color printing. Some tiny color sections are not separated into independent parts and are integrated directly into major components. AMS is recommended for optimal results. Given the abundant fine details, you are strongly advised to calibrate your printer, dry the filament, and clean the build plate before printing. PLA filament is recommended for this model. The filaments used in the showcase images are listed below: Hull - Superstructure: Bambu PLA Matte Rock Gray Bottom Hull: Bambu PLA Matte Night Red Anchor - Waterline - Base: Bambu PLA Matte Charcoal Black Deck: Bambu PLA Matte Night Blue Propeller - Nameplate: Bambu PLA Silk+ Silk Gold The integrated turret of Plate A (A8, A9) has minimal first-layer contact area with the build plate. A high-adhesion build plate or adhesive application is strongly recommended!! Detachment here will impair the rotation of the gun barrels!! Figure 11 Sections with Minimal Build-Plate Contact Area The ironing parameters in the file are configured for my printer and filament, which may not suit yours. Adjust the ironing settings if necessary. 3.5 Assembly Notes The model features a snap-fit design. All parts are equipped with locating holes. Major components can be assembled without adhesive. For small parts, however, the holes are tiny. Variations in printers and filaments lead to significant differences in printed tolerances, which may result in overly loose or tight fits. This is unavoidable. Apply glue for loose joints and ream the holes if they are too tight. Your understanding is appreciated. 3.6 Tools Required It is recommended to prepare side cutters and tweezers for model assembly. Two auxiliary tools are included with the model to assist part installation. Use them as needed and refer to the instructions for operation details. Figure 12 Auxiliary Tools 3.7 Assembly Manual Notes The model comes with a complete 25-page assembly manual in PDF format, available for download at the end of this post. Reading through the manual before starting assembly is recommended. Gallery Shots: Figure 13 Showcase Figure 14 Plate A Figure 15 Plate B Figure 16 Plate C Figure 17 Plate D In summary, this model features intricate details yet carries a moderate level of difficulty in printing and assembly. These are all the notes I have for now. Feel free to leave questions in the comments if you have any!
Hope you like it, enjoy! Free model, commercial use is strictly prohibited!!
Descripción original del autor, publicada en MakerWorld.