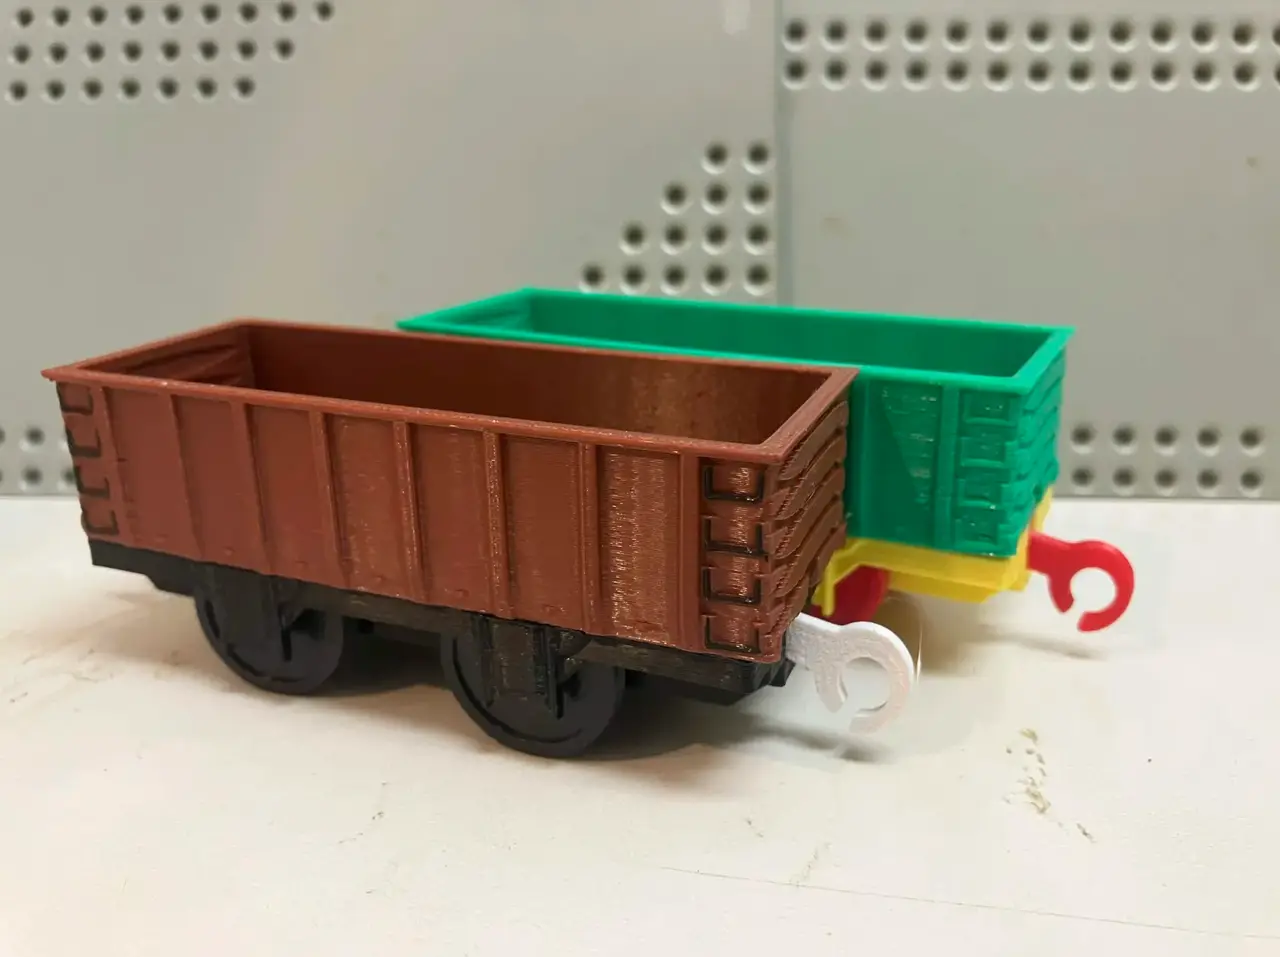
Toy Gondola - Plarail/Trackmaster Compatible!
por ✦ ⁱᶻᶻʸ⁻ⁱᵐᵐᵃⁿᵘᵉˡ ♡ en Printables
A stylized easy-to-print gondola to pair with my toy Side-Tank Porter for the Plarail/Trackmaster track standards!
Licencia
Solo uso personalCC BY-NC-SA 4.0 — Atribución, no comercial, compartir igual
Uso personal dando crédito; sin fines comerciales y las modificaciones con la misma licencia.
Al descargar aceptas respetar la licencia y dar crédito a ✦ ⁱᶻᶻʸ⁻ⁱᵐᵐᵃⁿᵘᵉˡ ♡.
- Categoría
- Juguetes y juegos
- Formatos
- 3MF, STL
- Descargas
- 0
- Publicado
Sobre este modelo
What is this? Built for the Plarail track and coupling standard with easier assembly than ever before! It prints with no brims, rafts or supports to waste plastic!* Measuring in at 52mm tall, 38mm wide, and 132mm long, this little car is sure to fit on even the tightest of layouts. New features include fully printed couplings, no supports, and a clip-together system that makes assembling the car a snap! *With a well tuned printer...
Designed with my Plarail/Trackmaster Porter engine and pairs wonderfully with it! Please read assembly instructions fully before assembling rolling stock! Parts may not fit together if assembled out of order or incorrectly! Assembly Wheels - Take the Axle Core and slot it into the center hole of the Wheel. (This step may need some force! Consider using pliers and light tapping to help!)
- Slide the Axle Shell over the core, and align its tabs to the wheel's.
- Complete the Wheelset by adding another Wheel on top, ensuring its tabs are aligned to the Axle Shell. (Please note the tabs on the Shell are offset by 90º!)
- Repeat twice to create two Wheelsets. (Ensure the offsets on the wheels are the same and that the wheels are fully seated onto the axles)
Uploading...
Chassis - Slot the Wheelsets into the Chassis block, and add the Sideframes. They may be a tight fit!
- Slot the Clip Bar and Front Coupler into the chassis block. Both should snap in with a click and hold firmly.
Final Assembly - Slip the Loop Coupler onto its post, and snap the Body onto the chassis to lock it in place.
- And you're done! Enjoy! :3
Printing! Please note that these still may be difficult to print! The outer axle can be prone to failure (Small bed area combined with tall structure) so consider slowing your prints down! As well, the Hook and Loop couplers may warp as well, so consider using a brim if this is a known issue with your printer! For best results, the wheels and axles should be given the "Random" seam position! The provided 3MF should already have it, but if you use the STL or make a remix it's something to keep in mind! When removing the print from the bed, please be careful with the Chassis! It can break easily if bent backwards, which can happen when forcibly pulled off the print bed. (Use a bed scraper or wait for the plate to cool!) Minimum build volume 95mm x 38mm x 25mm (Individual parts) 101mm x 126mm x 25mm (Fully plated) Last Notes "Why is the Loop Coupler like that?" This design of loop coupler lets the car be pushed more easily, whether by more rolling stock behind it or by motorized engines with front couplers. (E.g. powered tenders or special edition engines) This coupling is still fully compatible with regular Plarail ones, and has minimal performance impacts. (from what I can tell) As per this model's CC-BY-NC license, please do NOT sell prints of or products made with these files! As well, please don't repost the model and call it your own work! I'm a small creator doing this as a hobby, and building my name as a creator is the easiest thing you can do for me! (Other than post your makes of course!) Unlike the porter model, using Split to Parts in-slicer should work fine with this model! That's all I really have to say really, just a simple little gondola. Feel free to modify as you wish and happy printing! Changelog - Nov 2 - Originally published
Descripción original del autor, publicada en Printables.