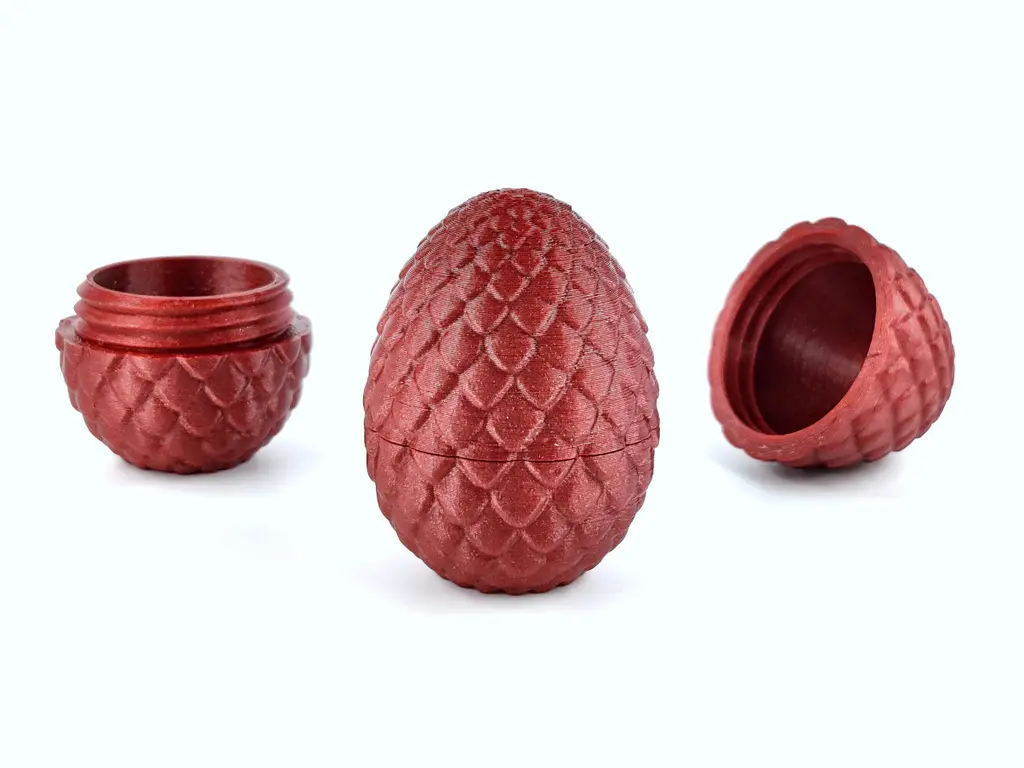
Threaded Dragon Egg, Great for Easter and Gifts
por tonyyoungblood en Cults3D
Please "like" this thing to help it rise in the search results!
Cults3D entrega los archivos a usuarios con cuenta gratuita
Licencia
Uso comercial permitidoCC BY-SA 4.0 — Atribución, compartir igual
Puedes usarlo y modificarlo dando crédito; las versiones modificadas deben compartirse con la misma licencia.
Al descargar aceptas respetar la licencia y dar crédito a tonyyoungblood.
Archivos (3)
- CalibrationThreads_PrintFirstToTestFit.stl STL
- DragonEggStandardBottom.stl STL
- DragonEggStandardTop.stl STL
- Categoría
- Juguetes y juegos
- Formatos
- STL
- Descargas (todas las plataformas)
- 20,206
- Publicado
También en
Sobre este modelo
Please "like" this thing to help it rise in the search results!
Less than 10 percent of people who download an item click the “like” button. Be the 10 percent. Click the “like” button and show your support.
If you find this model useful, feel free to buy me a coffee.
It's a threaded dragon egg, great for Easter egg hunts, gifts, and Game of Thrones fans.
The whole egg measures 63mm tall by 47mm wide. I will soon add large and extra large versions.
This is a remix of my own threaded Easter egg. I made every bit of this from scratch, including the scales. I made the scales by importing a custom texture into a Blender brush and placing every scale one at a time, adjusting the size as I went. I designed it with Sketchup, Blender, and Meshmixer. (And Gimp for the scale alpha.)
Instructions:
Print the bottom and top pieces as oriented in the files. Supports are not required. I recommend a layer height of 0.2mm or smaller, wall thickness of 1.2mm, a bottom thickness of 0.6mm, and a top thickness of 0.8mm. Infill density of 12 percent or higher. I tried to allow for horizontal expansion in the design, so try printing first WITHOUT adjusting horizontal expansion or slicing tolerance or x/y compensation. If it prints too tight or too loose, then you can use one of those slicing features to compensate. Threads are notorious for being the hardest item to print, so please be patient. If you want to save time while testing, you can print the included calibration test instead of the full model.
Once printed, screw the threads in and out repeatedly to remove any stray particles. It may feel too tight on the first threading but should screw easily after ten seconds of doing this.
Note the small nubs near the threads. Refer to the pictures to see what I'm talking about. When the two nubs are parallel, you know you've got the proper alignment.
You may sells PRINTS of this design, but you MAY NOT sell the digital files or share them on any repository. If you want to see them on a particular repository, message me, and I will add them myself. When you sell prints, please respect the Creative Commons - Attribution - Share Alike license and credit me on the sales page with a link to this page. Attribution is mandatory.
Descripción original del autor, publicada en Cults3D.