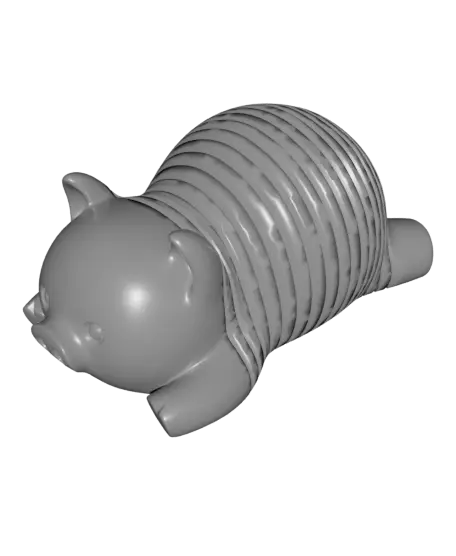
Springy Piggy
por Grzegorz K en Thangs
Small Pig with a springy body
Thangs entrega los archivos a usuarios con cuenta gratuita
Licencia
Solo uso personalCC BY-NC-ND 4.0 — Atribución, no comercial, sin derivadas
Solo para uso personal, sin modificarlo y dando crédito. No se permite vender ni redistribuir cambios.
Al descargar aceptas respetar la licencia y dar crédito a Grzegorz K.
Archivos (6)
- SpringyPiggyV11.stl STL · 1,2 MB
- SpringyPiggyV11_Eyes-negative-volume.stl STL · 13 KB
- SpringyPiggyV11_Keyring-addon.stl STL · 71 KB
- SpringyPiggyV11_MULTI_Eyes.stl STL · 22 KB
- SpringyPiggyV11_MULTI_Smile.stl STL · 4 KB
- SpringyPiggyV11_Spring-joiner.stl STL · 2 KB
- Categoría
- Juguetes y juegos
- Formatos
- STL
- Descargas
- 28
- Publicado
Sobre este modelo
Small Pig with a springy body Version 1.1 12 VI 2026
Optional Keayring, printing in parts (body+eyes) and a multicolor print
---
If you want to sell prints of this model you can buy a Commercial License Membership for all of my models on Thangs
---
PRINGING TIPS 0.1-0.2mm layer height 2-3 walls No supports needed
Classic wall generator recomended (instead of Arachne) - top of coils will look cleaner
---
**May be harder to print than typical models You will need a good bed adhesion and a good cooling** Using a glue for 3d printing on a bed plate is recommended
You may be needed to separate spring coils from each other after a print. Usually just by expangins a spring or with your finger nails, in some more rare cases with a thin knife (scalpel) It mostly depends on your seam settings and filament stringing
If you will have problems with a nozzle knocking out spring parts you can use a brim or a Spring-joiner wich will connect spring coils with lines of filament - you will need to cut it with a knife after a print Drop a Piggy and a Spring-joiner to slicer and merge both models together I printed my pigs without any problems without using spring-joiners
---
Piggy with holes for a filament string eyes Drop a Piggy in slicer Right click and add a negative volume, select Eyes-negative-volume file After a print push some black filament in the holes and cut the excess with pliers. Then you can gently burn the string ends to round them up You can also leave a piggy with holes
KEYRING Drop a Piggy and a Keyring addon in slicer, merge both models together
MULTICOLOR Drop a Piggy and both MULTI files in slicer and merge models together. You can also use it with a keyring Then select a color for each part
---
Tips if the model is breaking Filament should be dry and with a good self adhesion Printing with wet filament will make the model more brittle (especially PLA) and Piggy may break when stretched
Silk filaments (especially dual or tripple color) and the ones with particles (like 'marble') may not be a good option - but it all depends on the filament
You can try printing it slower, bonds between layers should be stronger
---
Descripción original del autor, publicada en Thangs.