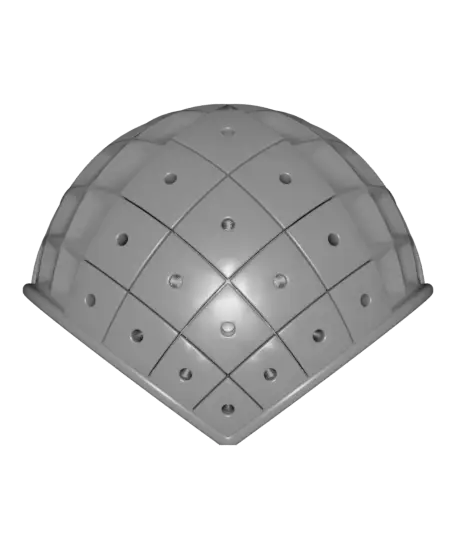
Spherical Chess Board
por DaveMakesStuff en Thangs
Game play remains the same but instead of moving in straight lines, pieces move in arcs across the surface of the sphere.
Thangs entrega los archivos a usuarios con cuenta gratuita
Licencia
Solo uso personalCC BY-NC-SA 4.0 — Atribución, no comercial, compartir igual
Uso personal dando crédito; sin fines comerciales y las modificaciones con la misma licencia.
Al descargar aceptas respetar la licencia y dar crédito a DaveMakesStuff.
Archivos (5)
- Spherical Chess Board Display Do Not Print.stl STL · 2,4 MB
- Sphere Chess Board Frame.stl STL · 874 KB
- Spherical Chess Board Frame with Supports.stl STL · 3,0 MB
- Tile Quadrant.stl STL · 1,5 MB
- Chess Pieces Full Set.stl STL · 14,0 MB
- Categoría
- Juguetes y juegos
- Formatos
- STL
- Descargas (todas las plataformas)
- 497
- Publicado
También en
Sobre este modelo
Game play remains the same but instead of moving in straight lines, pieces move in arcs across the surface of the sphere.
Magnets are required to hold the pieces in place unless you are playing in a non-Euclidean universe.
See here for video: https://youtu.be/adiWA9qTgwA
The “Spherical Chess Board Frame” is provided with and without supports. The version with supports provides extra stability around the base of the pillars when printing. You will still need to add your preferred support for the rest of the structure, but you’ll need less of it.
You will need a total of four “Tile Quadrants,” two of each colour.
A standard set of playing pieces is included with holes for 1/8” by 1/8” magnets.
You will need a total of 96 1/8” by 1/8” magnets, one for each square and one for each piece. Insert the magnets into the square tiles before gluing them on to the frame. The magnets used in the design and assembly of this model were purchased through www.kjmagnetics.com.
Proper positioning of the “square” tiles on the board framework is the most challenging part of assembly. There are a few pieces that have very subtle differences in curves and edge lengths, and it is easy to put them in incorrectly. To make this easier, small dimples have been added to the bottoms of each “square” tile. There is a single dimple on the uppermost corner of every tile to ensure proper orientation. There is a single dimple on the outer chamfer of the four inner “squares,” and two dimples on the outer chamfer of the outer twelve “squares.” Refer to the picture provided.
Arrange the piece first, do a dry fit to make sure you’ve got it right, then use glue to attach the tiles to the framework. CA glue works well.
The magnet holes on the pieces and tiles are designed for a tight fit and shouldn’t need glue. Make sure you get the polarity right so that all the pieces stick to all the squares!
Descripción original del autor, publicada en Thangs.