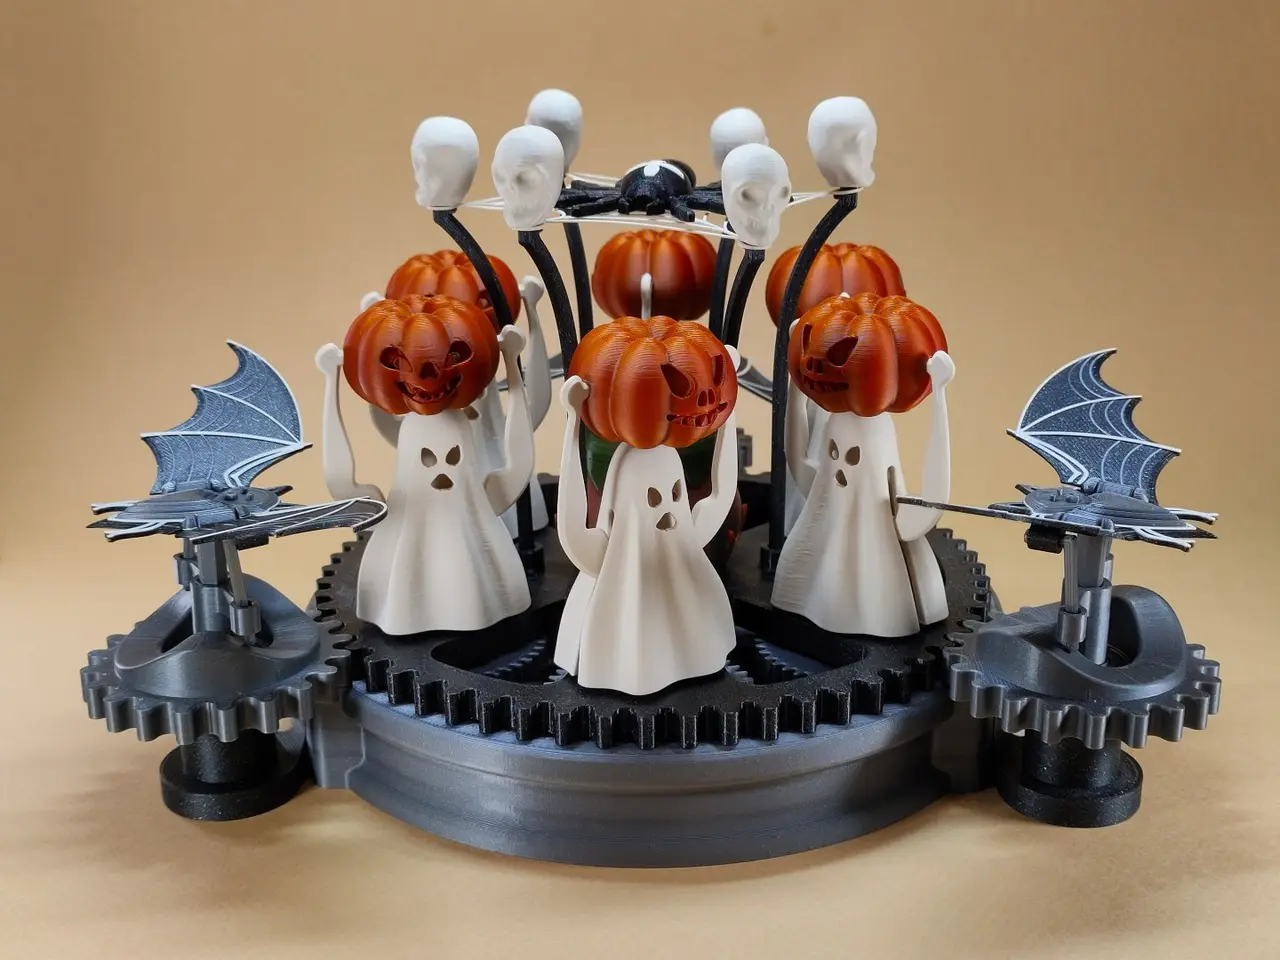
Spectacular Halloween Carousel
por Thorin Oakenshield en Printables
Spectacular Halloween Carousel, All Halloween icons in motion!!!
Licencia
Solo uso personalCC BY-NC-ND 4.0 — Atribución, no comercial, sin derivadas
Solo para uso personal, sin modificarlo y dando crédito. No se permite vender ni redistribuir cambios.
Al descargar aceptas respetar la licencia y dar crédito a Thorin Oakenshield.
Archivos (30)
- Base.stl STL · 2,5 MB
- Big gear wheel.stl STL · 3,2 MB
- Central axle.stl STL · 25 KB
- External gears 3x.stl STL · 1,1 MB
- Bat stand 3x.stl STL · 78 KB
- Internal gears 6x.stl STL · 307 KB
- Motor case.stl STL · 83 KB
- Drive wheel from the motor.stl STL · 501 KB
- Manual driver stand.stl STL · 1,1 MB
- Manual drive wheel.stl STL · 1,6 MB
- Ghost 6x.stl STL · 13,9 MB
- Ghost base 6x.stl STL · 74 KB
- Pumpkin 1.stl STL · 6,0 MB
- Pumpkin 2.stl STL · 5,9 MB
- Pumpkin 3.stl STL · 6,0 MB
- Bat updated.stl STL · 4,0 MB
- Bat holder 3x.stl STL · 2 KB
- Bat wings arms.stl STL · 83 KB
- Bat wings fixer 3x.stl STL · 127 KB
- Ghost arms.stl STL · 365 KB
- Wing joints 6x.stl STL · 43 KB
- Skull.stl STL · 4,3 MB
- Spiderweb strand.stl STL · 412 KB
- Spider web.stl STL · 592 KB
- Spider.stl STL · 8,0 MB
- Spider cross.stl STL · 310 KB
- Cauldron.stl STL · 2,1 MB
- Fire.stl STL · 813 KB
- Potion.stl STL · 2,9 MB
- Skuls.stl STL · 9,3 MB
- Categoría
- Juguetes y juegos
- Formatos
- STL
- Descargas
- 39
- Publicado
Sobre este modelo
Spectacular Halloween Carousel Watch the video – it captures the model much better than photos !!! All Halloween icons in motion!!! Introducing the participants of this grand carousel party!
There’s a bat, a ghost, a pumpkin, some spooky skulls, and a gross spider in a web hanging above a Halloween cauldron. They are all spinning, waving, and bouncing around. The ghost performs three types of movement: it moves forward, spins, and lifts the pumpkin. The skulls bounce up and down, lifting the spider to keep it from falling asleep,the web beneath the spider ripples. Meanwhile, the bats are poised for takeoff. Creating a model like this was a truly wild idea. At first, I didn't even want to start, but by the end, I was really enjoying it. Once everything finally started working smoothly after several rounds of fine-tuning and testing, I was absolutely thrilled. Update!! Modified stand part for manual drive – expanded base for finger-gripping. Update!!! I have slightly increased the tolerance of the bat-wing joints to allow for freer movement. I also recommend this specific placement for the print seams, to prevent any thickening from forming on the edges of the joint sockets.
Now, let’s look at the assembly instructions: The most critical aspect of a model with so many moving parts is minimizing friction !!!—this is the key to ensuring smooth operation. This is a common issue with 3D-printed parts, especially when they move against the print layers. To address this, I sanded the surfaces with fine-grit sandpaper, applied a coat of ski wax (specifically for low temperatures—it must not be sticky), and finished with a PTFE-based lubricant (Teflon), which doesn't attract dirt or debris. Sand down and round off the ends of the guide rods for the ghosts and the spider web to minimize friction—it will help!!
The model, which incorporates ten 608 bearings (8x22x7mm) and 18 rods that travel along wavy tracks, runs surprisingly well. I have prepared two drive versions: manual and motorized. Swapping them is ridiculously simple—just slide the drive mounts into the slot on the model's base. Update!! Modified stand part for manual drive – expanded base for finger-gripping.
The motor is an N20 type with a low RPM; mine runs at about 20 RPM. You can buy the bearings at any sports store—they are the type used for inline skates. Bearings and bearing components fit together quite tightly, so that gluing is not required. Check out the video for instructions; I believe it covers everything you need for assembly. The trickiest part is assembling the bat. After printing, carefully loosen up its wings so they can move. Glue the joints and the mount, attach the wings to the arms, and then insert the assembly into the "bat holder"—positioned perpendicular to the carousel.
Update!!! I have slightly increased the tolerance of the bat-wing joints to allow for freer movement. I also recommend this specific placement for the print seams, to prevent any thickening from forming on the edges of the joint sockets. See the photos.
Clean radius But don't be afraid to flap those wings vigorously—it will help, in any case!
I applied PTFE lubricant to all rods that have moving parts. If I’ve forgotten anything, or if anything is unclear, please let me know—we’ll fine-tune the model to perfection! Please adhere to the model's license terms. It is becoming increasingly common for my models to be stolen, distributed without permission, and resold
Descripción original del autor, publicada en Printables.