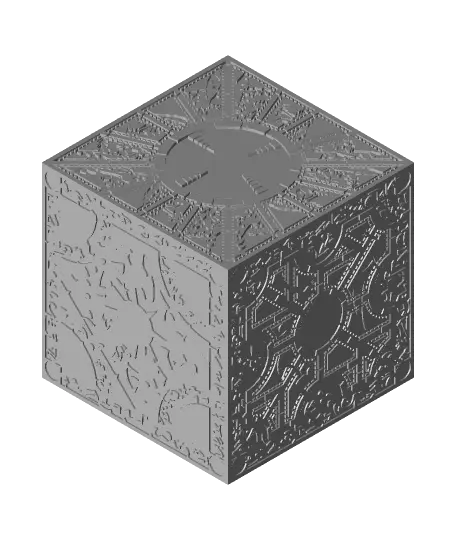
Puzzle Cube v1.3
Model originally uploaded to Thingiverse at https://www.thingiverse.com/thing:4641303.
Thangs entrega los archivos a usuarios con cuenta gratuita
Licencia
Revisa las condicionesLICENSE
El autor usa su propia licencia. Revisa sus condiciones en la página original antes de compartir, modificar o vender.
Al descargar aceptas respetar la licencia y dar crédito a Troy M.
Archivos (12)
- Lament_Configuration_Cube-3x3x3N.stl STL
- Puzzle_Cube_v1.3-core.stl STL
- Puzzle_Cube_v1.3-core3.stl STL
- Puzzle_Cube_v1.3-lament-lower.stl STL
- Puzzle_Cube_v1.3-lament-open.stl STL
- Puzzle_Cube_v1.3-lament-star.stl STL
- Puzzle_Cube_v1.3-lament-upper.stl STL
- Puzzle_Cube_v1.3-lament.stl STL
- Puzzle_Cube_v1.3-lower.stl STL
- Puzzle_Cube_v1.3-neg.stl STL
- Puzzle_Cube_v1.3-tool.stl STL
- Puzzle_Cube_v1.3-upper.stl STL
- Categoría
- Juguetes y juegos
- Formatos
- STL
- Descargas
- 85
- Publicado
Sobre este modelo
Model originally uploaded to Thingiverse at https://www.thingiverse.com/thing:4641303.
UPDATED VERSION HERE (https://www.thingiverse.com/thing:4967195)
Updated Hellraiser inspired puzzle box using my own planetary gearbox core. Using latest modular gearbox code (https://github.com/tmackay/solid-core-compound-planet) and to remove the "false" alignments which allowed for a partial open.
https://www.youtube.com/watch?v=SVGQ_9T5_Bc
Assembly video (https://youtu.be/JLJvNn56pJ8) - Jump to the end to see the finished product in action. "Core" preparation (https://youtu.be/sk70thJSrVc). These are for the previous versions but are mostly applicable. Key takeaways are dial in your printer to avoid "elephant foot" and tolerence to allow gears to print slightly fused - too much and they will stay fused, too little and there will be too much backlash. Give the core a whack on the side with a rubber mallet to free the gears, then use a single edged razor blade to carefully "crack" the ring gears (take care, blood has been shed to bring you this box - a hobby knife is not the right tool, wedging not slicing).
Print at 0.2mm (at least the core - it is designed to produce a 1-layer gap between the ring gears and is sensitive to layer height) and separate ring gears with a single edged razor blade or scraper. Print upper and lower parts separately (around 16 hours each, 8 for the core). Ease the core (wider tabs first, careful of orientation and alignment of the narrow tabs) into the end of the "claw", they will need to flex a little.
Enable Support Interface at 100%, Touching Buildplate with overhang of 85 degrees for improved finish. This will give a nice solid disk to support the raised dial which can be pried off. Core does not require support.
I'd also recommend "breaking in" the core by giving it a few minutes on a drill or Dremel tool to spin the gears (I use a long M5 nut and bolt in the drill chuck). Mark the starting positions with a pencil. They will soon wear in to move freely.
If you are having trouble getting the dials to move, a strip cut from a soda can can be used as a shim. Work it in and around the gap.
I have attempted to remain faithful to the original design, however it is apparent that multiple on-screen props were used with differing configurations, even some faces mirrored. To this end I have settled on the widely used HR1 configuration by Xane (http://www.cenobite.com/box/lament/)
The Lament configuration - art by artist064 (https://www.deviantart.com/artist064) "The original Lament Configuration was created by Simon Sayce (https://www.youtube.com/watch?v=OcX2sYlTq2U) for the original Hellraiser movie".
Descripción original del autor, publicada en Thangs.