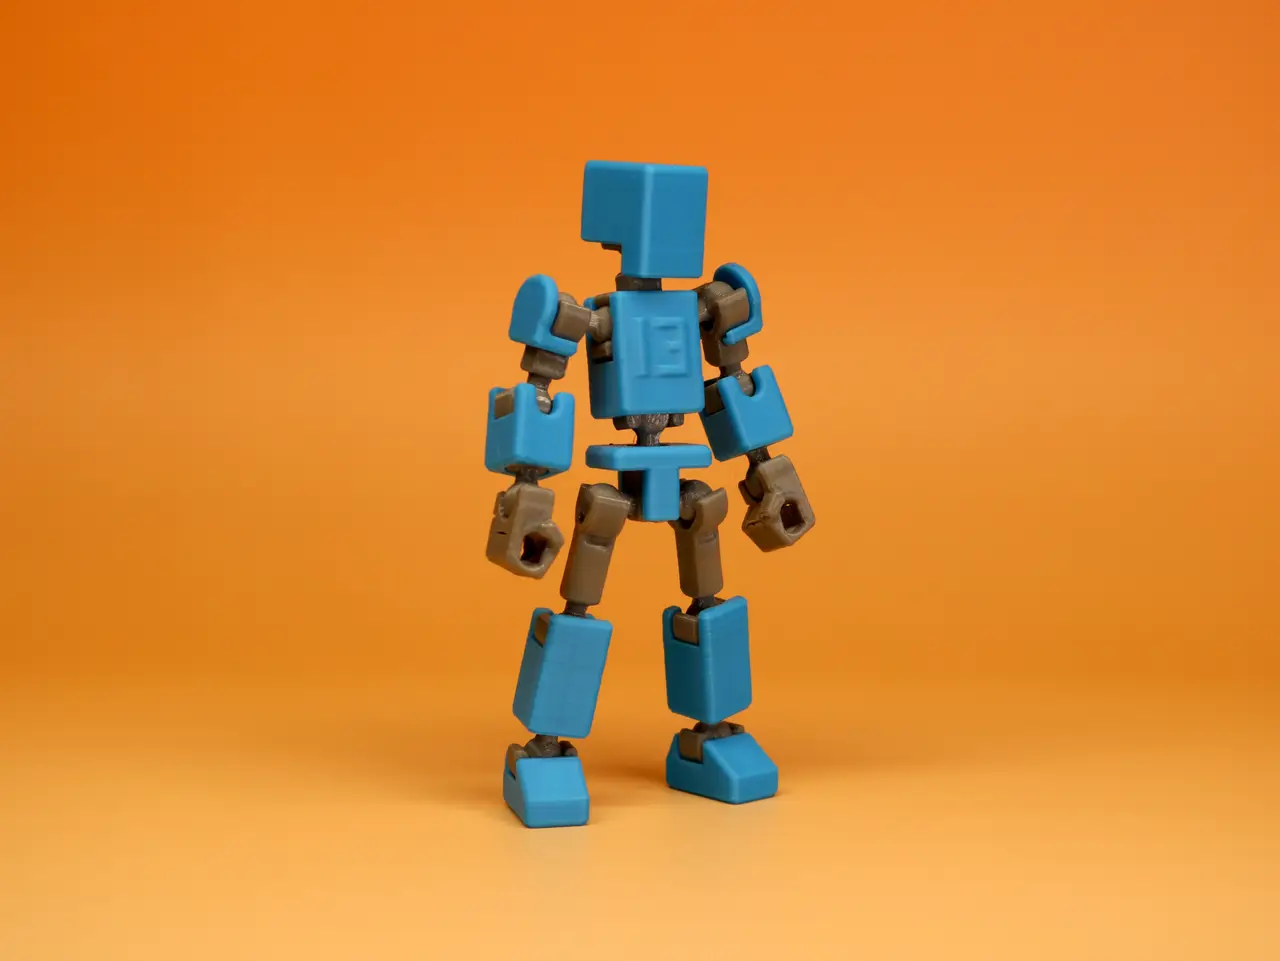
MINI 13 v.2026
por soozafone en Printables
An updated version of MINI 13 with design improvements making parts easier to print and assemble.
Licencia
Solo uso personalCC BY-NC-SA 4.0 — Atribución, no comercial, compartir igual
Uso personal dando crédito; sin fines comerciales y las modificaciones con la misma licencia.
Al descargar aceptas respetar la licencia y dar crédito a soozafone.
Archivos (29)
- allparts-armor.stl STL · 702 KB
- allparts-frame.stl STL · 7,2 MB
- allparts-xtra.stl STL · 344 KB
- kitcard-armor.stl STL · 920 KB
- kitcard-frame.stl STL · 7,5 MB
- kitcard-xtra.stl STL · 501 KB
- armor-arm-2x.stl STL · 79 KB
- armor-chest.stl STL · 170 KB
- armor-foot-2x.stl STL · 91 KB
- armor-head.stl STL · 89 KB
- armor-leg-2x.stl STL · 100 KB
- armor-shoulder-2x.stl STL · 129 KB
- armor-waist-withBall.stl STL · 499 KB
- armor-waist.stl STL · 35 KB
- frame-arm-4x.stl STL · 903 KB
- frame-chest.stl STL · 1,1 MB
- frame-handClosed-left.stl STL · 452 KB
- frame-handClosed-right.stl STL · 452 KB
- frame-handOpen-left.stl STL · 283 KB
- frame-handOpen-right.stl STL · 284 KB
- frame-headFoot-3x.stl STL · 446 KB
- frame-leg-4x.stl STL · 762 KB
- frame-shoulder-2x.stl STL · 1,6 MB
- frame-waist.stl STL · 1,2 MB
- xtra-backpack.stl STL · 66 KB
- xtra-hat.stl STL · 43 KB
- xtra-shield.stl STL · 149 KB
- xtra-sword.stl STL · 64 KB
- xtra-wrench.stl STL · 83 KB
- Categoría
- Juguetes y juegos
- Formatos
- STL
- Descargas
- 51
- Publicado
Sobre este modelo
Time for a tune up This model is an updated version of Mini 13, featuring a bunch of design improvements that should make it easier to print and assemble. I've uploaded this as a new model so that I don't break compatibility with the many remixes of the original. Printing If you've printed any of my other designs, you know the drill here. :) Parts There are three "layers" of parts. - The frame is the mechanical skeleton of the figure and provides the articulated joints.
- The armor sits on top of the frame.
- The accessories slot into the hands, head, and back of the figure.
You have three options for what parts you want to print: - Use the plated parts to get all the parts together in one file per layer (frame, armor, and accessories). The quickest way to make sure you have everything.
- Use the kit cards to get all the parts together and bundled into model kit-style runners. Good for sharing and a little extra bed adhesion.
- You can also pick and choose from the individual parts if you need to print extras or just like organizing everything yourself.
Whatever you choose, just make sure you have a full set of frame and armor parts (and the accessories if you want them!) Materials Like always, the frame should be printed in a mechanically tough material like PETG or ASA. PLA will go floppy over time :( The armor and accessories can be printed in the material of your choosing. Settings Your slicer's default 0.15/0.16mm settings should be fine -- though I never recommend grid infill. No supports are needed. If you have issues with some parts detaching, consider adding a brim, but a better solution is to clean your print bed with dish soap and warm water. Assembly All parts are designed to snap-fit together with no glue, tools, or hardware. Compatibility Mini 13 v.2026 uses the same size hands as all the 13 series models, so any handheld accessories designed for the previous version or Dummy 13 (etc) should still be compatible here. Since a lot of the connection designs have changed, most of the armor remixes from the previous generation of Mini 13 won't be compatible, unfortunately. But the ball joint design remains the same, so you can always mix and match frame parts to make it work. Changes from the previous version - All parts were remodeled from scratch incorporating 4.5 years of experience designing printable action figures.
- Improvements to printability: - Kit cards/runners redesigned to keep parts secure while printing but easy to remove for assembly. - Added separate runner for all accessory parts.
- Removed chamfer on ball joints that gave the first layer less contact area.
- Added small cutout on shafts connecting to ball joints that should improve bridging performance.
- Redesigned hat accessory for more consistent bridging performance.
- Improvements to assembly: - New connection design for attaching head and feet, no longer depending on unreliable press fits.
- Head and feet use the same frame piece, reducing number of distinct parts.
- New connection design for fitting arm and leg armor onto frame pieces. It is now a tapered press fit that should be easier and more consistent to assemble.
- New connection design for fitting shoulder armor onto frame pieces. The connection should now snap into place more securely.
- New connection design for fitting chest armor onto frame piece. It now snaps into place with retaining tabs rather than relying on other parts to keep it captive.
- New connection design for fitting waist armor onto frame piece. It now has a raised tab that should slide more easily into place while better holding the position of the armor.
- Hat accessory now has more reliable friction fit.
- Small adjustment to backpack connection to make it easier to both install and remove.
- Improvements to durability: - Relief cuts added to ball joint sockets on chest and hand pieces. This gives the socket more flex, so it should require less force to assemble and be less likely to crack during assembly.
- Added material to shoulder armor to make the part less likely to split along layer lines.
- Aesthetic changes: - Redesigned leg armor to cover slightly more area while preserving articulation.
Descripción original del autor, publicada en Printables.