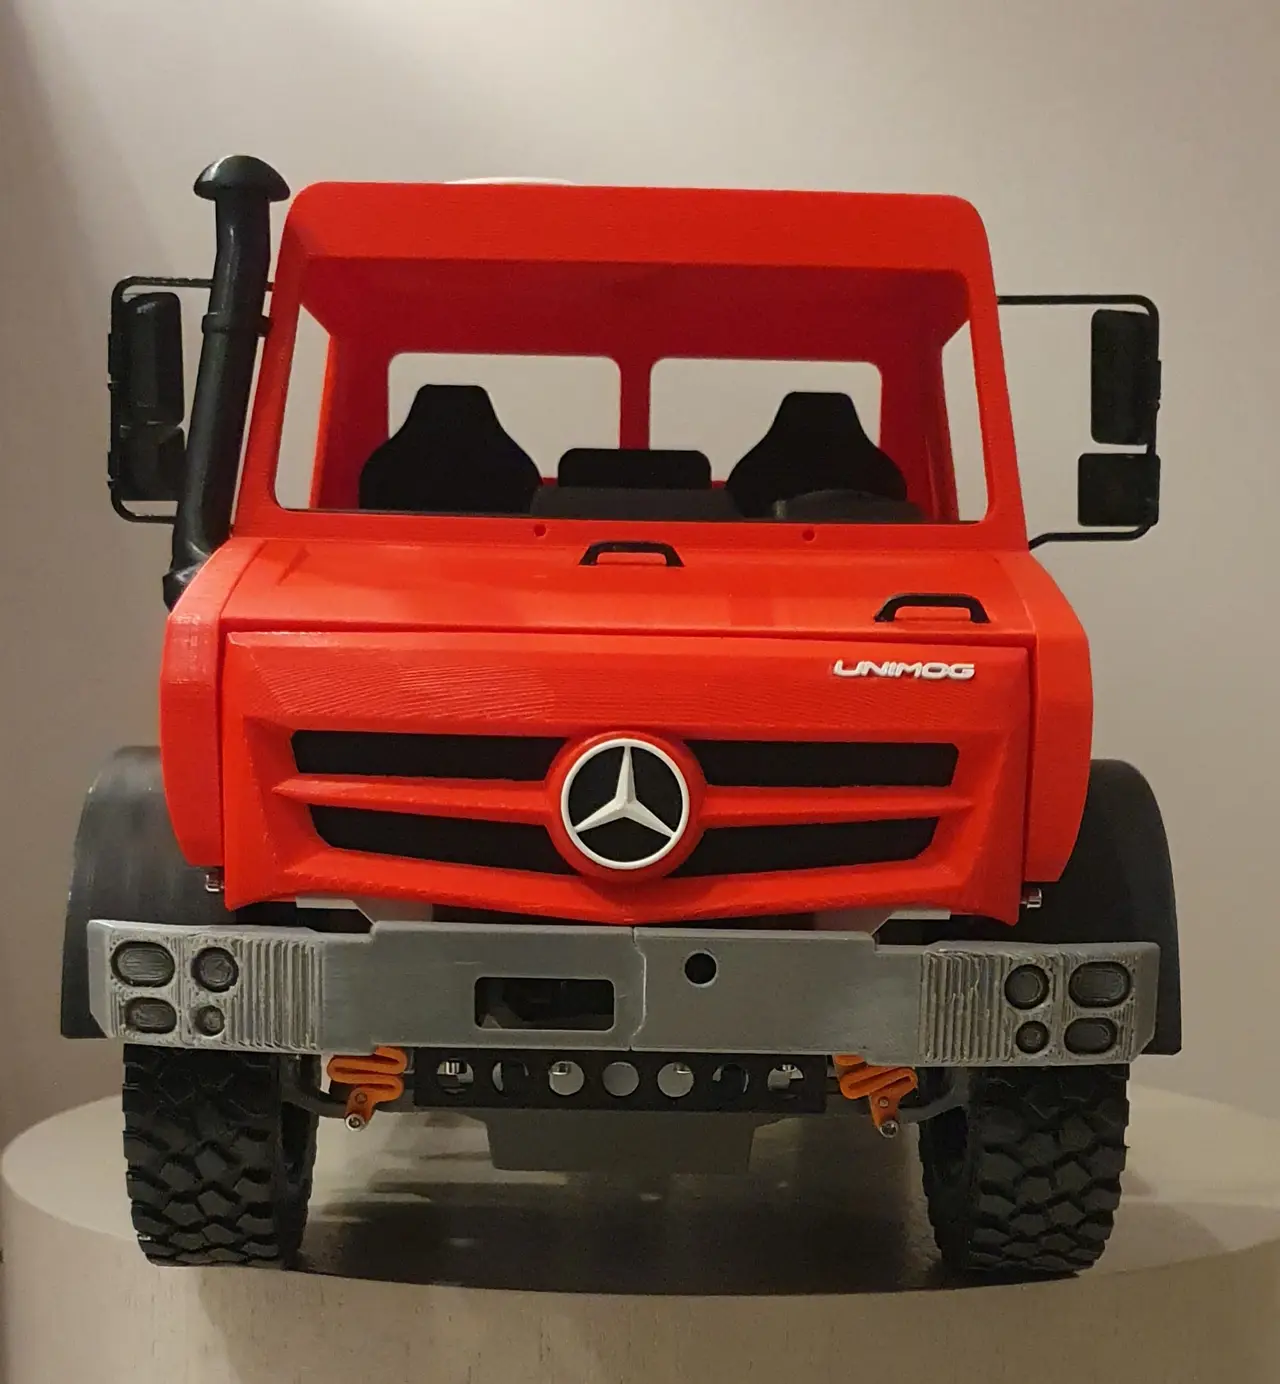
Mercedes UNIMOG U5023 Cabin / Body (RC CAR / RC TRUCK) 1/10 scale
por Prism08 en Printables
This is a cabin for my UNIMOG RC project. It goes with the corresponding chassis.
Licencia
Solo uso personalCC BY-NC-SA 4.0 — Atribución, no comercial, compartir igual
Uso personal dando crédito; sin fines comerciales y las modificaciones con la misma licencia.
Al descargar aceptas respetar la licencia y dar crédito a Prism08.
Archivos (52)
- CAB08-02-U5023.stl STL · 66 KB
- CAB04-01-Big logo.stl STL · 72 KB
- CAB07-01-Unimog logo.stl STL · 174 KB
- CAB15-01-Hatch.stl STL · 183 KB
- CAB16-01-Hatch swivel.stl STL · 54 KB
- CAB57-01-STW Logo.stl STL · 64 KB
- CAB70-02-BM glass.stl STL · 9 KB
- CAB71-02-SM glass.stl STL · 7 KB
- CHE90-01-Front Cabin support R.stl STL · 32 KB
- CHE91-01-RL Cabin support.stl STL · 13 KB
- CHE92-01-RR Cabin support.stl STL · 13 KB
- CHE93-01-Front Cabin support L.stl STL · 32 KB
- CAB01-01-Door inside R.stl STL · 558 KB
- CAB02-01-Door inside L.stl STL · 591 KB
- CAB05-01-BL background.stl STL · 20 KB
- CAB06-01-Grill background.stl STL · 31 KB
- CAB09-01-FENDER L.stl STL · 175 KB
- CAB10-01-FENDER R.stl STL · 174 KB
- CAB17-01-Dashboard.stl STL · 1024 KB
- CAB20-01-Floor.stl STL · 430 KB
- CAB21-01-Snorkel.stl STL · 622 KB
- CAB22-02-Mirrors support.stl STL · 155 KB
- CAB50-02-Hood pin.stl STL · 31 KB
- CAB51-04-Door pin.stl STL · 18 KB
- CAB52-01-Hood Handle M.stl STL · 7 KB
- CAB53-01-Hood Handle L.stl STL · 7 KB
- CAB54-02-Door handle.stl STL · 26 KB
- CAB55-01-Little side grill.stl STL · 32 KB
- CAB56-01- Steering wheel.stl STL · 1,2 MB
- CAB23-01-Big mirror L.stl STL · 197 KB
- CAB24-01-Small mirror L.stl STL · 53 KB
- CAB25-01-Big mirror R.stl STL · 204 KB
- CAB26-01-Small mirror R.stl STL · 53 KB
- CAB03-01-Grill 5023.stl STL · 88 KB
- CAB12-01-Cabin main.stl STL · 297 KB
- CAB13-01-Cabin left.stl STL · 92 KB
- CAB14-01-Cabin right.stl STL · 92 KB
- CAB18-01-Hood.stl STL · 198 KB
- CAB19-01-Left door.stl STL · 267 KB
- CAB30-01-Right door.stl STL · 370 KB
- CAB12-01-Cabin main no hatch.stl STL · 264 KB
- CAB12-01-Double cabin1.stl STL · 311 KB
- Unimog Cab 5023 DC interface.step STEP · 82 KB
- RED-Grey01_0.1mm_PLA_MK3S_6m.gcode GCODE · 364 KB
- Grey01_0.3mm_PLA_MK3S_2h22m.gcode GCODE · 3,5 MB
- Red01_0.3mm_PLA_MK3S_9h11m.gcode GCODE · 11,3 MB
- Red02-doors_0.3mm_PLA_MK3S_3h55m.gcode GCODE · 11,4 MB
- Red03-Cabin_0.3mm_PLA_MK3S_15h27m.gcode GCODE · 37,8 MB
- Black01-floor STW_0.3mm_PLA_MK3S_17h33m.gcode GCODE · 12,0 MB
- Black02-inside doors snorkel_0.3mm_PLA_MK3S_4h41m.gcode GCODE · 12,0 MB
- Black03-fenders mirrors_0.3mm_PLA_MK3S_3h19m.gcode GCODE · 5,4 MB
- Black04-Dashboard_0.3mm_PLA_MK3S_4h25m.gcode GCODE · 5,9 MB
- Categoría
- Juguetes y juegos
- Formatos
- STL, STEP, GCODE
- Descargas
- 2,724
- Publicado
Sobre este modelo
November 3, 2026 Added a main cabin without hatch (RED folder) June 18, 2024 Added a main cabin that is open at the back and a step file of the section in order to allow for an easier design of a double cabin. The added part should be attached to the front with 4 M3 screws. When using my chassis you need to take care of the clearance below the rear seats. ---------------------------------------- This is a cabin for my UNIMOG RC project. It goes with the corresponding chassis you can find here. To mount it on the chassis you will need 4 brackets I'm providing here (you won't find them in the chassis files). The files are divided in 3 colors (Red = the body color , Grey = the logos + brackets, Black = Seats, mirrors ,fenders etc.) The U5023 signs are printed in 2 colors; the bottom is Red and the letter /numbers are Grey. Obviously you can chose other colors but this allows to organize the print files. The cabin comes in 3 parts because it was too big to print in one go. The 2 front parts are mounted with 2 M3 screws each on the main part. The hatch is attached to its swivel by a M3 screw and the swivel is secured to the cabin roof with another screw. You should be able to “open” the hatch and put it on the left side of the cabin. The hood has 2 pins that work like hinges so that the hood can also be opened. You need to slide the pins starting from the hood until they reach the corresponding hole in the cabin. Mounting the front grill: For the Mercedes sign glue the circular black background to the middle round part then glue the logo on top. Also at the back of the grill you need to glue the grill background. Then mount the grill to the cabin with at least 2 short M3 screws (4 if you have plenty). You can then add the Unimog logo by gluing it to the grill. The dashboard is mounted on the “floor” part (this includes the seats) with 2 M3 screws. You can then glue the steering wheel and the little Mercedes logo (it is quite fragile so you might need to position / glue separately the star and the circle if they detach. You can now mount this assembly on to the cabin with 4 M3 screws. (To ease the process and as the fit is tight, you should use a nail to ensure the screw holes are aligned). You can now add (glue) the hood handles and the little grill that goes on the left side of the cabin. Fenders: Position the fenders and attach them to the cabin with 2 M3 screws each (one screw will go into the “floor” part). Doors: Glue the corresponding door interiors to their respective door (guides provided). Glue the handles and the U5023 sign. Put the 4 pins inside the hinges on the cabin (you might want to glue them so that they don't fall off); then mount the doors (sliding them onto the pins). You should be able to open the doors. Mirrors: Glue the grey ”glass" parts on their respective mirrors. Assemble the mirrors on the supports (guides) it should be a snap fit so that you can change the angle of the mirrors. Then glue the mirrors supports to the doors (guides). You can now glue the snorkel on the right side of the cabin. Position the brackets on the chassis (2 M3 screws each). There are not so many available screw holes left on the chassis so you should be able to find them ! The front brackets are to be assembled just behind the bumper and the rear brackets go just before the steering rods (coming from the front). If you're still looking for the right screw holes, the last picture might help ! Now mount the cabin on the chassis with 2 M3 screws in the front. Gravity will keep the rear part in place. Enjoy ! (printing is quite long but at 1/10 scale it is to be expected)
Descripción original del autor, publicada en Printables.