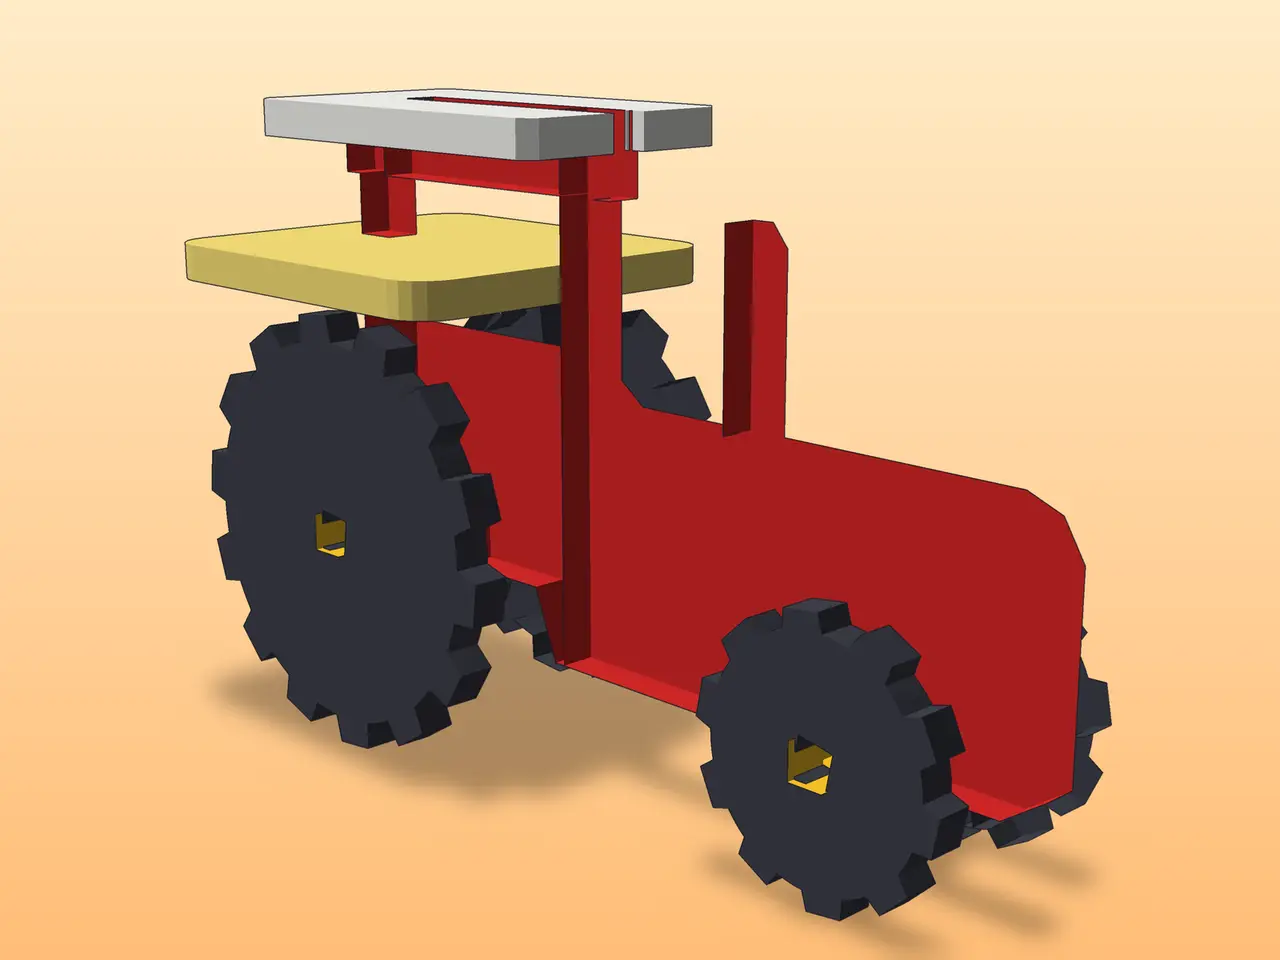
Kit Card Farm Tractor - Snap-Fit Toy, Rolling Wheels, No Supports
por Micah Buckenham en Printables
One flat print: snap out the parts and build a farm tractor toy with rolling wheels. No glue, no supports.
Licencia
Uso comercial permitidoCC BY-ND 4.0 — Atribución, sin derivadas
Puedes imprimirlo y compartirlo sin cambios dando crédito; no se permite distribuir versiones modificadas.
Al descargar aceptas respetar la licencia y dar crédito a Micah Buckenham.
Archivos (1)
- Categoría
- Juguetes y juegos
- Formatos
- STL
- Descargas
- 0
- Publicado
Sobre este modelo
A classic farm tractor on a single flat kit card. Print the card in one go, snap the parts off the frame, and in a couple of minutes you have a little tractor with big lugged rear wheels, rolling axles, a fender deck and a cab roof. No glue, no supports, no screws. Why it's fun: printing the card is half the fun, because it looks like an old-school plastic model kit straight off the print bed. Kids love snapping the pieces out and building it, and the finished tractor actually rolls across the desk. It also makes a great small gift or party favour, and it's a nice quick print to show off what your printer can do. Parts on the card (10 pieces): tractor body (side profile with hood, exhaust stack and open cab), fender deck, cab roof, 2 large rear wheels (30 mm), 2 small front wheels (18 mm), rear axle and front axle. Card size: about 131 x 81 x 2.5 mm. Assembled tractor: about 64 mm long, 45 mm tall and 26 mm wide. How to assemble Step 1: Snap every part off the frame by bending it gently at the thin gates. Trim any leftover nubs with a hobby knife or a file so the slots and axles fit cleanly. Step 2: Push the rear axle (the longer one) up into the keyhole slot at the back of the body. It clicks past the narrow neck and then spins freely. Do the same with the front axle in the front slot. Step 3: Press a big wheel onto each end of the rear axle and a small wheel onto each end of the front axle. The square holes grip the square axle ends, and the wider spacer sections stop the wheels against the body. Step 4: Slide the fender deck in from the back of the tractor through the slot in the rear cab pillar until it stops against the front pillar. A small bump holds it in place. Step 5: Slide the cab roof on from the front so its slot goes over the tab on top of the cab until it sits flush. Print settings Material: PLA (PETG also works). Layer height: 0.2 mm. Supports: none. The card is completely flat. Infill: 15 to 20 percent is fine; the parts are thin so they are mostly walls anyway. Brim: optional, only if your bed adhesion is weak. Print time: roughly 45 to 60 minutes on a typical printer. Tips: if your printer runs tight, scale X and Y up by 1 to 2 percent or lightly sand the axle ends. If the wheels feel loose, a drop of glue on the axle ends will lock them, but they should hold by friction on most printers. If you print one, please post a Make and share a photo of your tractor. I love seeing them, and it really helps other people find this model. Check out my other Kit Cards too!
Descripción original del autor, publicada en Printables.