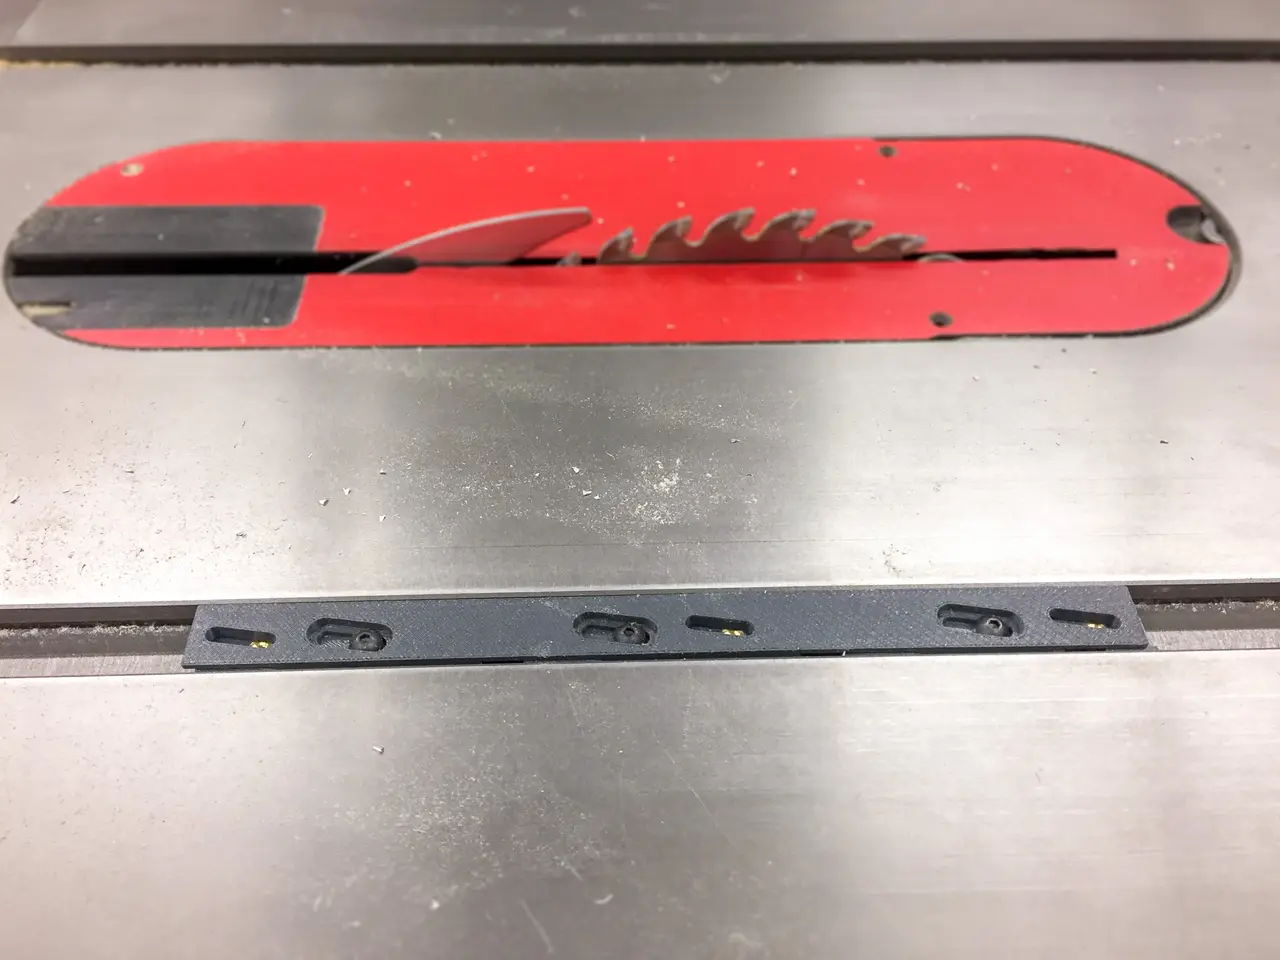
Zero Play Guide Bars for table saw miter slot
por Brian Wolfe en Thingiverse
The zero play guide bar system is a huge benefit for anyone making and using jigs in a climate where conventional wood guide bars will expand and contract. I will use this with my table saw miter slot but you may find it useful with your band saw or router table. Microjig has devised a nice...
Licencia
Uso comercial permitidoPuedes imprimirlo, modificarlo y venderlo dando crédito al autor.
Al descargar aceptas respetar la licencia y dar crédito a Brian Wolfe.
Archivos (15)
- base_in.stl STL · 1,5 MB
- top_V2_in.stl STL · 807 KB
- base_nuts_in.stl STL · 1,5 MB
- top_V2_nuts_in.stl STL · 807 KB
- base_metric_mm.stl STL · 1,5 MB
- top_V2_metric_mm.stl STL · 1,8 MB
- base.SLDPRT SLDPRT · 133 KB
- top_V2.SLDPRT SLDPRT · 188 KB
- zero_play_assembly.SLDASM SLDASM · 628 KB
- base_nuts.SLDPRT SLDPRT · 165 KB
- top_V2_nuts.SLDPRT SLDPRT · 196 KB
- zero_play_assembly_nut.SLDASM SLDASM · 615 KB
- 91255A189_ALLOY_STEEL_BUTTON-HEAD_SOCKET_CAP_SCREW.SLDPRT SLDPRT · 428 KB
- 91255A190_ALLOY_STEEL_BUTTON-HEAD_SOCKET_CAP_SCREW.SLDPRT SLDPRT · 483 KB
- 93365A140_BRASS_HEAT-SET_INSERT_FOR_PLASTICS.SLDPRT SLDPRT · 747 KB
- Categoría
- Herramientas
- Formatos
- STL, SLDPRT, SLDASM
- Descargas
- 9,904
- Publicado
Sobre este modelo
The zero play guide bar system is a huge benefit for anyone making and using jigs in a climate where conventional wood guide bars will expand and contract. I will use this with my table saw miter slot but you may find it useful with your band saw or router table. Microjig has devised a nice solution https://www.microjig.com/products/zeroplay I relied upon the users manual to inform my design and hardware choices. https://s3-us-west-2.amazonaws.com/microjig-ecommerce-staging/uploads/resources/files/ZEROPLAY-User-Manual.pdf This current model has adjustability to fit slots from 0.688-0.774in (17.5-19.7mm) STL UNITS ARE IN INCHES Each guide piece is 8.94" (227mm) long. One guide set will fit diagonally on a 200mm x 200mm build plate. There are two configurations for this design. One uses heat-set inserts, one uses a little bit longer fasteners into low-profile hex nuts. BOM --- For Assembling the bars for heat-set insert configuration --- 2 - top_V2_in.stl prints 2 - base_in.stl print 12 - 8-32 thread size, 0.185" installed length heat-set inserts for plastics (mcmaster: https://www.mcmaster.com/#93365a140/=1c5hk4f) 6 - 8-32 thread 3/16" long button head hex drive screws (mcmaster https://www.mcmaster.com/#91306a264/=1c5hkqt) --- For Assembling the bars for hex nut configuration --- 2 - top_V2_nuts_in.stl prints 2 - base_nuts_in.stl print 12 - 8-32 thread size Narrow Hex Nut (https://www.mcmaster.com/#90760a009/=1ccrera) 6 - 8-32 thread 1/4" long button head hex drive screw (https://www.mcmaster.com/#91255a190/=1ccrmoc) --- For Assembling the METRIC bars for heat-set insert configuration --- 12 - M4 heat set inserts (https://www.mcmaster.com/#94180a351/=1cjbptu) 6 - M4 x 0.7mm thread - 5mm long button head hex drive screws (https://www.mcmaster.com/#91239a136/=1cjbqk5) 2 - base_metric_mm.STL (STL UNITS IN MILLIMETERS) 2 - top_V2_metric_mm.STL (STL UNITS IN MILLIMETERS) --- For attaching the bars to your specific jig --- 6 - 8-32 thread 1/2" long* pan head screw (mcmaster https://www.mcmaster.com/#91735a194/=1c5hman) 6 - #10 flat washer (mcmaster https://www.mcmaster.com/#92141a011/=1c5hmtj) To adjust, you will need a 3/32" allen wrench Follow the user guide (linked above) for the setup/installation. I did NOT create a stop piece for setup, as you can easily use a clamp and scrap materials to the same effect. After printed parts were removed from printer, I used some sandpaper to touch-up the long faces of my prints (there was a little deformation around the knit line). I also suggest that you flatten the bottom face after installing the inserts as material will swell around the holes on the underside. *This length with change depending on how thick the base plate of your jig is or how deep you're counterboring into that material.
Descripción original del autor, publicada en Thingiverse.