Yume ITX PC Case SFX PSU
por Ayu en Printables
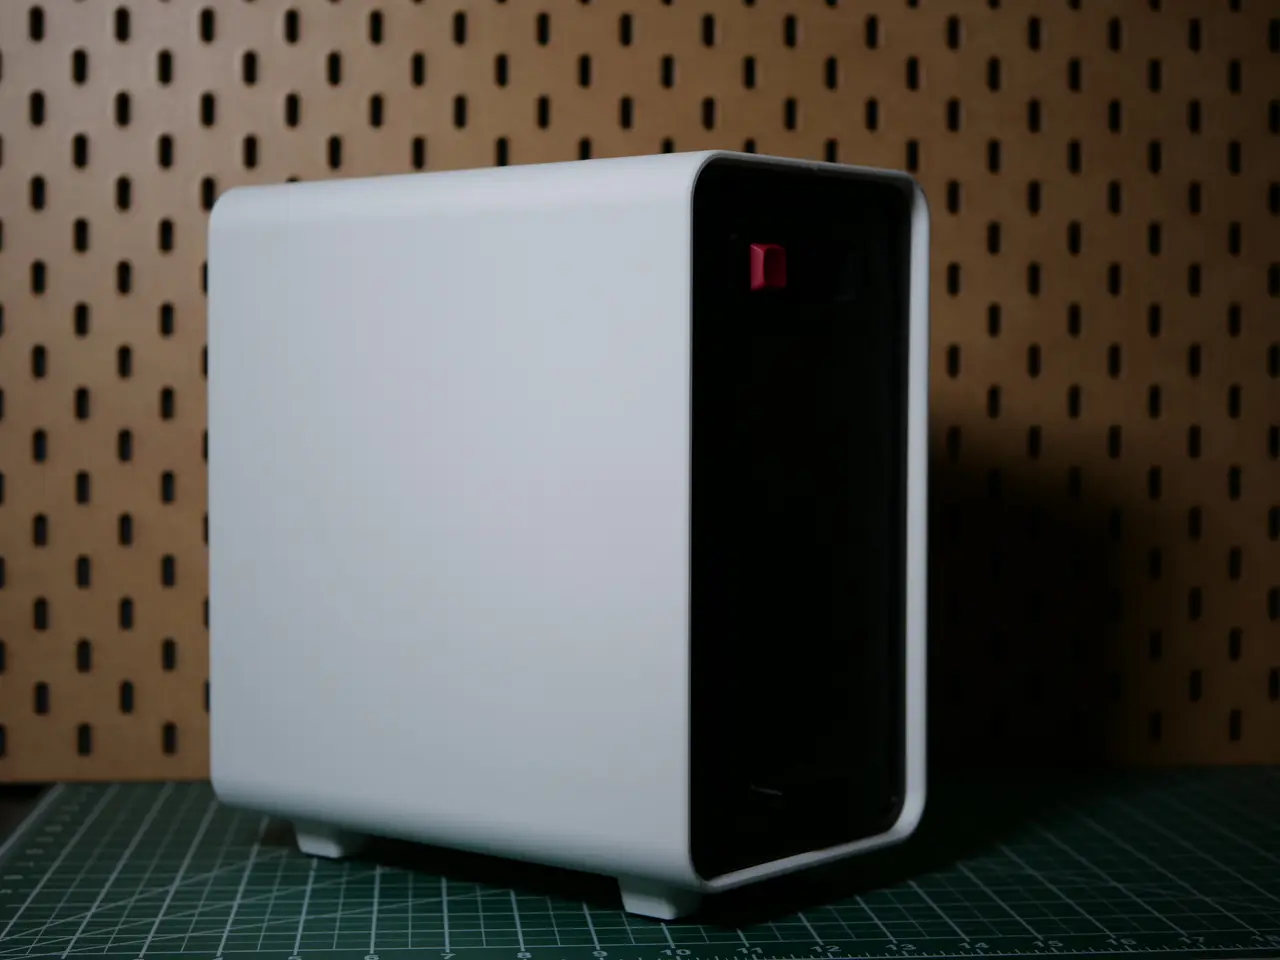
This is a little ITX PC case that supports an SFX PSU and optional add-ons.
Licencia
Solo uso personalCC BY-NC 4.0 — Atribución, no comercial
Puedes imprimirlo y modificarlo para uso personal dando crédito. No se permite vender las impresiones.
Al descargar aceptas respetar la licencia y dar crédito a Ayu.
Archivos (18)
- Fan Clip (Print 2).step STEP · 31 KB
- Mesh Rim.step STEP · 53 KB
- Foot (Print 2).step STEP · 162 KB
- FrontIO Plug.step STEP · 69 KB
- FrontIO Switch Holder.step STEP · 64 KB
- Magnet Plug 15mm (Print 8).step STEP · 7 KB
- Mesh Grille.step STEP · 252 KB
- 4-Pin Fan Connector Holder.step STEP · 51 KB
- Front Handle.step STEP · 44 KB
- Side Brace.step STEP · 105 KB
- Rear Plate.step STEP · 137 KB
- Shell.step STEP · 208 KB
- Mobo Tray.step STEP · 112 KB
- Side Brace Crossmember.step STEP · 59 KB
- Fan Plate.step STEP · 625 KB
- Exhaust Grille.step STEP · 1,2 MB
- ITX PC CASE.f3d F3D · 7,0 MB
- Print Orientation.zip ZIP · 2,7 MB
- Categoría
- Tecnología
- Formatos
- STEP, F3D, ZIP
- Descargas
- 71
- Publicado
Sobre este modelo
This is a little frame to mount an ITX motherboard and SFX PSU along with a 140mm fan by default.
The entire thing slides into a frame with attached feet.
There are 4 screw threads on the bracing opposite of the motherboard side where one can design and mount HDD holders or a mount for very small GPU's like an Intel ARC B50 or something.
The rear Exhaust grill is modular and can be replaced with one to mount a GPU with a riser cable so there is access to the HDMI/DP on the rear.
Front only accepts a 140mm fan, held in by only 2 screws with brackets. The fan mounting hardware is screwed into the front so it is easily modded if you want a magnetic fan attachment or some latching mechanism.
A small clip holds a typical 4-pin female fan connector (from a fan extension) on the front so the fan can be removed from the the front for cleaning without taking the PC frame out of the Shell.
----
It's pretty basic and gets the job done for now, while being easily modded for other hardware. It is extremely rigid and sturdy and was designed and tested with Finite Element Analysis, SA, and the topology has been optimized. This is not some flimsy 3D printed case, this thing is durable.
Every single part is oriented such that no ugly top surfaces are visible. It's nice PEI textured bottom surfaces everywhere the eye can see.
Everything can be printed on a 256x256x256 print volume printer, so nearly every standard size 3D printer can print this.
It prints almost entirely without supports. Only the feet and a couple of little holes where magnets go need support. Recommend using snug support type.
Stuff you Need / BOM: There is only 1 screw type: #6-32 x 1/4" Pan Head Machine Screw. There is only 1 heat set insert type: #6-32 x 1/4" brass Threaded Inserts A bag of 50 each (screws and inserts) is plenty. Nothing else is needed besides typical Standard Motherboard Standoffs that fit into the #6-32 inserts. Magnets (8) are 15mm diameter circular magnets with a depth of 1.6mm, but all 8 magnets go into plugs that are glued in place so if you want to use a different magnet size just edit the magnet plug to fit yours. CA/Super-Glue is used to mount the magnet plugs into the holes (for the magnetic front mesh filter). CA/Super-Glue is used to mount the rear exhaust grille into the rear panel. (If you want to design and mount a GPU in there you should use 2-part epoxy for this or just design it into the rear panel directly. I chose to use glue here because I wanted it recessed and with the textured PEI side visible) I used 12x12x3mm square rubber adhesive feet. Anything that fits in a 12x12 area and is at least 1mm tall will work here. You can use any sort of mesh you like as long as it's under about 0.5mm thick (you can even 3D print one), but I used a 300x1000x0.5mm PVC mesh with 0.5mm hole diameter here: https://www.amazon.com/dp/B0DFPZXWJH Typical keyboard switch was used for the power switch, but you can modify the FrontIO Switch Plate to use whatever switch or switches you want. You can also add frontIO like USB A/C headphone or whatever here.
See the Images for print orientations zip folder in Other Files for print info and support info.
Recommend printing the frame out of ASA/ABS or similar higher temp material. For low TDP CPU's PLA/PETG might work fine, I tested with a 65W CPU with PLA for several days with no issues, but your results may vary.
F3D and STEP files included.
Descripción original del autor, publicada en Printables.