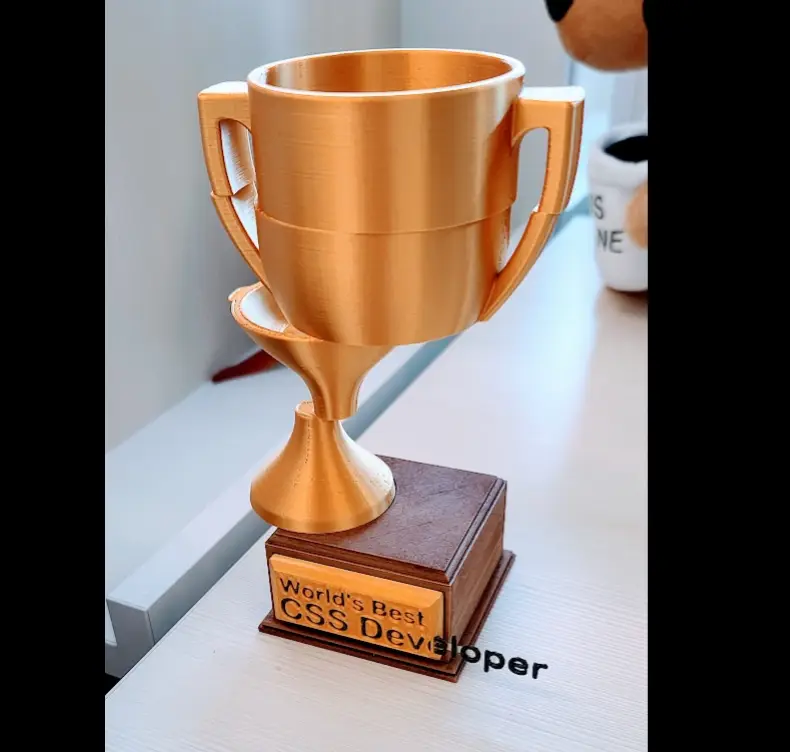
"World's Best CSS Developer" Trophy
por OversizedHat en Printables
An award for those who flex our boxes and color our backgrounds
Licencia
Solo uso personalCC BY-NC-SA 4.0 — Atribución, no comercial, compartir igual
Uso personal dando crédito; sin fines comerciales y las modificaciones con la misma licencia.
Al descargar aceptas respetar la licencia y dar crédito a OversizedHat.
Archivos (17)
- trophy-cup.3mf 3MF · 750 KB
- trophy-base.3mf 3MF · 44 KB
- trophy-plaque-dissolvable-supports.3mf 3MF · 136 KB
- trophy-plaque-mmu.3mf 3MF · 136 KB
- trophy-plaque-combined.stl STL · 426 KB
- trophy-pins.3mf 3MF · 25 KB
- trophy-cup.stl STL · 2,8 MB
- trophy-base.stl STL · 47 KB
- trophy-plaque-base.stl STL · 186 KB
- trophy-plaque-letters.stl STL · 239 KB
- trophy-plaque-letter-support.stl STL · 1 KB
- trophy-plaque-single-extruder.3mf 3MF · 137 KB
- trophy-pin.stl STL · 13 KB
- trophy-plaque-dissolvable-supports_0.15mm_PVA_MK3SMMU2S_2h2m.gcode GCODE · 2,5 MB
- trophy-base_0.15mm_PLA_MK3SMMU2S_3h53m.gcode GCODE · 10,5 MB
- trophy-cup_0.2mm_PLA_MK3SMMU2S_11h8m.gcode GCODE · 25,6 MB
- trophy-pin_0.2mm_PLA_MK3SMMU2S_9m.gcode GCODE · 136 KB
- Categoría
- Figuras y arte
- Formatos
- 3MF, STL, GCODE
- Descargas
- 4,117
- Publicado
Sobre este modelo
Those brave souls who risk madness and worse to keep the web (mostly) organized and stylized. They deserve all of our thanks, but also perhaps just a bit of good-natured ribbing. Print this model and give the CSS guru in your life the recognition they deserve! This model is printed in three main parts: - trophy-cup (remixed with gratitude from Flowalistic's Trophy Cup Collection). Recommend printing upside-down, using supports everywhere (and, ideally, PrusaSlicer's ‘snug’ supports), at as small a layer height as you're willing to wait for. Use a metallic filament for best effect. - trophy-base: The base of the trophy. This is a great candidate for trying out PrusaSlicer's variable layer height, as you'll want as fine detail as you can get near the bottom/top but the rest can be nice big layers, especially if you're willing to do a little sanding (and you should, this part will look best if printed in a woodfill PLA and sanded/given a bit of stain. - trophy-pin: Used to join the cup to the base. There are holes for two, though honestly one is likely sufficient, depending on how tight you get the press fit. - trophy-plaque-*: The plaque on the front of the trophy. This took a lot of experimenting to get right, and it's still a rather fiddly print. There's a single color variant (trophy-plaque-combined) included, but for full effect, you really want to use the MMU if you have it. If you've got one:- Add trophy-plaque-base as the ‘base’ model - Add trophy-plaque-letters and trophy-plaque-letter-support as parts to the trophy-plaque-base. - Use a metallic filament (likely the same as used for the cup) for trophy-plaque-base part - Use a black filament for trophy-plaque-letters - Use a transparent filament for trophy-plaque-support - Print at 0.15mm layer height - Make sure to turn on brim - with the extra time to cool during filament changes warping is highly likely otherwise. - Turn on ironing (topmost surface only) - Optional but highly recommended - use BVOH or a similar dissolvable filament for the supports. If one is not available, make sure to set PrusaSlicer to use the transparent filament as the support interface filament - getting every single little string of support off the trophy-plaque-support will be difficult and you don't want any strands of metallic filament ruining the illusion you get with the transparent filament.
Assembly: - Remove all supports. This should be surprisingly easy for the cup, and unsurprisingly stressful for the plaque. - (Optional) Sand and stain the base - Use the pins to join the cup to the base. This should be press-fit-able but if you ended up resizing the pins you can also use some superglue to help hold everything together. - Use superglue to attach the plaque to the base. - Be careful transporting, the letters are quite fragile. Fortunately, the finished model is just about the perfect size to fit in a filament box, just put some paper towels around it and orient it with the left side down!
Descripción original del autor, publicada en Printables.