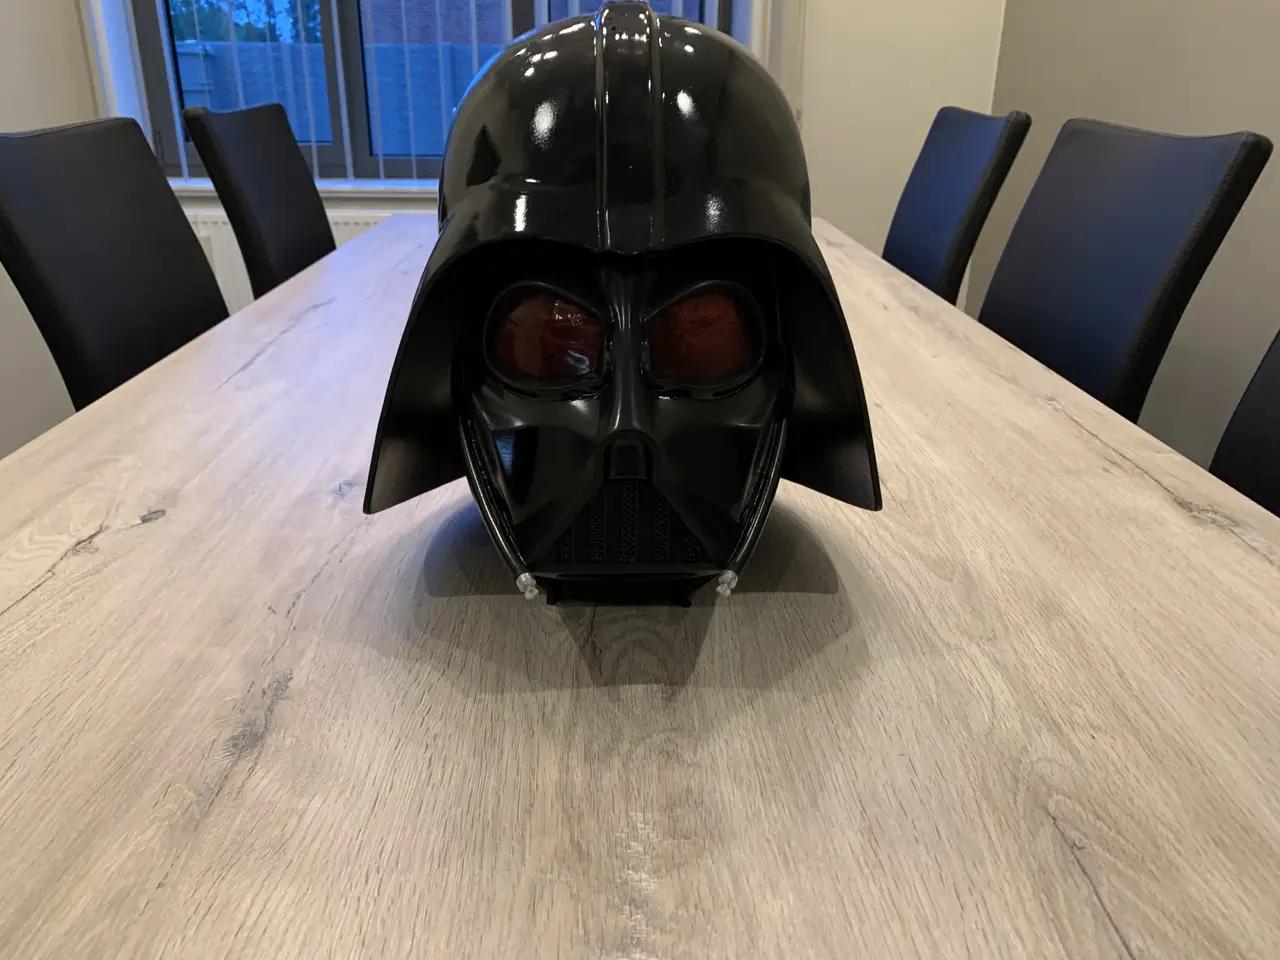
Wearable Darth Vader Helmet (for Prusa i3 sized printers)
por lecter en MyMiniFactory
It has been a long journey, but I was finally able to finish this project.
MyMiniFactory entrega los archivos a usuarios con cuenta gratuita
Licencia
Solo uso personalCC BY-NC-SA 4.0 — Atribución, no comercial, compartir igual
Uso personal dando crédito; sin fines comerciales y las modificaciones con la misma licencia.
Al descargar aceptas respetar la licencia y dar crédito a lecter.
Archivos (38)
- chinmesh.stl STL
- facel00.stl STL
- facel01.stl STL
- facel10.stl STL
- facel11.stl STL
- facel20.stl STL
- facel21.stl STL
- facel30.stl STL
- facer00.stl STL
- facer01.stl STL
- facer10.stl STL
- facer11.stl STL
- facer20.stl STL
- facer21.stl STL
- facer30.stl STL
- helmetl00.stl STL
- helmetl01.stl STL
- helmetl10.stl STL
- helmetl11.stl STL
- helmetl12.stl STL
- helmetl20.stl STL
- helmetl21.stl STL
- helmetl22.stl STL
- helmetr00.stl STL
- helmetr01.stl STL
- helmetr10.stl STL
- helmetr11.stl STL
- helmetr12.stl STL
- helmetr20.stl STL
- helmetr21.stl STL
- helmetr22.stl STL
- lefteye.stl STL
- lefteyebuck.stl STL
- lefttusk.stl STL
- mouthmesh.stl STL
- righteye.stl STL
- righteyebuck.stl STL
- righttusk.stl STL
- Categoría
- Cosplay y props
- Formatos
- STL
- Descargas
- 3,893
- Publicado
Sobre este modelo
It has been a long journey, but I was finally able to finish this project.
Let me start by thanking Steen Winther. His model (https://grabcad.com/library/darth-vader-helmet-2) was the starting point of this remix.
14 months ago I started this project, today I end it by sharing this remix. I hope it may be usefull for some of you guys. If you decide to print one, I would love to see your results.
----
The model is split into pieces that should fit most i3 style printers. Each part has alignment holes that should help you with the assembly. Is used toothpicks to insert into the holes and line everything up before glueing. If you resize the models, those probably won't fit, so find some small nails or something else that is ridgid enough and fits the holes.
If you want the option to wear the mask, don't forget to keep that back parts (FaceR00, FaceR10, FaceL00, FaceL10) seperated from the rest. Use the alignment holes, to make sure everthing fits together, but don't glue those four parts to the others (only to each other). I hot-glued some velcro to the top, and magnets on the sides to snap the mask together.
For the lenses: you can either print them (if you only intend to display the helmet) or (vacu)form the lenses, using the buck models. I used Worbla Transparent Art dyed in Jacquard iDye Poly Red. This worked great, but unfortunately I used too much heat when forming them over the bucks and I end up damaging the Worbla. I might redo them at some point, but for now, they will have to do. Also rember that PLA can deform easily under heat, so maybe use ABS or PETG for the bucks.
Oh yeah, there's also sanding involved, lots and lots of sanding... For a great result probably more sanding then I did :)
I did not paint the 'nose' silver/chrome because I don't like the way that looks, so yeah, now you know :)
----
The helmet and mask only fit together if the mask is raised from the surface. To solve this issue I 'designed' a stand. You can find the stand here:
https://www.myminifactory.com/object/3d-print-121767
Descripción original del autor, publicada en MyMiniFactory.