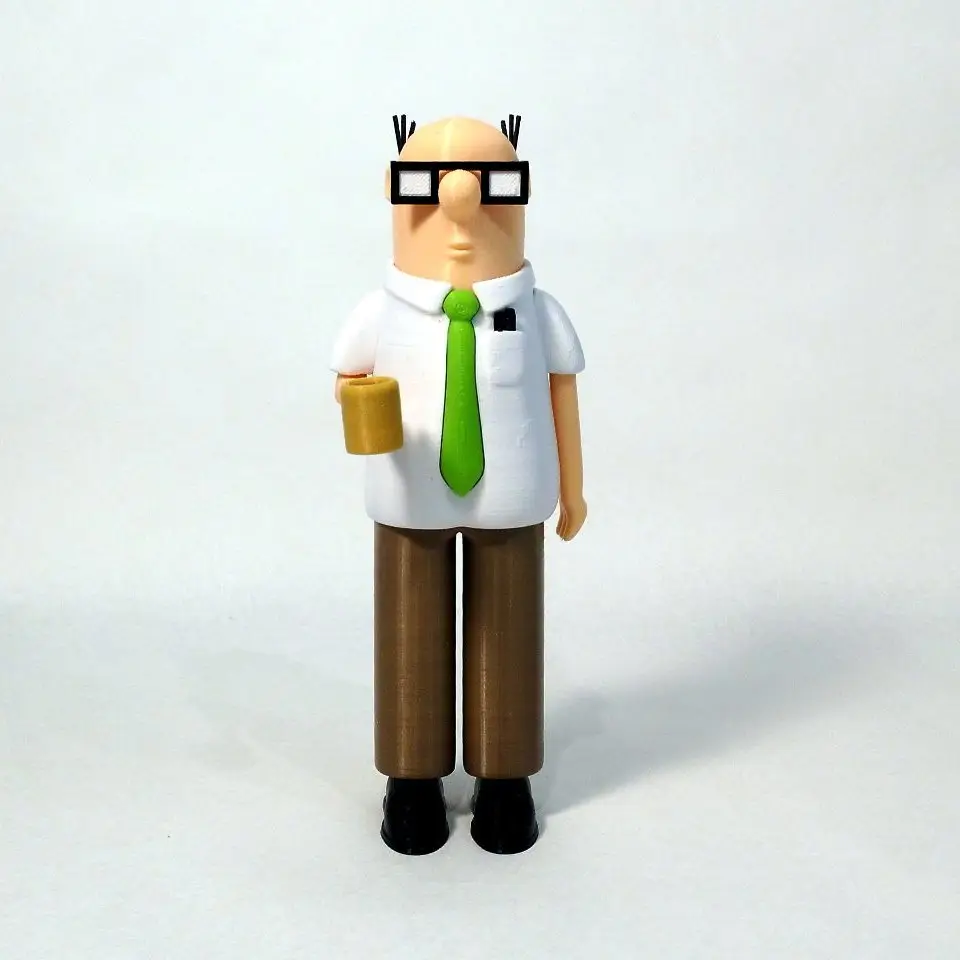
Wally
por Steve Solomon en MyMiniFactory
Wally, from the comic strip 'Dilbert' by Scott Adams.
Licencia
Solo uso personalMyMiniFactory - Credit - Remix - Noncommercial
Licencia de MyMiniFactory: puedes imprimirlo y remezclarlo dando crédito, sin fines comerciales.
Al descargar aceptas respetar la licencia y dar crédito a Steve Solomon.
Archivos (20)
- Arm Left.stl STL
- Arm Right.stl STL
- Body Bump.stl STL
- coffee.stl STL
- cup.stl STL
- eyes.stl STL
- Glasses Arms.stl STL
- glasses.stl STL
- Hair Left.stl STL
- Hair Right.stl STL
- head.stl STL
- pants.stl STL
- pens.stl STL
- shirt.stl STL
- Shoe Left.stl STL
- Shoe Right.stl STL
- Sleeve Left.stl STL
- Sleeve Right.stl STL
- socks.stl STL
- tie.stl STL
- Categoría
- Figuras y arte
- Formatos
- STL
- Descargas
- 922
- Publicado
Sobre este modelo
Wally, from the comic strip 'Dilbert' by Scott Adams.
In the comic strip, Wally can avoid work in ways we never thought possible. In fact, avoiding work is a job in itself which he can be proud of!
No supports are required. If you have the right filament colors, no painting is needed.
The completed model is 200mm tall after assembly. This model is in proportion to the Dilbert and Pointy Haired Boss models previously posted.
Enjoy!
Print Settings
Printer: FlashForge Creator X Rafts: Doesn't Matter Supports: No Resolution: .2mm Infill: 10%
Notes: A brim or raft may be required for arm_right. Building the model
------------------------------------------------------------------
Colors (there are no multiple printed pieces) Beige/Skin: head arm_right arm_left .. Black: shoe_right shoe_left glasses glasses_arms pens hair_right hair_left .. White: shirt sleeve_left sleeve_right eyes socks .. Brown: pants coffee .. Green: tie .. Gold: cup .. Any color (hidden part): body_bump
-----------------------------------------------------------
Printing and assembly tips Printing Tips: 1-No supports or rafts are required for the pieces, however a raft or brim may be needed for the arm_right due to the small base and part angle. .. 2-All pieces were printed and fitted using a .4mm nozzle. In my slicer I verified that a .5mm nozzle should still work well with the small pieces. .. .. Assembly tips: -The diagram in the pictures section will help in assembling the model and is quite straightforward. -The model is meant to be glued together. -The eyes should fit snugly into the back of the glasses. I was able to push the eyes with the top layers first into the back of the glasses right off the printer with no cleanup. -For some people, small parts can be hard to put together and glue. Personally, I glued in the glasses_arms into the notch in the head with some tacky glue first. While the glassses_arms glue was still tacky, I placed the glasses (with the eyes already inserted) on the nose and glued them into the glasses_arms. It all turned out much simpler than I had originally expected. -The hair parts are also small, but with tacky glue they should pose no problem at all. .. .. General comment: My goal is to make models that are fun, free from supports and simple to build. If you encounter any issues, please inform me so I can learn from the feedback (Many thanks for the tremendous constructive feedback I've already received on my previous models, you know who you are!). All parts should fit nicely and the only cleanup should be on the first layer, if any.
Descripción original del autor, publicada en MyMiniFactory.