
Voron Bowden ptfe tube guide arm and canbus cable support
por Galvanic en Printables
Voron PTFE Bowden tube guide and canbus cable holder
Licencia
Uso comercial permitidoPuedes usarlo, modificarlo y venderlo; si distribuyes versiones modificadas deben ir con la misma licencia y sus fuentes.
Al descargar aceptas respetar la licencia y dar crédito a Galvanic.
Archivos (13)
- Bowden_Guide V2.step STEP · 1,4 MB
- Bowden_Guide V2.f3d F3D · 3,3 MB
- Mount.stl STL · 69 KB
- Mount_Bearing.stl STL · 90 KB
- Under_extrusion_mount.stl STL · 71 KB
- Under_extrusion_mount_bearing.stl STL · 91 KB
- Low_Mount_Bearing.stl STL · 89 KB
- Short_Arm_Bearing.stl STL · 1,2 MB
- Short_Arm.stl STL · 1,2 MB
- Long Arm Bearing.stl STL · 1,5 MB
- Long_Arm.stl STL · 1,5 MB
- Bowden_Guide V2.3mf 3MF · 1,3 MB
- V1.zip ZIP · 1,6 MB
- Categoría
- Para tu impresora
- Formatos
- STEP, F3D, STL, 3MF, ZIP
- Descargas
- 13,023
- Publicado
Sobre este modelo
V2- PTFE bowden tube guide and CANBUS wire support
**** 7NOV24 -Removed a zip tie hole on the long arm's that was a weak point ****
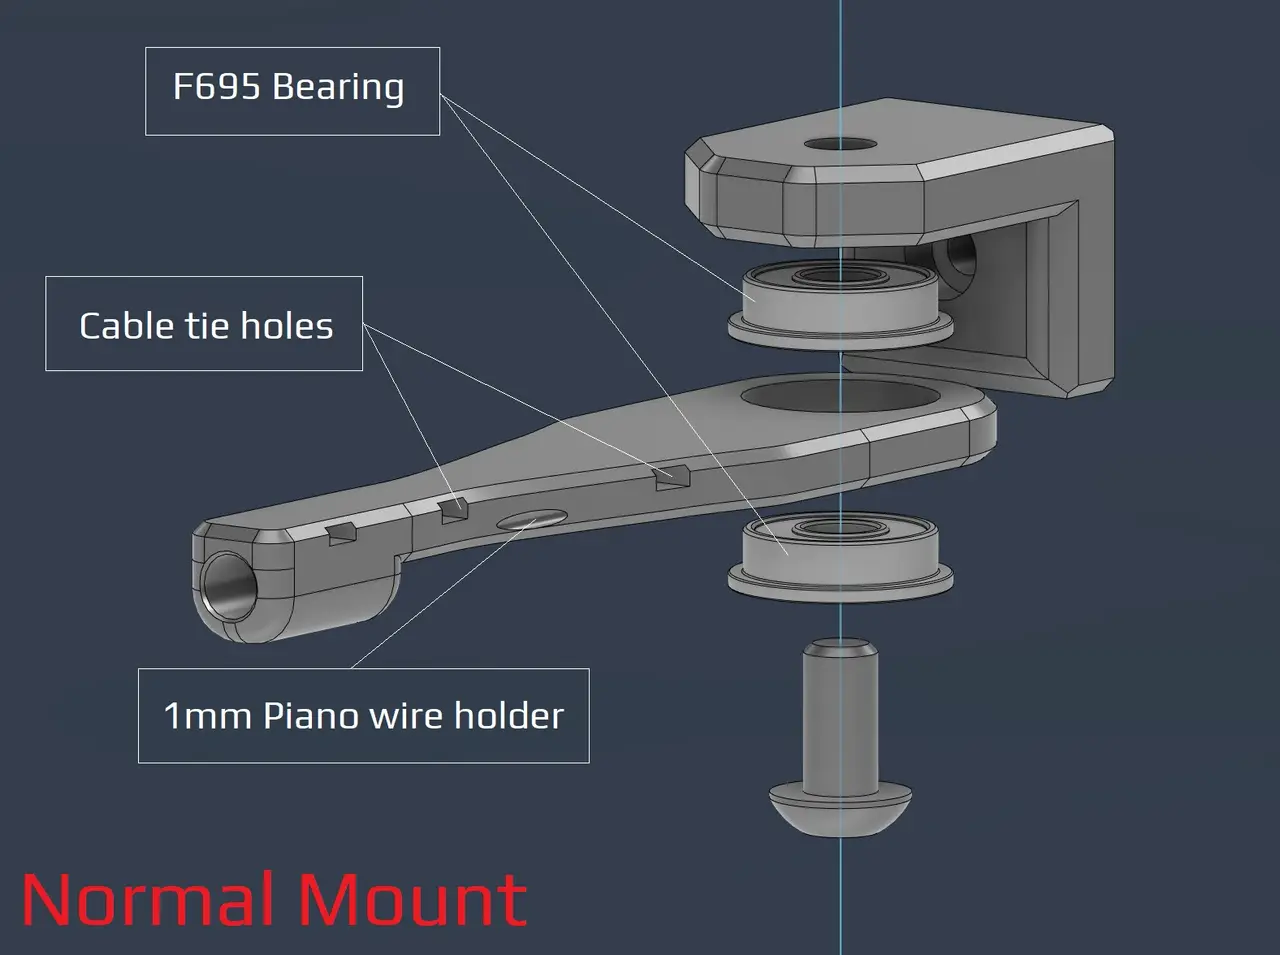
I've made some adjustment after some feedback from the community. Changes made over V1: - Added a option to have F695 bearings incorporated
- Enlarged the tube opening
- Added cable/zip tie openings
- Added spot for 1mm piano wire if needed.
Recommended print settings: - Voron print settings (4 walls, 40% infill and 5 top and bottom layers)
- Turn off thin walls
- Bridge setting: keep only bridges (watch out for bridging for cable tie holes)
- 0.2mm layers and 0.2mm first layer
- No need to adjust for ABS shrinkage
Required Hardware: - M3x8 Bolt and M3 T-nut
- M5 bolt to suit option.
- Optional M5 nut if you can fit it with the bearing option.
V1 - PTFE bowden tube guide and CANBUS wire support This is can found inside the zip files and of the initial release Required Hardware: - M3x8 Bolt and M3 T-nut
- M5x10 Bolt or a M5x8/12
- Optional 4mm drill bit for cleaning out bowden tube path
About In my 350 build the PTFE tube kept getting caught so I made this arm to keep it up. The shorter arm works better so I recommend using it instead The setup has also been used by a few user to support their CANBUS wires (zip tied to the reverse bowden) Install - Drill out bowden guide with 4mm drill bit for a perfect fit (optional)
- Bolt mount to rear frame with M3x8 and tnut putting the lip at the top
- Screw arm on with M5x10 (I used a M5x8mm and it works fine) into the plastic allowing the arm to still be able to swivel
Descripción original del autor, publicada en Printables.



