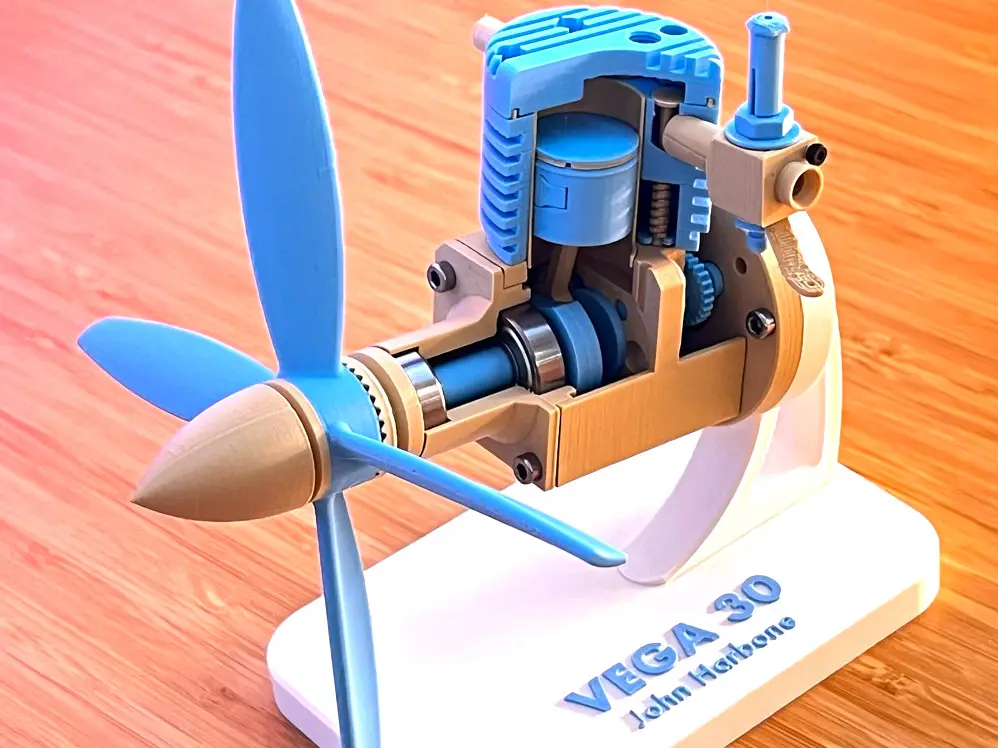
Vega 30
por Apex Prototype en MakerWorld
Vega 30. by John Harbone. The Vega range was designed and built from the late 1980's through to the mid 1990's by John Harbone of Birmingham, England. His intent was to provide a range of engines for sport or scale flying that would be quiet and reliable. They were manufactured in small…
MakerWorld entrega los archivos a usuarios con cuenta gratuita
Licencia
Solo uso personalStandard Digital File License
Licencia estándar de archivos digitales: solo uso personal. No se permite compartir, revender ni subir el archivo a otros sitios, ni vender las impresiones.
Al descargar aceptas respetar la licencia y dar crédito a Apex Prototype.
Archivos (39)
- Nose Cone.stl STL · 620 KB
- Propeller.stl STL · 2,0 MB
- Crankcase Body Cutout.stl STL · 419 KB
- Cylinder Liner Cutout.stl STL · 94 KB
- O-Ring Cutout.stl STL · 48 KB
- Cylinder Head Cutout.stl STL · 673 KB
- Cylinder Jacket Cutout.stl STL · 712 KB
- Bearing House Cutout.stl STL · 225 KB
- Needle Thimble.stl STL · 2,8 MB
- Throttle Barrel.stl STL · 196 KB
- Carburetor Hex Nut.stl STL · 3,1 MB
- Throttle Arm.stl STL · 70 KB
- Spraybar.stl STL · 795 KB
- Washer.stl STL · 57 KB
- Throttle Body.stl STL · 230 KB
- Prop Driver.stl STL · 295 KB
- Piston Head.stl STL · 249 KB
- Crankcase Oil Lite.stl STL · 98 KB
- Compression Rig.stl STL · 69 KB
- Wrist Pin.stl STL · 84 KB
- Valve Cap.stl STL · 77 KB
- Valve.stl STL · 242 KB
- Exhaust Pipe.stl STL · 192 KB
- Crankcase Vent.stl STL · 296 KB
- Hex Nut.stl STL · 2,3 MB
- Bearing House.stl STL · 266 KB
- Crankshaft.stl STL · 996 KB
- Split Cone.stl STL · 103 KB
- Backplate.stl STL · 233 KB
- Oilite.stl STL · 165 KB
- Conrod.stl STL · 1,1 MB
- Inlet Cam.stl STL · 414 KB
- Exhaust Cam.stl STL · 400 KB
- Follower Shaft.stl STL · 518 KB
- Prop Washer.stl STL · 72 KB
- Arm.stl STL · 112 KB
- Base.stl STL · 34 KB
- Interface.stl STL · 115 KB
- Label.stl STL · 269 KB
- Categoría
- Educación
- Formatos
- STL
- Descargas
- 3,414
- Publicado
Sobre este modelo
Vega 30 by John Harbone
The Vega range was designed and built from the late 1980's through to the mid 1990's by John Harbone of Birmingham, England. His intent was to provide a range of engines for sport or scale flying that would be quiet and reliable. They were manufactured in small quantities from bar-stock until ill-health forced an end to the venture.
Resources:
- Motorboys Website
- Vega 30 Page
----
UPDATE - 11/07/2026 I swapped PLA Matte filament for PLA Tough+. This is ideal for tiny fragile parts, making it much stronger and easier to handle
PLA Matte still does works just fine but its a bit more fragile. ----
Hello Everyone, First of and foremost:
If you want to learn how to model this engine in Fusion 360 please visit the Learn It Youtube Channel! If you want to support Learn It, join his Patreon!
----
In my quest to learn more about reading blueprints I found Learn It playlist on how to model the Vega 30 engine. I thought it looked amazing and had to 3d print it to have it in my desk. Of course I had to share this with everyone so enjoy!
Boost MeIf you want to support me, leave a Like, Comment, and a Boost! Thank you!Removing Supports Grab a cup of coffee. This is a labor of love. 🚨 Some parts are very fragile. Handle with care. If anything breaks, just print another one.
Begin by removing all the supports from the parts:
Assembly The images should help you assemble all the pieces. If you have any questions, drop me a comment.
Let's assemble the crankshaft! You can sand it a bit to make it smooth You can sand it a bit to make it smooth Some of the pins have a small elephant foot. You can just cut it out in case its too hard to fit the pieces together Add a few drops of glue here It should look like this when done
Add a drop of glue here
604z Bearing and 3x M3x12mm Screws 604z Bearing and 3x M3x12mm Screws 608ZZ and 607ZZ Bearings 608ZZ and 607ZZ Bearings
2x 0.4x5x15mm Springs 2x 0.4x5x15mm Springs
3x M3x12mm Screws
3x M2x2.5x30mm 3x M2x2.5x30mm
Add a drop of glue here to glue the cylinder liner
Push the Piston in. It should snap easily Add a few drops of glue here Add a few drops of glue here
3x M3x12mm Screws
M2x6mm Screw
Add a drop of glue here Glue the Carburetor assembly to the Cylinder Jacket Insert the Exhaust Pipe
Congratulations! You did it! Thank you for taking the time to print and assemble this awesome engine. Be sure to Like and Boost Me if you want to support me.
One last tip. Add a few drops of Sewing Machine Oil (or any other oil) to make everything lubricated
Boost MeIf you want to support me, leave a Like, Comment, and a Boost! Thank you!
Descripción original del autor, publicada en MakerWorld.