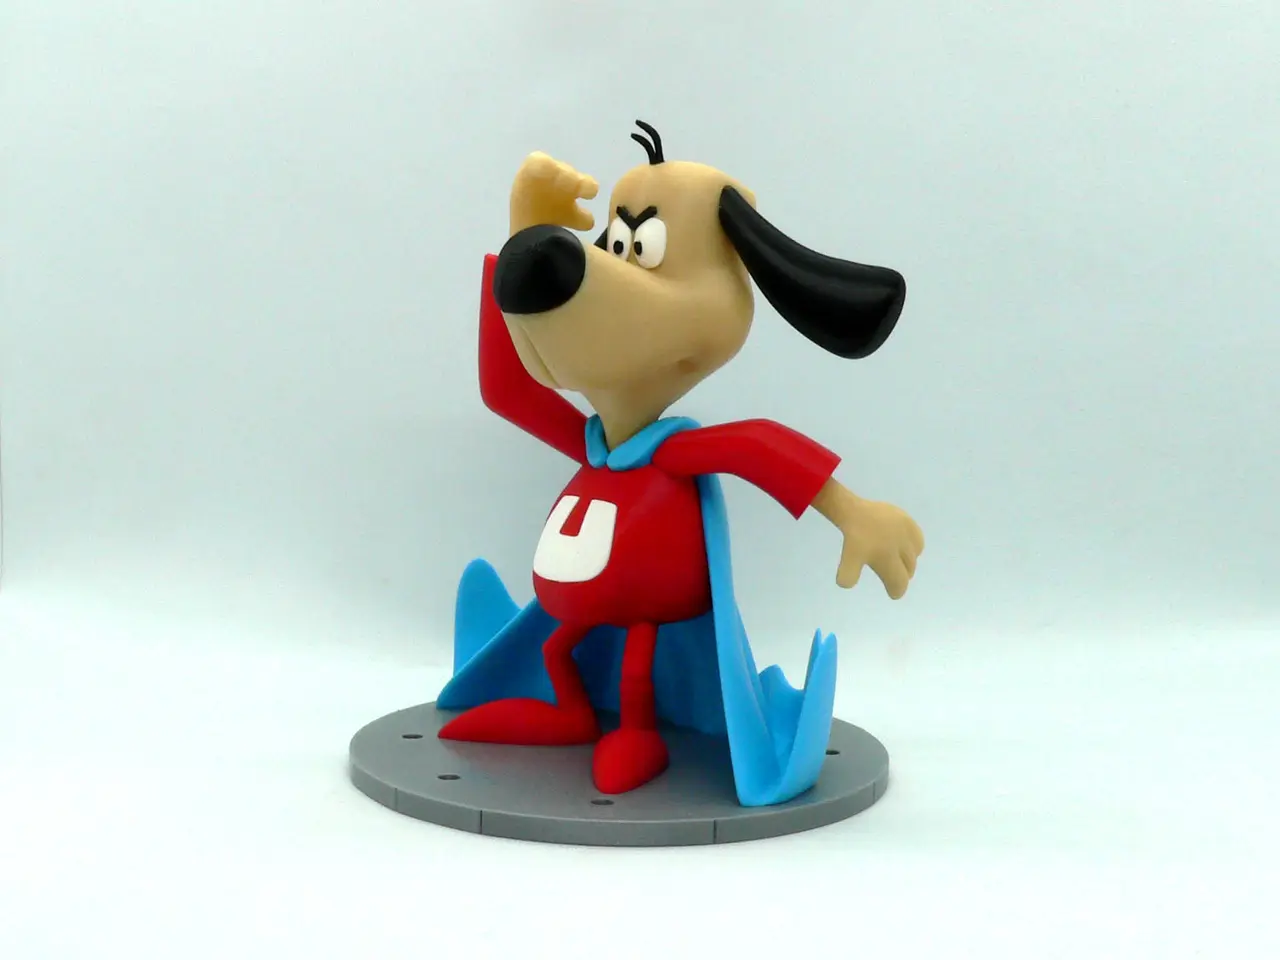
Underdog
por Steve Solomon en MyMiniFactory
Underdog, is an American Saturday morning animated television series that ran from 1964, to 1967. It is one of the early Saturday morning cartoons.
Licencia
Solo uso personalCC BY-NC-SA 4.0 — Atribución, no comercial, compartir igual
Uso personal dando crédito; sin fines comerciales y las modificaciones con la misma licencia.
Al descargar aceptas respetar la licencia y dar crédito a Steve Solomon.
Archivos (22)
- manhole_cover_prt.stl STL
- u_arm_left_prt.stl STL
- u_arm_right_prt.stl STL
- u_body_prt.stl STL
- u_cape_prt.stl STL
- u_cape_strap_left_prt.stl STL
- u_cape_strap_right_prt.stl STL
- u_ear_left_prt.stl STL
- u_ear_right.stl STL
- u_eyeblacks_prt.stl STL
- u_eyebrows_prt.stl STL
- u_eyewhite_left.stl STL
- u_eyewhite_right.stl STL
- u_feet_left_prt.stl STL
- u_feet_right_prt.stl STL
- u_hair_prt.stl STL
- u_hand_left_prt.stl STL
- u_hand_right_prt.stl STL
- u_head_prt.stl STL
- u_head_with_supports_prt.stl STL
- u_nose_prt.stl STL
- u_U_prt.stl STL
- Categoría
- Varios
- Formatos
- STL
- Descargas
- 163
- Publicado
Sobre este modelo
Underdog, is an American Saturday morning animated television series that ran from 1964, to 1967. It is one of the early Saturday morning cartoons.
Underdog, Shoeshine Boy's heroic alter ego, appears whenever love interest Sweet Polly Purebred is being victimized by such villains as Simon Bar Sinister or Riff Raff. Underdog nearly always speaks in rhyming couplets such as in "There's no need to fear, Underdog is here!" His voice was supplied by Wally Cox.
One part, u_head, requires supports. The part is supplied with built-in supports for printing at .2mm layer height, as well as without supports if you want to use slicer supports. If you have the proper filament colors, no painting is needed.
This model can be printed and displayed stand-alone or paired with my next model, Riff-Raff, that will go under the manhole cover.
The assembled Underdog model is 170mm tall.
Enjoy!
...........................................................................................................
Special shoutout to maker Benoît Lussier for providing QA printing and quality feedback. Special thanks to Jason McMillan (makerworld ID Gatekeeper) for creating the Bambu Print Profile.
...........................................................................................................
**Print Instructions:** Supports: u_head part only. Supplied with built-in supports Resolution: .2mm Infill: 15%
***************
**Building the model**
Colors
Black: (Devil Designs PLA - Black) u_eyeblacks (file contains two identical pieces) u_eyebrows u_nose u_hair u_ear_left u_ear_right ..
Blue: (Devil Designs PLA - Blue) u_cape u_cape_strap_left u_cape_strap_right ..
Aluminum: (Devil Designs PLA - Aluminum) manhole_cover ..
Skin: (Paramount3d - Universal Beige) u_head u_head_with_supports u_hand_right u_hand_left ..
Red: (Hatchbox PLA - True Red) u_body u_arm_right u_arm_left U_feet_right u_feet_left ..
White: (Devil Designs PLA - White) eyewhite_left eyewhite_right u_U ..
****************************************
...........................................................................................................
**Printing and assembly tips**
Printing tips:
1 - One part requires support, u_head. The part is supplied with built-in supports that have been tested for printing at .2mm layer height. Another part is also supplied without the built-in supports and Silcer supports can be used.
2 - There are some pieces that may need brims or rafts, use your discretion. When setting up my prints I prefer to be conservative to ensure the least chance of a print failure, especially since the base of many parts are hidden when inserted into another part.
*I used a brim on: u_hand_right u_hand_left u_ear_right u_ear_left
3 - When removing parts from the printer bed, it's a **VERY** good idea to place left/right parts into separate containers to help with the assembly process. Sometimes the difference between the left and right parts is very small but it is still worth keeping track of them (especially if you size up the model significantly) and assembling them in their proper place.
4 - Be aware that due to the slope of the head, there may be scarring on the back side from the supports.
.. Assembly tips:
1 - Take your time gluing the model together and enjoy the process. Dry fit all the parts and give some thought into which parts to glue together as groups and then gluing the groups together. Let the glue for each group set completely before combining groups.
Descripción original del autor, publicada en MyMiniFactory.