
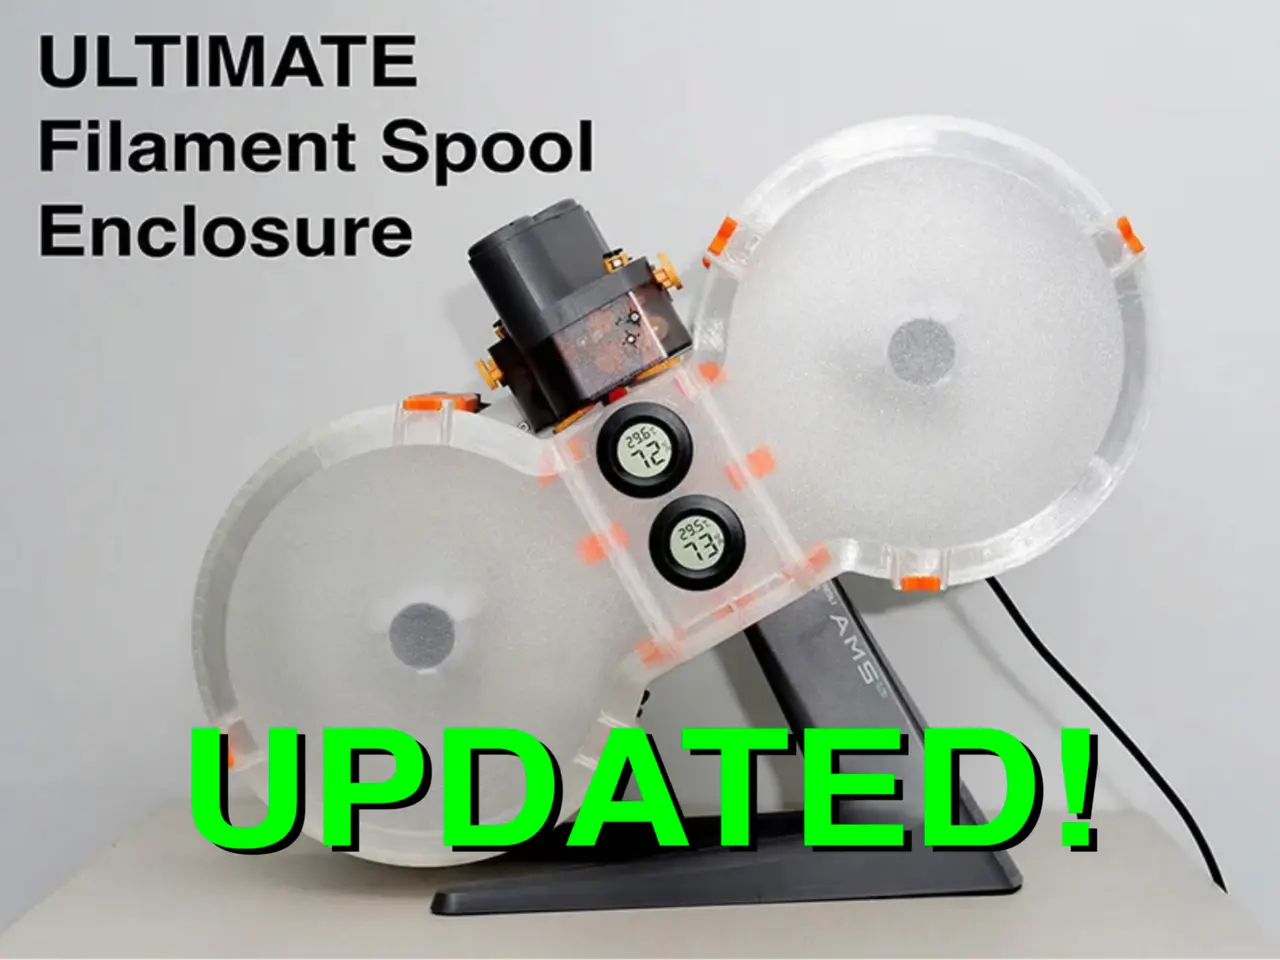
Ultimate Filament Spool Enclosure - TYPE 01
por Supergrapher en MakerWorld
Boost MeIf you are looking for the boost button, here it is :-). UPDATE: Type 02 released as BETA
MakerWorld entrega los archivos a usuarios con cuenta gratuita
Licencia
Solo uso personalStandard Digital File License
Licencia estándar de archivos digitales: solo uso personal. No se permite compartir, revender ni subir el archivo a otros sitios, ni vender las impresiones.
Al descargar aceptas respetar la licencia y dar crédito a Supergrapher.
- Categoría
- Para tu impresora
- Descargas
- 79,071
- Publicado
Sobre este modelo
Boost MeIf you are looking for the boost button, here it is :-) UPDATE: Type 02 released as BETA https://makerworld.com/en/models/1171679-ultimate-filament-spool-enclosure-type-02#profileId-1180009 Table of Content 1)Updates 2)Introduction 3)Instructions 4)Videos
1) Updates Updates (11 Nov 2024) Slight update on how the hygrometer is installed. This should make it more intuitive. Updates (30 Sep 2024) I’ve received many requests from A1 Mini users for this enclosure. While it can’t be printed on the A1 Mini, made a few partnerships so you can now purchase one directly.
Blurolls3D
D3D
https://www.ebay.de/itm/387973970167
If you have trouble removing the spools, you can try this spool removal tool https://makerworld.com/models/762482 Updates (23 Sep 2024) Finally! I've able to release the update that I've been working on for quite some time. Do consider this as BETA until more feedback from the community. Here are some of the problems that I worked on.
- Filament binding is reduced in the new design, which features an angled exit path and a sliding grommet that allows slight movements. These movements adapt to the angle at which the filament is being pulled, thus reducing binding.
- A larger Action-Bucket for silica beads, featuring a more secure sliding lid that also functions in vertical orientation.
- The dual monitoring Action-Panel is now a two-part print, making it easier to adjust or remove the hygrometer. By eliminating overhangs, the panel itself is more airtight.
- Paintable covers in the vertical orientation for wall mounted AMS.
- Closed up the sliced corner of the cover. Will be a tight squeeze for top mounting but it will still fit.
- If you are using cardboard spools, I'm working on an adapter. It is still in BETA. https://makerworld.com/en/models/665427#profileId-592899
Most importantly, the updates are backwards compatible. If you want to add more silica beads, simply print the new Action-Bucket. If you're experiencing binding issues, you can just print the new Spool Buckets with the corresponding grommets etc…
Information on the plates Plate 1, 2 - Bottom buckets to hold the spools (Print each of these plates twice, a pair for each side). Plate 3, 4 - Paintable covers with horizontal nozzle label for AMS-lite horizontal placement (Print each of these plates twice).
- Important: Do not print plates 5 and 6 if choosing these plates!
Plate 5, 6 - Paintable covers with vertical nozzle label for AMS-lite vertical placement (Print each of these plates twice).
- Important: Do not print plates 3 and 4 if choosing these plates!
Plate 7 - Action-Panels (Print 1 of the 3 panels for each side for a total of 2 panels printed):
- A. One hydrometer opening
- B. Single hydrometer opening
- C. Two hydrometer openings for inside/outside reading
Plate 8 - Action-Buckets (Choose one bucket for each side for a total of 2 buckets printed):
- A. The bigger ones along with the lids are for loose desiccant.
- B. The smaller ones are for desiccant bags.
Plate 9 - Brackets for stability by holding the 2 sides together (This plate just needs to be printed once). Plate 10 - Clips and grommets (Print this plate twice, one for each side).
Important: Make sure to look through the remixes and additions listed below the main plate set for component options you may want to switch out, such as buckets with spool-viewing windows or panels with square hydrometer openings. 2)Introduction Finally I've created the ULTIMATE FILAMENT SPOOL ENCLOSURE for the AMS-Lite! Thank you for all the support and feedback on the previous design. I’ve incorporated everything I’ve learned to create a new design that I believe is better and more user-friendly. Now, installing and feeding filament is so much easier. The cover is attached using clips, making the process more straightforward. No additional tools or parts are needed, and you have a choice of Action-Panels and Action-Buckets to suit your needs.
My favorite Action-Panel is the dual monitoring (inside/outside) hygrometer panel.
This is also compatible with my and Bambulab's AMS-Lite top mount. If you are using Bambulab's version you'll need to remove the locking screw and use the low profile screw a member shared in the profiles.
Installation is also relatively easy. Let’s get started! 2) Instructions
PLA is recommended, but many users seem to have success printing with PETG as well. Connect the buckets together as shown above using the clips.
Descripción original del autor, publicada en MakerWorld.



