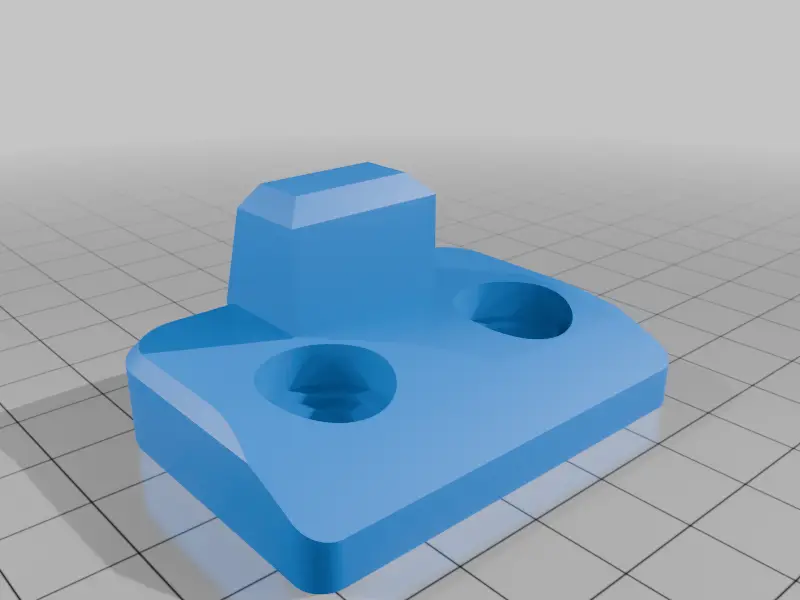
Toyota Celica GT Rear Hatch Stopper / Cushion Replacement (TPU)
por Srikar Chanamolu en Thingiverse
This replaces the rubber rear hatch stopper (also called a cushion or bumper) on the Toyota Celica GT. After years of sun and weather the original rubber cracks and crumbles, which lets the hatch rattle and shift side to side. This printable replacement bolts into the same two holes and is designed.
Licencia
Uso comercial permitidoCC BY-SA 4.0 — Atribución, compartir igual
Puedes usarlo y modificarlo dando crédito; las versiones modificadas deben compartirse con la misma licencia.
Al descargar aceptas respetar la licencia y dar crédito a Srikar Chanamolu.
Archivos (1)
- Categoría
- Repuestos
- Formatos
- STL
- Descargas
- 0
- Publicado
Sobre este modelo
This replaces the rubber rear hatch stopper (also called a cushion or bumper) on the Toyota Celica GT. After years of sun and weather the original rubber cracks and crumbles, which lets the hatch rattle and shift side to side. This printable replacement bolts into the same two holes and is designed to be printed in flexible TPU so it cushions the hatch like the original. It was modeled from a worn original, then test-fit on a [year] Celica GT through several PLA prototypes until the hatch closed properly. Changes from the original: A thin, curved top edge so the hatch clears it when closing A sloped, solid support under the stopper tab for strength Shallow bolt pockets with washer seats, so longer bolts can be used I’ve only tested it on my own car, so check the fit on yours before relying on it. Dimensions 52 × 38.8 × 25.2 mm Two 6 mm bolt holes, 27.4 mm apart Hardware 2 bolts (longer than stock, since the original had a metal insert this part doesn’t) 2 flat washers, 9.7 mm outer diameter / 5.6 mm inner diameter Print settings (Cura, Ender 3 V2, 95A TPU) Layer height: 0.2 mm Walls: 3 Top/bottom layers: 5 / 4 Infill: 30% gyroid (gives a little squish, like the original rubber) Nozzle: 225°C, bed: 50°C Print speed: 20 mm/s, first layer 15 mm/s Retraction: 1.5 mm at 20 mm/s, or off if your extruder jams Supports: none needed. Print flat side down. Recommended: add a 100% infill modifier (about 12 × 12 mm) around each bolt hole so the bolts don’t crush the infill and loosen over time. Installation Remove the old stopper and clean the mounting area. Place a washer in each pocket. Bolt it on, and tighten just until the washers seat. Don’t overtighten, because TPU compresses. Close the hatch slowly the first time to check the fit. Tip: Print a quick PLA test first to check the fit on your car, then print the final part in TPU. Don’t use the PLA version permanently. It’s rigid and can crack or mark your paint.
Descripción original del autor, publicada en Thingiverse.