TESTA ANIMATRONICA V2
por Alessio;) en MakerWorld
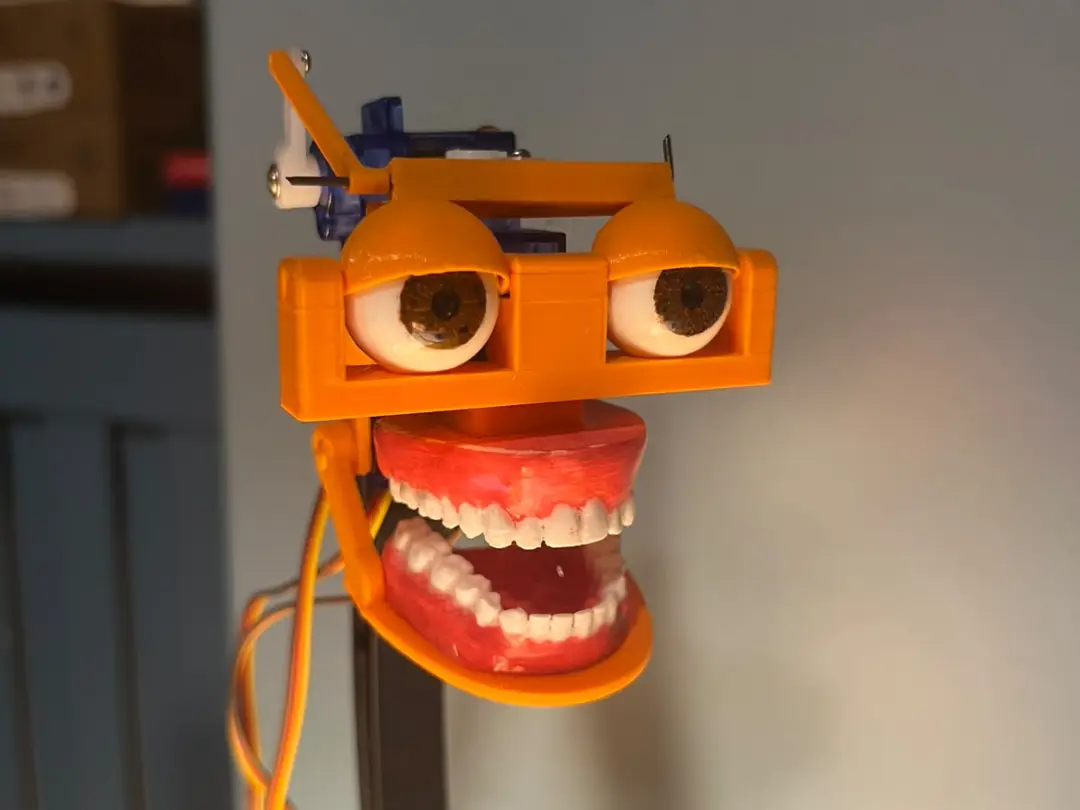
REALISTIC 3D ANIMATRONIC HUMAN HEAD – V2. This is V2 of my realistic 3D animatronic human head.
MakerWorld entrega los archivos a usuarios con cuenta gratuita
Licencia
Solo uso personalStandard Digital File License
Licencia estándar de archivos digitales: solo uso personal. No se permite compartir, revender ni subir el archivo a otros sitios, ni vender las impresiones.
Al descargar aceptas respetar la licencia y dar crédito a Alessio;).
- Categoría
- Figuras y arte
- Descargas
- 0
- Publicado
Sobre este modelo
REALISTIC 3D ANIMATRONIC HUMAN HEAD – V2 This is V2 of my realistic 3D animatronic human head. Before starting, I recommend reading the description of the V1 project. The assembly process for V2 is practically the same as the first version, with some improvements to the eyelid mechanism and the fit of the parts. The YouTube assembly video included in the original V1 project description is still valid for V2 and can be used as a guide during assembly. V2 MODIFICATIONS V2 introduces several mechanical improvements designed to make the assembly simpler, more precise and reliable.
- The parts have been modified to achieve more precise and stable connections.
- The two eyelids are mechanically connected to each other, allowing them to move together.
- The new eyelid system requires less hardware than the previous version.
- The eyelid movement is more synchronized and uniform.
- The overall assembly system has been simplified.
SERVO MOUNTING The servos are attached to the main part using two screws. There is no specific screw size required. You can use screws you already have available, as long as they fit the holes correctly and securely hold the servo without damaging the printed part. Avoid using screws that are too long, as they could interfere with the internal mechanism. EYELID SERVO ARM MODIFICATION To achieve the correct synchronized movement of both eyelids, the servo arm needs to be modified. A section of the servo arm must be cut. The exact section to cut and how to make the cut are shown in the project photos. This modification allows the servo to be correctly connected to the eyelid mechanism and provides a complete and synchronized movement of both eyelids. WIRE CONNECTION Only one piece of metal wire is required for the eyelid mechanism. The wire is used exclusively to connect the servo to the eyelid mechanism, transferring the servo movement to both eyelids, which are already mechanically connected to each other. ASSEMBLY AND GLUING The assembly process is practically the same as the V1 version. For this reason, the YouTube assembly video included in the original project description can still be used as a guide. The main differences in V2 concern the new eyelid system and the improved part connections. The only parts that need to be glued are the two mouth pieces, which must be joined together to create the complete mouth mechanism. The other parts designed to fit together do not require glue. Recommended assembly procedure:
- Use the V1 assembly video as a reference.
- Assemble the parts without gluing them initially.
- Check that all connections fit correctly.
- Attach the servos to the main part using two screws.
- Connect the two eyelids mechanically.
- Modify the servo arm according to the instructions shown in the project photos.
- Use one piece of metal wire to connect the servo to the eyelids.
- Glue the two mouth pieces together.
- Manually check all movements.
- Test the servos with small movements before using their full range.
IMPORTANT NOTES V2 is an update of the original project and is not a completely separate design. For information about the dimensions, electronics, servos, finishing and general operation, please refer to the V1 project description. The YouTube assembly video included in the V1 description is still valid for V2, since the general assembly procedure has not changed. Always respect the servo movement limits to prevent the mechanism from reaching its end stops and putting excessive stress on the servo. Enjoy printing and assembling!
Descripción original del autor, publicada en MakerWorld.