
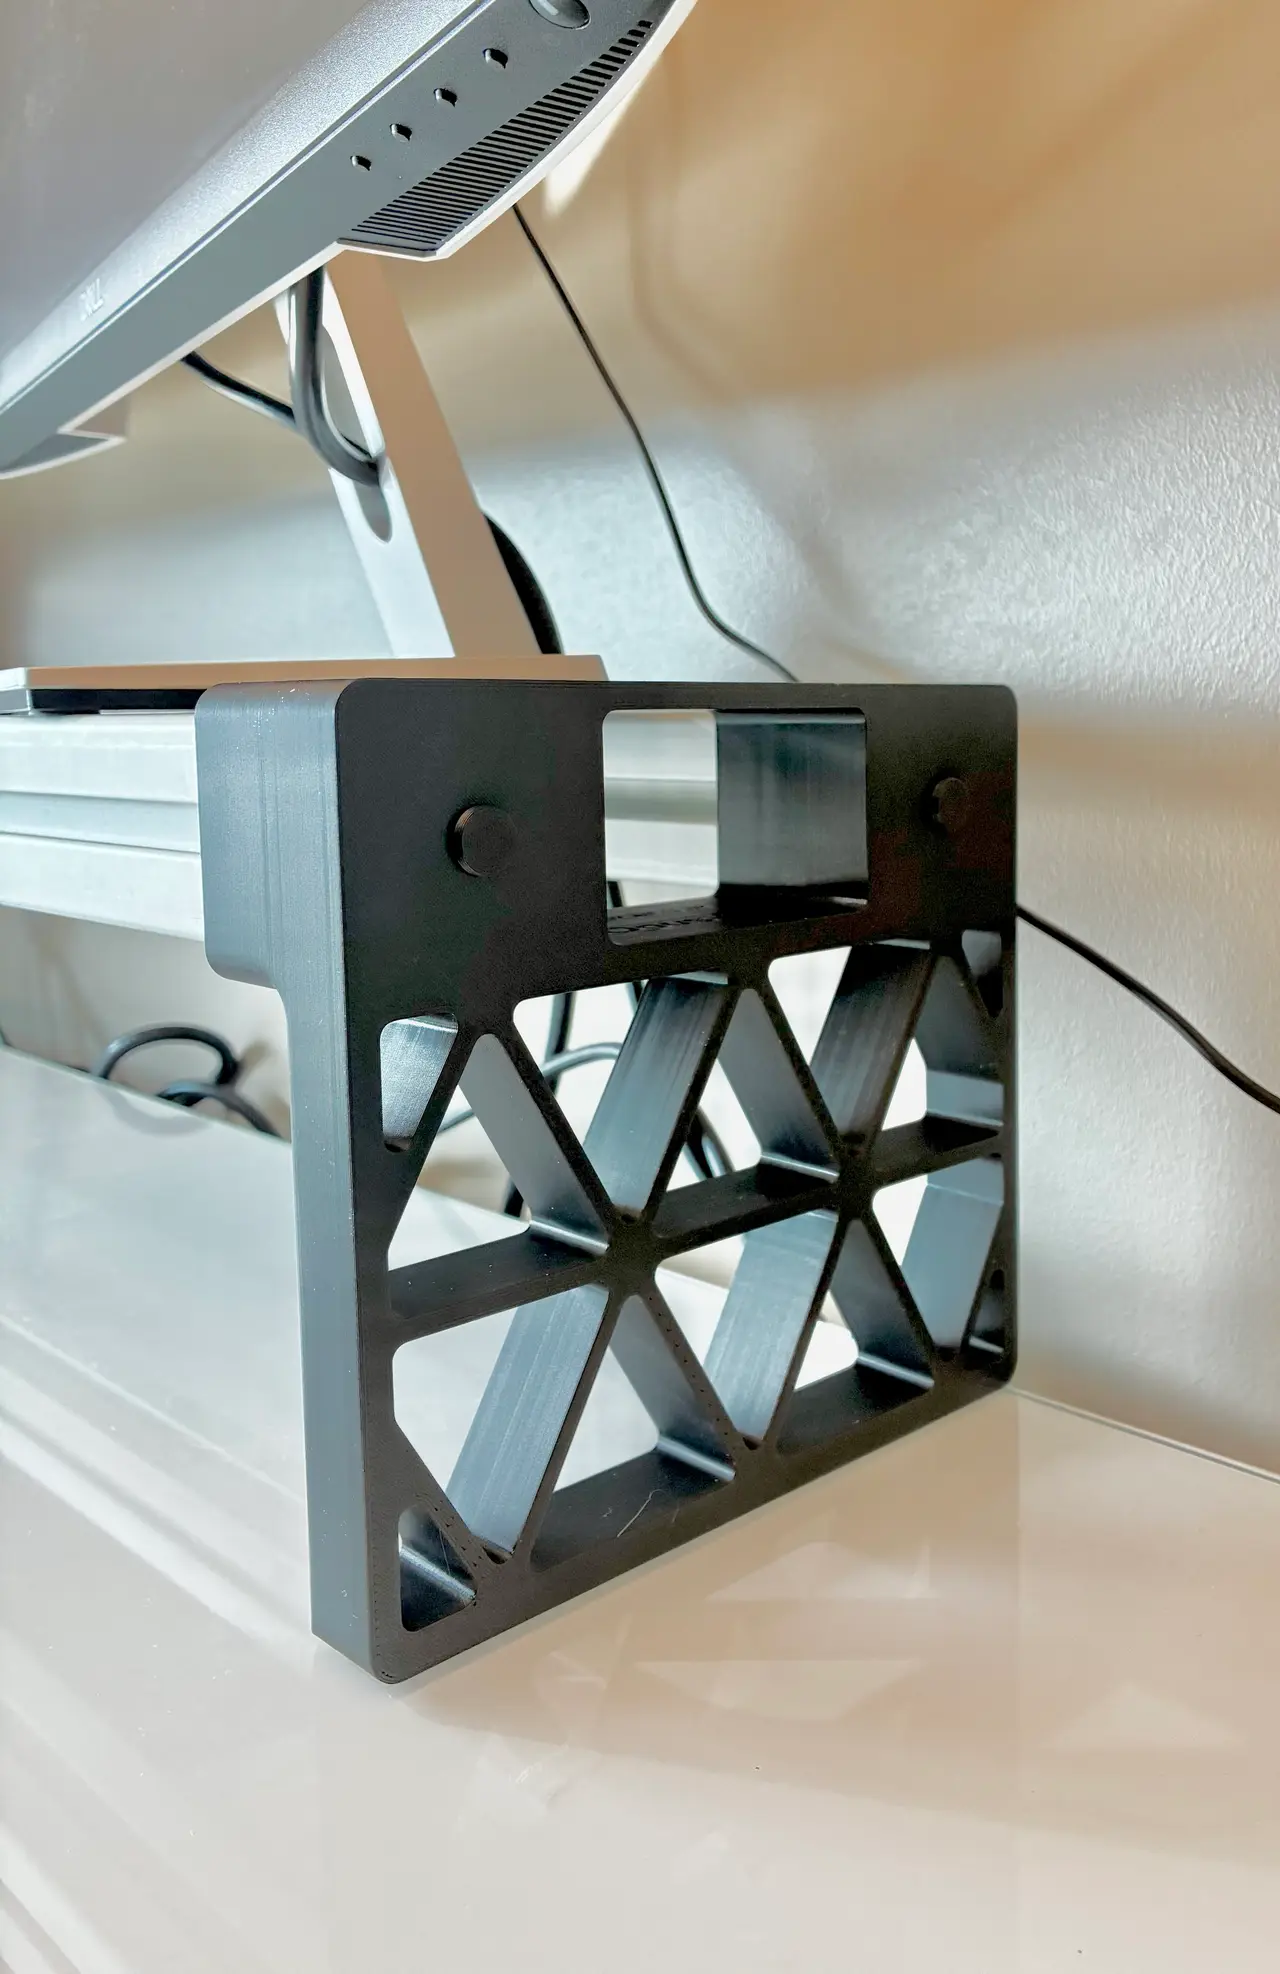
T-Slot Monitor Riser Feet – 20mm, 40mm, 1" & 1.5" Aluminum Extrusion
por DevIndustries en Printables
Printed feet that turn two lengths of T-slot extrusion into a sturdy 6" monitor riser. Versions for 20mm, 40mm, 1" and 1
Licencia
Uso comercial permitidoCC BY-SA 4.0 — Atribución, compartir igual
Puedes usarlo y modificarlo dando crédito; las versiones modificadas deben compartirse con la misma licencia.
Al descargar aceptas respetar la licencia y dar crédito a DevIndustries.
Archivos (8)
- Monitor Riser_Foot_40mm.3mf 3MF · 104 KB
- Monitor Riser_Plug_40mm.3mf 3MF · 7 KB
- Monitor Riser_Foot_1-5in.3mf 3MF · 103 KB
- Monitor Riser_Plug_1-5in.3mf 3MF · 7 KB
- Monitor Riser_Foot_1in.3mf 3MF · 99 KB
- Monitor Riser_Plug_1in.3mf 3MF · 7 KB
- Monitor Riser_Foot_20mm.3mf 3MF · 91 KB
- _Plug_20mm.3mf 3MF · 7 KB
- Categoría
- Hogar
- Formatos
- 3MF
- Descargas
- 0
- Publicado
Sobre este modelo
Turn two lengths of T-slot aluminum extrusion into a clean, rock-solid monitor riser. These printed feet cap the ends of two parallel extrusions and hold them 6" off the desk. The extrusion ends slide into blind pockets, so the outside of each foot stays flat and clean. A small tapered plug taps through the end of each foot into the extrusion's center bore and locks it in place. No tapping, no T-nuts, no screws. The support below the extrusions is a triangulated isogrid. The diagonals meet directly under each extrusion, so the load goes straight to the desk with very little plastic. Mine holds two 27" office monitors. Why I made it: I wanted a riser to get my monitors up higher on my desk, but I didn't want to buy one. I also didn't have any scrap wood around to use with one of the existing designs. What I did have was some 40 mm extrusion left over from a project a few years back, so I designed the feet around it. I figured others might like it too, so I made versions for 20 mm, 1" and 1.5" extrusion as well. The best part of using extrusion for the top is the open T-slots. If you ever want to add accessories, like a drawer, you can clip them right in. Pick the files for your extrusion: Files Extrusion size Example profiles Center bore the plug fits
Foot_20mm / Plug_20mm 20 × 20 mm 80/20 20-2020, most 2020 profiles 4.2 mm
Foot_1in / Plug_1in 1 × 1 in 80/20 1010 0.205 in (5.2 mm)
Foot_1-5in / Plug_1-5in 1.5 × 1.5 in 80/20 1515 0.257 in (6.5 mm)
Foot_40mm / Plug_40mm 40 × 40 mm 80/20 40-4040, 40-4040-Lite 6.8 mm
Every version has the same footprint and height. Only the pockets and plugs change. The size is debossed inside one pocket so you can tell the prints apart. What you need for one riser: - 2 feet and 4 plugs, printed for your extrusion size
- 2 extrusions of equal length (I used 36")
- A small mallet
Dimensions: - Top of the extrusions: 6.00" (152.4 mm) above the desk
- Extrusion spacing: 6.2" (157.5 mm) outside to outside
- Each foot: 168 mm wide × 158 mm tall × 44 mm deep
Assembly: - Cut both extrusions to the same length and deburr the ends.
- Slide the extrusion ends into the pockets of one foot until they bottom out. Repeat on the other end.
- Push a plug through each end-cap hole and into the extrusion's center bore.
- Tap each plug with a mallet until the head sits on the foot. It should go in with a firm tap, not a hammering.
To take it apart, pry the plug heads out with a flat screwdriver. Fit: The pockets have 0.25 mm of clearance per side. Each plug is 0.29 mm oversize at the extrusion face and split down the middle so it flexes as it seats. If your printer runs tight or loose, scale the plug 99–101% in X and Y. The feet should not need scaling. Designed by DevIndustries (that's me) with some Claude MCP just for fun to try it out. (It worked pretty Well) Print settings Both parts print with no supports and no brim. Use these for the print settings fields and the print instructions. Setting Foot Plug
Orientation Flat outer face (end cap) on the bed, pockets open upward Head down, standing upright
Supports None None
Raft / brim None None
Nozzle 0.4 or 0.6 mm 0.4 mm recommended
Layer height 0.2 mm (0.4 nozzle), 0.3 mm (0.6 nozzle) 0.15–0.2 mm
Perimeters 4 3 or more
Infill 20–30% 100%
Material PLA (tested); PETG also works PLA (tested)
Quantity per riser 2 4
Minimum bed size 170 × 160 mm Any
I printed mine in PLA on a Prusa XL.
Descripción original del autor, publicada en Printables.



