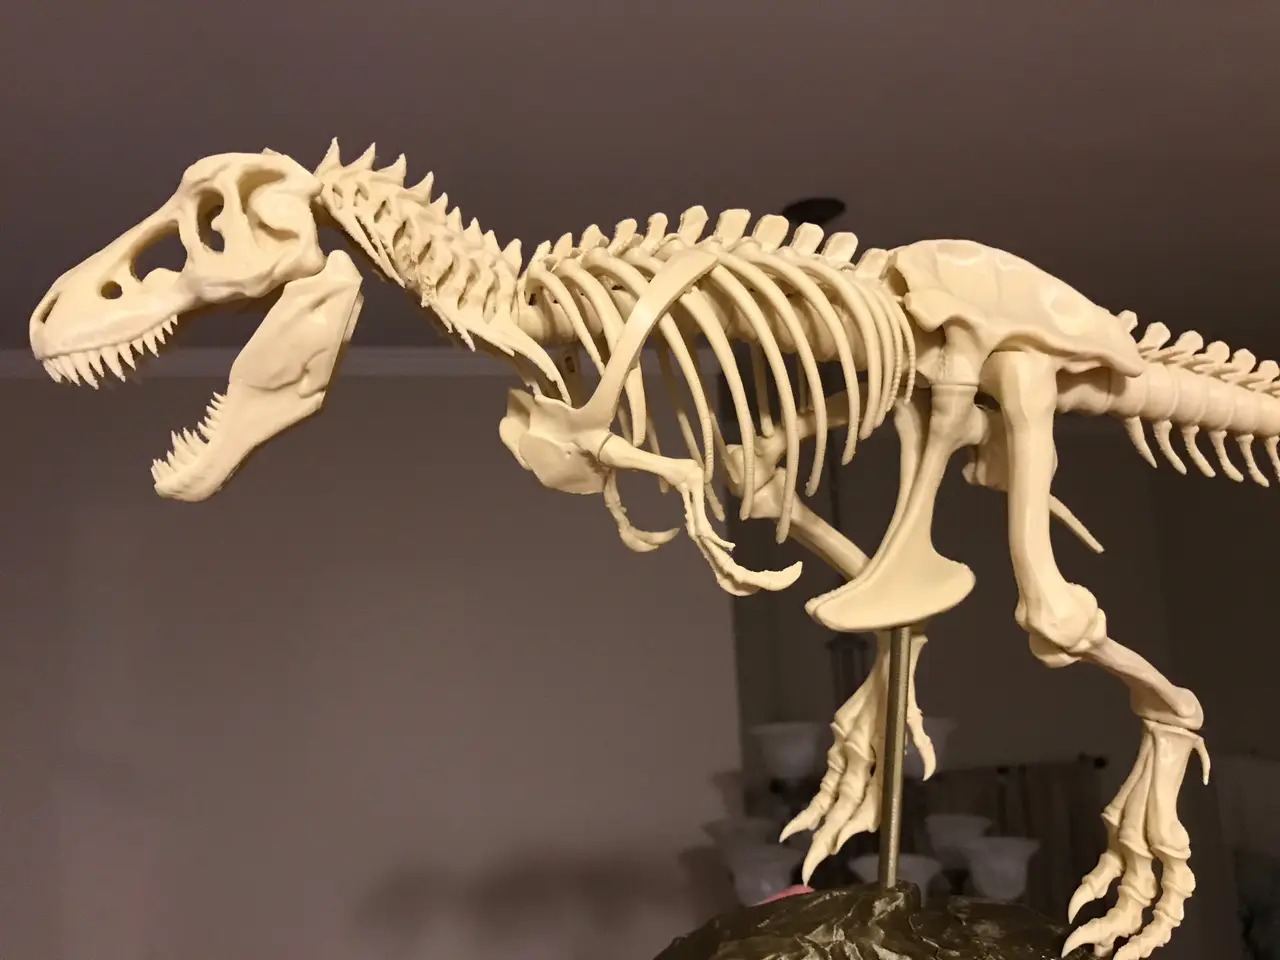
T-Rex Skeleton fixed and printable
por Bin Hu en Thingiverse
MakerBot's T-Rex Skeleton is a masterpiece. Too bad MakerBot has ignored fans' long-time cry to fix some obvious and critical issues. Thus I made the following fixes to make the model printable: --I fixed tail parts A and B. Tail part A is largely and part B is completely separated at the second...
Licencia
Uso comercial permitidoCC BY-SA 4.0 — Atribución, compartir igual
Puedes usarlo y modificarlo dando crédito; las versiones modificadas deben compartirse con la misma licencia.
Al descargar aceptas respetar la licencia y dar crédito a Bin Hu.
Archivos (37)
- assembly_instructions.pdf PDF · 12,3 MB
- skull.stl STL · 11,5 MB
- jaw.stl STL · 8,0 MB
- arm_L.stl STL · 2,1 MB
- foot_L.stl STL · 7,6 MB
- foot_R.stl STL · 9,1 MB
- neck.stl STL · 9,3 MB
- hip_top.stl STL · 6,4 MB
- hip_bottom.stl STL · 2,6 MB
- dorsal_A.stl STL · 13,1 MB
- dorsal_B.stl STL · 10,2 MB
- scapulas.stl STL · 12,0 MB
- tail_A.stl STL · 2,3 MB
- tail_B.stl STL · 2,8 MB
- tail_C.stl STL · 7,6 MB
- tail_D.stl STL · 3,3 MB
- L1.stl STL · 1020 KB
- L2.stl STL · 1,7 MB
- L3.stl STL · 1,7 MB
- L4.stl STL · 2,0 MB
- L5.stl STL · 1,9 MB
- L6.stl STL · 1,8 MB
- L7.stl STL · 1,6 MB
- L8.stl STL · 1,5 MB
- L9.stl STL · 1,3 MB
- L10.stl STL · 1,2 MB
- L11.stl STL · 925 KB
- base_back.stl STL · 6,1 MB
- base_front.stl STL · 14,0 MB
- base_onepiece.stl STL · 3,6 MB
- base_beam.stl STL · 36 KB
- h-clips.stl STL · 47,8 MB
- tibia_L.stl STL · 6,4 MB
- tibia_R.stl STL · 7,3 MB
- femur_L.stl STL · 6,0 MB
- femur_R.stl STL · 6,4 MB
- rib_cage.stl STL · 34,2 MB
- Categoría
- Figuras y arte
- Formatos
- PDF, STL
- Descargas (todas las plataformas)
- 124,378
- Publicado
También en
Sobre este modelo
MakerBot's T-Rex Skeleton is a masterpiece. Too bad MakerBot has ignored fans' long-time cry to fix some obvious and critical issues. Thus I made the following fixes to make the model printable: --I fixed tail parts A and B. Tail part A is largely and part B is completely separated at the second vertebrate, making part B unprintable and part A extremely fragile if barely printable. I added internal structures to make both parts solid. --I separate arms, tail segments, femurs and tibias. These tall and thin parts are very susceptible to being knocked over by the nozzle as it moves from part to part. In addition the frequent retraction makes these parts (if successfully printed) poor quality and stringy in-between. You can either print them individually for best quality or group them any way you want, preferably closer. I found out that the best way to print the ribs is to print the entire rib cage on its side with support, for which I uploaded the rib_cage.STL file. You must enable Support Interface in Cura, otherwise the ribs will be impossible to be cleanly removed from support. I also included individual left ribs. --I merged the neck H clip into the H clip file. --I included a merged one-piece base for those whose bed is large enough. No more seam on the base. Printing note: --ONLY LEFT ARM AND LEFT INDIVIDUAL RIBS ARE INCLUDED. MIRROR THEM TO PRINT THE RIGHT COUNTERPARTS (OR PRINT THE ENTIRE RIB CAGE WITH SUPPORT). --Using 8mm of brim is strongly recommended for all parts except the H clips and rib cage. It is easy to remove so no worries. --To increase first-layer adhesion, a secret brute force solution is Aqua Net Super Hold hairspray. Spray lightly and let dry and never worry about adhesion again. Don't use for the base or any other large contact area models! You will struggle to remove them. You must use this particular hairspray. Don't buy it from Amazon. It's sold for only $3 at Walgreens: https://www.walgreens.com/store/c/aqua-net-professional-hair-spray-extra-super-hold-3-unscented/ID=prod5458027-product. --I suggest grouping some tall and thin tail parts closely together so there will be enough cooling time. --Although the original design was meant to be printed support-free, I suggest using support at 60-70 degrees on a few parts: rib cage (on side), jaw, arms, neck, and tail tip. Make sure to use support interface so support is easy to remove. Happy printing! P.s. for those who don't have printers or can't get it right, I do commissions on this model at 100% or 200%. I've printed and shipped many of them (unassembled). Message me for details. I live in the US, if you are wondering about shipping.
Descripción original del autor, publicada en Thingiverse.