Spring-Loaded Coin Tubes with Viewing Window (US + Euro)
por hadigar en Printables
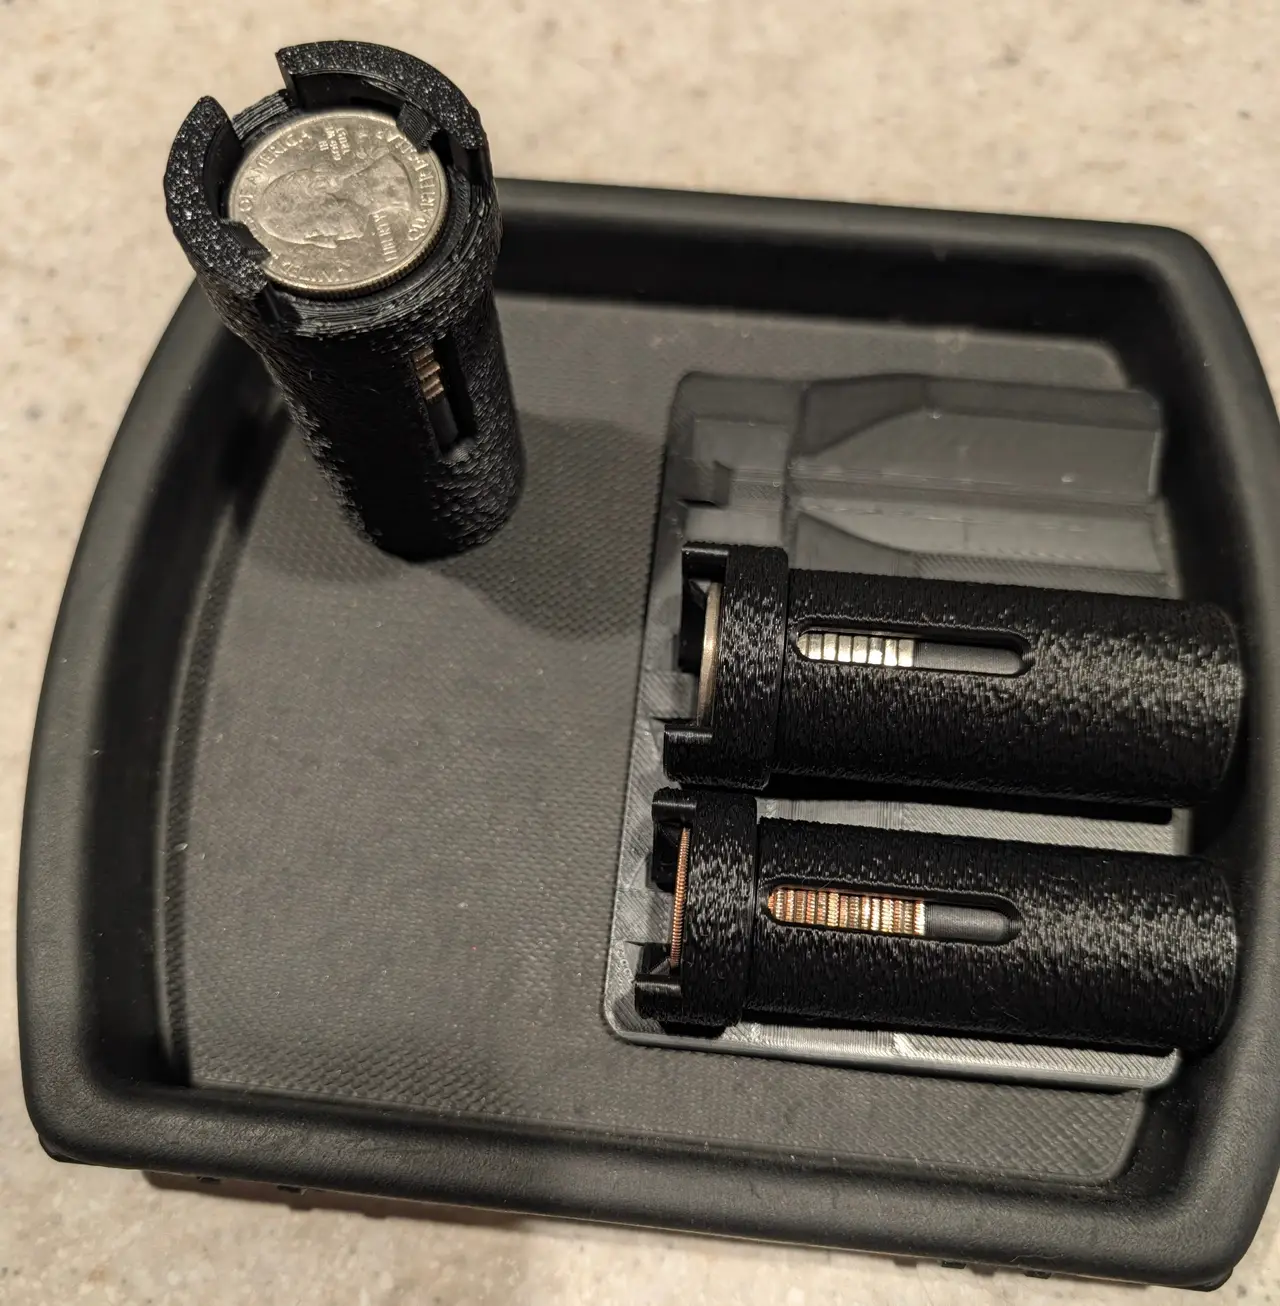
Steel-spring coin dispensers for US coins and euros: snap-beam cap, viewing window, and a holder for a car console tray.
Licencia
Solo uso personalCC BY-NC-SA 4.0 — Atribución, no comercial, compartir igual
Uso personal dando crédito; sin fines comerciales y las modificaciones con la misma licencia.
Al descargar aceptas respetar la licencia y dar crédito a hadigar.
Archivos (48)
- coin_tubes_US_BambuStudio.3mf 3MF · 2,9 MB
- coin_tubes_US_OrcaSlicer.3mf 3MF · 2,9 MB
- coin_tubes_US_SnapmakerOrca.3mf 3MF · 2,9 MB
- coin_tube_nickel_follower.stl STL · 174 KB
- coin_tube_nickel_spool.stl STL · 201 KB
- coin_tube_penny_follower.stl STL · 175 KB
- coin_tube_penny_spool.stl STL · 197 KB
- coin_tube_dime_spool.stl STL · 198 KB
- coin_tube_quarter_spool.stl STL · 197 KB
- coin_tube_quarter_follower.stl STL · 176 KB
- coin_tube_dime_follower.stl STL · 175 KB
- coin_holder_4_tubes_with_penny.stl STL · 420 KB
- coin_holder_3_tubes_quarter_nickel_dime.stl STL · 326 KB
- coin_tube_nickel_cap.stl STL · 1,2 MB
- coin_tube_nickel_tube.stl STL · 1,2 MB
- coin_tube_penny_cap.stl STL · 1,2 MB
- coin_tube_penny_tube.stl STL · 1,2 MB
- coin_tube_quarter_cap.stl STL · 1,2 MB
- coin_tube_quarter_tube.stl STL · 1,2 MB
- coin_tube_dime_tube.stl STL · 1,2 MB
- coin_tube_dime_cap.stl STL · 1,2 MB
- coin_tubes_EU_OrcaSlicer.3mf 3MF · 4,1 MB
- coin_tubes_EU_SnapmakerOrca.3mf 3MF · 4,1 MB
- coin_tubes_EU_BambuStudio.3mf 3MF · 4,1 MB
- coin_tube_euro_2eur_follower.stl STL · 175 KB
- coin_tube_euro_2eur_spool.stl STL · 200 KB
- coin_tube_euro_10c_follower.stl STL · 175 KB
- coin_tube_euro_5c_spool.stl STL · 202 KB
- coin_tube_euro_5c_follower.stl STL · 173 KB
- coin_tube_euro_1eur_follower.stl STL · 176 KB
- coin_tube_euro_10c_spool.stl STL · 199 KB
- coin_tube_euro_50c_follower.stl STL · 178 KB
- coin_tube_euro_50c_spool.stl STL · 199 KB
- coin_tube_euro_20c_follower.stl STL · 178 KB
- coin_tube_euro_1eur_spool.stl STL · 200 KB
- coin_tube_euro_20c_spool.stl STL · 197 KB
- coin_tube_euro_5c_tube.stl STL · 1,2 MB
- coin_tube_euro_1eur_tube.stl STL · 1,2 MB
- coin_tube_euro_2eur_tube.stl STL · 1,2 MB
- coin_tube_euro_2eur_cap.stl STL · 1,2 MB
- coin_tube_euro_20c_cap.stl STL · 1,2 MB
- coin_tube_euro_5c_cap.stl STL · 1,2 MB
- coin_tube_euro_50c_cap.stl STL · 1,2 MB
- coin_tube_euro_1eur_cap.stl STL · 1,2 MB
- coin_tube_euro_10c_tube.stl STL · 1,2 MB
- coin_tube_euro_20c_tube.stl STL · 1,2 MB
- coin_tube_euro_50c_tube.stl STL · 1,2 MB
- coin_tube_euro_10c_cap.stl STL · 1,2 MB
- Categoría
- Repuestos
- Formatos
- 3MF, STL
- Descargas
- 0
- Publicado
Sobre este modelo
Spring-loaded coin tubes that keep loose change tidy and hand you one coin at a time. Press a coin into the top and it snaps in under the cap; slide the top coin out sideways and the next one pops up. A window down the side shows how full each tube is. They lie side by side in a holder that fits a car's console coin tray, and work just as well on a desk or in a drawer. - Steel springs, not printed ones: two small, cheap compression springs stacked in each tube give an even push from the first coin to the last and don't wear out. Earlier versions with a printed TPU spring lost their push within days.
- Snap-beam cap: two flexible PETG beams with teeth hold the top coin. Coins snap in from the top and slide out sideways. No TPU or second material needed.
- Viewing window: a full window means a full tube; as the tube empties, you see the follower move up.
- Snap-on springs: each spring end twists over a small barb on its part, so the springs stay put while you assemble.
- Fuzzy-skin finish: the 3MF files have fuzzy skin painted on the outside of the tubes and caps only, which hides the seam and layer lines. Bores and threads stay smooth.
- No slicer supports: the cap prints on two small built-in support blocks that break out by hand. Nothing else needs support.
Coins and capacity Every tube is 69 mm (2.7 in) long and uses the same two springs. US coin Holds Euro coin Holds
Quarter 22 5 cent 23
Nickel 20 10 cent 20
Dime 29 20 cent 18
Penny 26 50 cent 16
1 euro 16
2 euro 17
The euro tubes come from the same tested design but have not been printed yet. If you print one, I'd love to hear how it works, the 20 cent coin with its notched edge especially. What you need Per tube, two compression springs, 0.5 mm wire and 10 mm outside diameter: - One 30 mm long spring (bottom). I used uxcell 0.5 x 10 x 30 mm, pack of 50.
- One 40 mm long spring (top). I used MECCANIXITY 0.5 x 10 x 40 mm, pack of 10.
Files Two folders, US coins and Euro coins, each with a 3MF for Snapmaker Orca, OrcaSlicer and Bambu Studio, plus plain STLs. - US 3MF: plate 1 has the quarter, nickel, dime and penny sets; plate 2 has the holders.
- Euro 3MF: plate 1 has 5, 10 and 20 cent; plate 2 has 50 cent, 1 euro and 2 euro.
- Each coin is one object in the object list, named like "Quarter set (tube, cap, follower, spool)". Delete the sets you don't want; everything else is ready to slice.
- Holders (US): the 3-tube holder (quarter, nickel, dime) fits a typical car console coin tray; the 4-tube holder adds the penny and is meant to stand on its own.
- STL files: the same parts without the fuzzy skin painting or slicer settings. See "Fuzzy skin from the STLs" below to add the finish yourself.
Printing - Material: PETG (I used PETG-HF, printed on a Snapmaker U1). The cap's snap beams rely on PETG's flex; PLA is stiffer and more brittle and is untested.
- Plate: textured PEI. PETG can weld itself to smooth PEI.
- Settings: 0.4 mm nozzle, 0.2 mm layers. The 3MFs already set seam at the back, no brim, and the fuzzy skin. Print every part as it is placed: the tubes standing up, the caps upside down, the followers and spools flat.
- Holders: printed flat with variable layer height (0.08 mm over the curved cradles), already set in the 3MF.
- Supports: none in the slicer.
Fuzzy skin from the STLs The 3MFs carry the fuzzy skin already. With the STLs you can add it in OrcaSlicer, Snapmaker Orca or Bambu Studio; here's how it was done: - Paint it, don't switch it on: the window cuts through the tube wall, so in those layers the slicer treats the inside of the tube as an outer wall too. "Fuzzy skin: outer walls only" would roughen the bore where the coins slide.
- Settings per object (tube and cap): fuzzy skin None, thickness 0.3 mm, point distance 0.8 mm. Painted faces still get fuzzy skin with these values.
- Paint with the fuzzy skin painting tool: the outside of each tube from the bottom up to where the thread starts, and the outside of each cap. Leave the thread, the bore and everything inside smooth.
- Seam position Back: the STLs are turned so the back of the bed is the side that lies down in the holder, which hides the seam there. Keep them in that orientation.
After printing - Cap: break out the two small support blocks (red in the picture): one under the cap's open side, the other under the push notch at the back.
Descripción original del autor, publicada en Printables.