
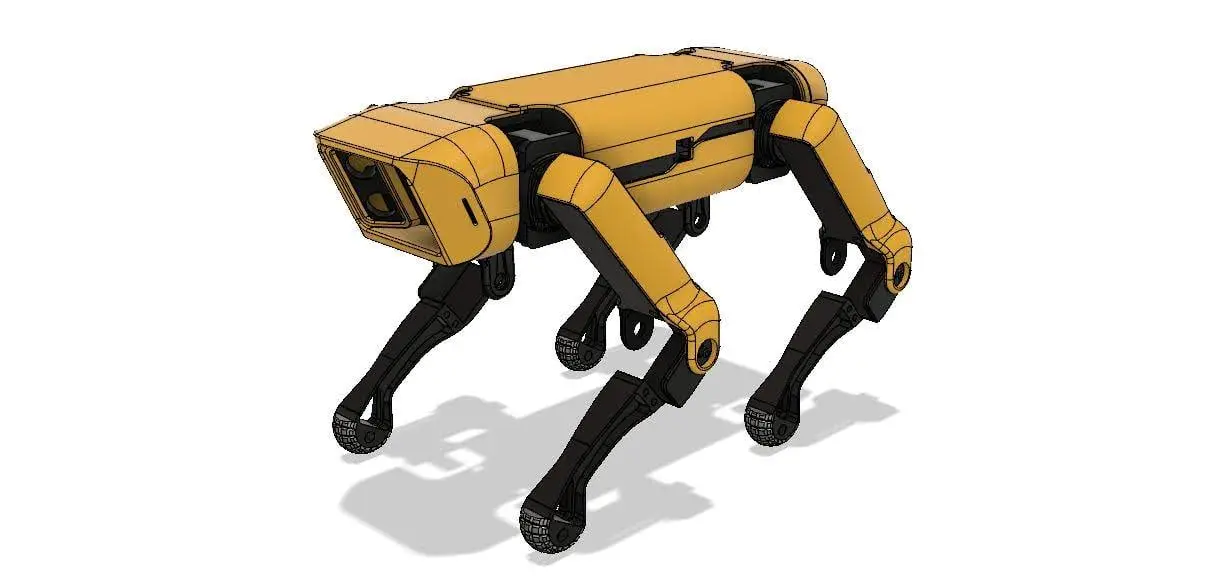
Spotmicro - robot dog
por Deok-yeon Kim en Thingiverse
I designed Spotmicro inspired by the Spotmini of Boston Dynamics. It works on the basis of the Arduino mega, and if you use a different board, you have to redesign the 'plate' file yourself and print the 'non-mega' file instead of the regular file. The ultra sonic sensor can be used for mapping or..
Licencia
Uso comercial permitidoPuedes imprimirlo, modificarlo y venderlo dando crédito al autor.
Al descargar aceptas respetar la licencia y dar crédito a Deok-yeon Kim.
Archivos (34)
- plate.stl STL · 209 KB
- L_side_plate.stl STL · 101 KB
- non-mega_L_side_plate.stl STL · 100 KB
- R_side_plate.stl STL · 100 KB
- I_shoulder_mg.stl STL · 219 KB
- I_shoulder_cls.stl STL · 218 KB
- O_shoulder.stl STL · 137 KB
- L_arm_joint_mg.stl STL · 478 KB
- R_arm_joint_mg.stl STL · 478 KB
- L_arm_joint_cls.stl STL · 527 KB
- R_arm_joint_cls.stl STL · 527 KB
- L_arm_mg.stl STL · 321 KB
- R_arm_mg.stl STL · 321 KB
- L_arm_cls.stl STL · 323 KB
- R_arm_cls.stl STL · 323 KB
- L_arm_cover.stl STL · 351 KB
- R_arm_cover.stl STL · 351 KB
- L_wrist_mg.stl STL · 176 KB
- R_wrist_mg.stl STL · 176 KB
- L_wrist_cls.stl STL · 193 KB
- R_wrist_cls.stl STL · 193 KB
- foot.stl STL · 1,0 MB
- F_cover.stl STL · 964 KB
- L_ultra_sonic.stl STL · 303 KB
- R_ultra_sonic.stl STL · 303 KB
- T_cover_mg.stl STL · 73 KB
- T_cover_cls.stl STL · 72 KB
- non-mega_T_cover_mg.stl STL · 68 KB
- non-mega_T_cover_cls.stl STL · 67 KB
- B_cover_mg.stl STL · 72 KB
- B_cover_cls.stl STL · 71 KB
- non-mega_B_cover_mg.stl STL · 68 KB
- non-mega_B_cover_cls.stl STL · 68 KB
- R_cover.stl STL · 358 KB
- Categoría
- Para tu impresora
- Formatos
- STL
- Descargas
- 60,572
- Publicado
Sobre este modelo
I designed Spotmicro inspired by the Spotmini of Boston Dynamics. It works on the basis of the Arduino mega, and if you use a different board, you have to redesign the 'plate' file yourself and print the 'non-mega' file instead of the regular file. The ultra sonic sensor can be used for mapping or obstacle avoidance. When you attach the servo horn to the 3D printed parts, you must use the HOTGLUE. THERE IS NO CODE YET, SO YOU HAVE TO WRITE IT YOURSELF. Assembly video part 1 : https://youtu.be/03RR-mz2hwA Assembly video part 2 : https://youtu.be/LV5vvmhwtxM Instagram : https://www.instagram.com/kim.d.yeon/ To make this, you need the following... Electronics 12 × MG 996 R servo motor 1 × Arduino Mega 2 × HC-SR04 Ultrasonic sensor 1 × HC-06 Bluetooth module 1 × MPU-6050 Gyro sensor 1 × I2C 16x2 LCD Module 1 × Rleil rocker switch RL3-4 7.4v Battery Screws, Nuts and Bearings 8 × 'M5×15' 40 × 'M4×20' 8 × 'M4×15' 48 × 'M4 nut' 4 × 'M3×20' 28 × 'M3×10' 16 × 'M3 nut' 8 × 'F625zz Flange ball bearing' --------------------------------------------------Servo Upgrade-------------------------------------------------- I Uploaded upgrade parts for cls6336hv servo. To use cls6336hv servo, print the file '~_cls'. If you want to use mg995 or mg996r servo, please print the '~_mg' file. A file without any markings is part of any type of servo. Made by Deok-yeon Kim
Descripción original del autor, publicada en Thingiverse.



