RobotArm
por Florin Tobler en Thingiverse
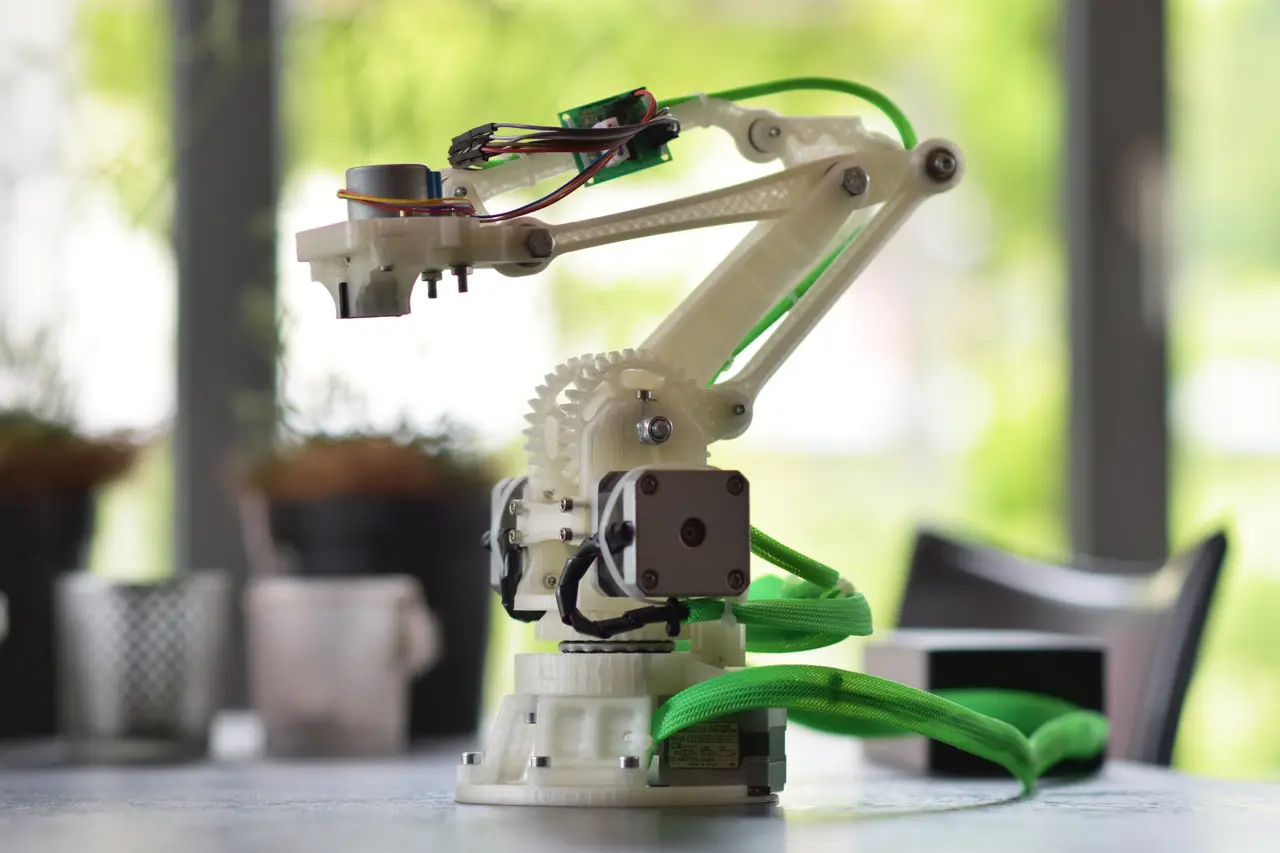
This is a 3D Printable Robot Arm. It may need a bit more time to build one, than your normal weekend Project. But the build process is one thing, the application environment the other. And that is what it is all about. Learning, combining and developing custom applications. If you make a...
Licencia
Solo uso personalCC BY-NC 4.0 — Atribución, no comercial
Puedes imprimirlo y modificarlo para uso personal dando crédito. No se permite vender las impresiones.
Al descargar aceptas respetar la licencia y dar crédito a Florin Tobler.
Archivos (44)
- stabilizer.stl STL · 373 KB
- pleuel_bend.stl STL · 241 KB
- upperShank.stl STL · 348 KB
- socket.stl STL · 737 KB
- socket_clearanceWoSetScrew.stl STL · 746 KB
- baseRing.stl STL · 555 KB
- stabilizer_endstop.stl STL · 652 KB
- GearBig_0.05mmTolerance.stl STL · 1,1 MB
- base.stl STL · 1,2 MB
- base_w_hole.stl STL · 1,6 MB
- GearBig_0.20mmTolerance.stl STL · 1,0 MB
- GearBig_0.01mmTolerance.stl STL · 1,1 MB
- triplate.stl STL · 1,1 MB
- GearRotate_0.05mmTolerance.stl STL · 1,0 MB
- GearRotate_0.01mmTolerance.stl STL · 1,0 MB
- GearRotate_0.15mmTolerance.stl STL · 1021 KB
- GearRotate_0.10mmTolerance.stl STL · 1,0 MB
- gripperHolePlate.stl STL · 183 KB
- GearSmall.stl STL · 533 KB
- leg_30mm.stl STL · 335 KB
- leg_35mm.stl STL · 322 KB
- leg_40mm.stl STL · 319 KB
- gripperBase.stl STL · 217 KB
- GearRotate_0.20mmTolerance.stl STL · 1,0 MB
- leg_45mm.stl STL · 313 KB
- GearBig_0.15mmTolerance.stl STL · 1,0 MB
- leg_50mm.stl STL · 305 KB
- manipulator.stl STL · 287 KB
- lowerShank.stl STL · 349 KB
- pleuel.stl STL · 207 KB
- lever.stl STL · 325 KB
- gripperFinger.stl STL · 237 KB
- GearBig_0.10mmTolerance.stl STL · 1,1 MB
- control_bottom.stl STL · 491 KB
- control_top.stl STL · 606 KB
- doc3.pdf PDF · 535 KB
- step.zip ZIP · 1,1 MB
- robotGeometry.pdf PDF · 1,1 MB
- robotGeometry20200531.pdf PDF · 9,2 MB
- GearRotate_-0.20mmTolerance.stl STL · 981 KB
- GearRotate_-0.05mmTolerance.stl STL · 934 KB
- GearRotate_-0.15mmTolerance.stl STL · 981 KB
- GearRotate_-0.10mmTolerance.stl STL · 981 KB
- step2screws.zip ZIP · 1,2 MB
- Categoría
- Tecnología
- Formatos
- STL, PDF, ZIP
- Descargas
- 62,661
- Publicado
Sobre este modelo
This is a 3D Printable Robot Arm. It may need a bit more time to build one, than your normal weekend Project. But the build process is one thing, the application environment the other. And that is what it is all about. Learning, combining and developing custom applications. If you make a derivative, please only upload the parts you changed. Thanks. Community There are a few community driven derivations and projects around, so check them out! - Some useful derivations such as end switches and a belt drive can improve your RobotArm build. - 20sffactory has created a support group on Facebook https://www.facebook.com/groups/828749637471209 - 20sffactory has also a python voice control Project, check it out on Github https://github.com/20sffactory/voicebot_opensource - Aaron Huang pointed out some errors in the inverse kinematics: https://github.com/AaronHuang1228/Question-for-RobotArm Code and Documentation updated accordingly
Please message me for an entry or addition to this list. Hardware The design goal for me was to build a Robot, which is stiff and strong, but still small and easy to handle. I used the common NEMA17 Step Motors, which provide enough power for fast movements and high precision. Almost every moveable joint has at least one ball bearing to reduce friction, overall stability and accuracy. The robot is designed to have a low center of mass. The robot is powered over a Computer Power Supply (12V). The gripper is easy to replace and is held horizontally in every position, which simplifies programming and also reduces the cost and complexity of additional axies. Most parts have a industrial look like cast Iron parts. Software Software is now on Github here: https://github.com/ftobler/robotArm/ The control system uses an Arduino Mega with a RAMPS 1.4 Board and A4988 Drivers. I provide a solid and working programming base for the Arduino, which handles the Interpolation of the stepper motors, makes all geometric calculations and smooth accelerations. It can handle some sort of GCODE communication over Serial. The software can be directly used without modifying or additional hardware like sensors can be added. To get you started, I have a simple Interface for your Windows Computer, which has a sequencer and manual control options built in. You should already have some decent programming skills to modify and use the Software. I am recommending this, because in my opinion programming is a key part of using a robot. Without it you can only scratch the surface of what's really possible. Assembly There are multiple versions of the big Gears. You may want to print them multiple times, if needed to reduce the gear slack of the rotational axis to a minimum. Depending on how high your Stepper Motor is, choose an appropriate leg height. Use Superglue to fix the bearings, if necessary. I have not cut any threads in the plastic. With PLA (maybe also others) you can 'melt' your thread through friction in, but you might want to drill the holes out a bit. The Wiring of the Robot is not different from a 3D Printer that uses a RAMPS board. Use the official documentation: http://www.reprap.org/wiki/RAMPS_1.4 You can find details about the dimensions in 'doc2.pdf' Video I made a 3D animation, which gives you a good technical overview and a I show a simple application in another video. Animation: https://youtu.be/-LztK9TKcZk Actual Robot: https://youtu.be/HLlylJr_Vs4
Descripción original del autor, publicada en Thingiverse.