
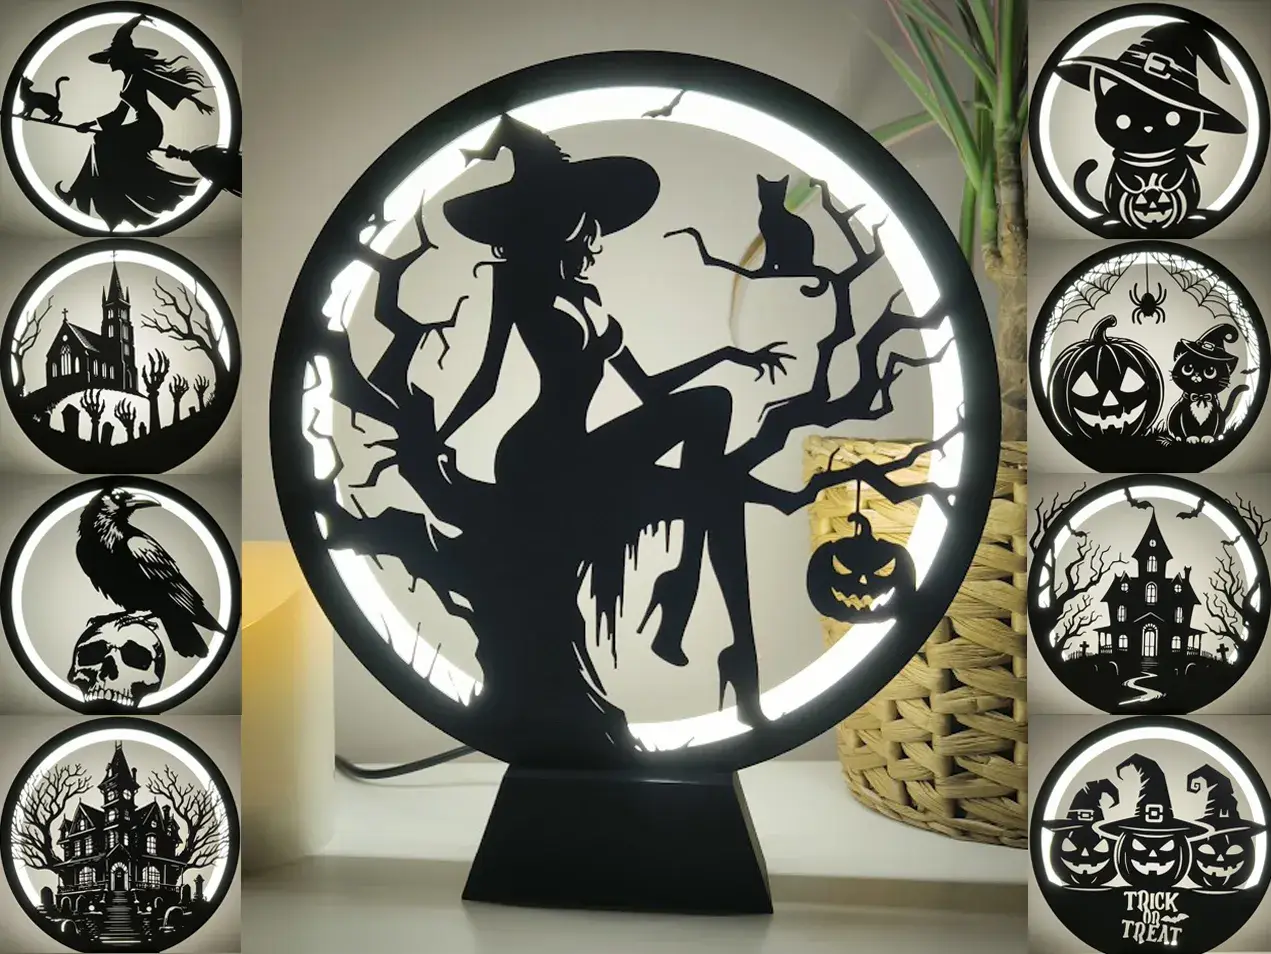
Ring Lamp II with Halloween Panels
por Andre Nuvi en Thingiverse
Overview This is my second version of the Ring Lamp. First version is available here: https://www.thingiverse.com/thing:6687166 In the beginning I wanted to change only a base and add some new Halloween panels in the Ring Lamp but in meantime I was working on the Crystal Lamp which I am very...
Licencia
Solo uso personalCC BY-NC 4.0 — Atribución, no comercial
Puedes imprimirlo y modificarlo para uso personal dando crédito. No se permite vender las impresiones.
Al descargar aceptas respetar la licencia y dar crédito a Andre Nuvi.
Archivos (22)
- Lamp_bottom-cover-for-base.stl STL · 3 KB
- Lamp_base-acdc-and-switch-on-off.stl STL · 42 KB
- Lamp_main-frame.stl STL · 285 KB
- Lamp_front-panel-clean.stl STL · 215 KB
- Lamp_shade-55.stl STL · 962 KB
- Lamp_shade_45.stl STL · 849 KB
- panel_cat-with-hat.stl STL · 1,1 MB
- panel_witch-on-broom.stl STL · 1,6 MB
- panel_witch-on-tree.stl STL · 2,6 MB
- panel_house.stl STL · 3,9 MB
- panel_crow.stl STL · 4,5 MB
- panel_big-house.stl STL · 15,4 MB
- panel_cat-and-pumpkin.stl STL · 7,2 MB
- panel_cathedra.stl STL · 7,3 MB
- panel_pumpkins-with-hats.stl STL · 2,2 MB
- optional_hook.stl STL · 14 KB
- optional_base-acdc-and-potentiometer.stl STL · 39 KB
- optional_stand.stl STL · 14 KB
- optional_back-panel.stl STL · 108 KB
- BambuLab_halloween-ring-lamp.3mf 3MF · 10,8 MB
- STEP_base.step STEP · 37 KB
- STEP_front-panel-clean.step STEP · 23 KB
- Categoría
- Hogar
- Formatos
- STL, 3MF, STEP
- Descargas (todas las plataformas)
- 22,622
- Publicado
También en
Sobre este modelo
Overview This is my second version of the Ring Lamp. First version is available here: https://www.thingiverse.com/thing:6687166 In the beginning I wanted to change only a base and add some new Halloween panels in the Ring Lamp but in meantime I was working on the Crystal Lamp which I am very pleased with. So I decided to continue develop this version of lamp and make to it some Halloween panels. I you interest my Cristal Lamp is available here https://makerworld.com/en/models/1126595-crystal-lamp#profileId-1126066 Halloween panels are fit also to previous version of Ring Lamp and also to Crystal Lamp. Electric parts you need. The easiest way is to use electrical parts designed specific for this kind of lamp. The kit provides easy installation without the need for soldering. It is available on Amazon (Dimmer version) https://amzn.to/4iJ3zHt (On-Off switch version) https://amzn.to/3ZNb0q4 You can also search for each part separately. You will need led stripe - best are LED COB 8 mm, 12V charger for LED strip dc connector - I used 2.1/5,5 mm , the diameter of the mounting hole is 12 mm On-Off switch alternatively you can use dimmer instead of typical on-off switch WARNINGS Led strips can emits some heat depends on what type of LED and voltage you use. If you use LED strip from the kit you you can print everything in PLA as it achieve only about 40 °C. If you will use your own LED strip with more power it may achieve more temperatures (in my case 58 °C and Main Frame can a little bend overtime. If you have such strong LED strip I recommend use ASA instead of PLA. Specifically you have to print out with ASA the Main Frame and Panels. Everything else can be printed with PLA. Printing Printed with PLA or ASA, nozzle 0,4 mm, layer 0,2 mm height IMPORTANT Part: Shade55 - use 0,16 mm layer height as it has quite steep (55 degree) and thin( 0,6mm) walls If you have problem with that part then print “Shade45” Instruction (some photos from Crystal Lamp)
Descripción original del autor, publicada en Thingiverse.



