Quadruped Bai Servo 12-DOF Desktop Robot Dog
por TomKnox en Printables
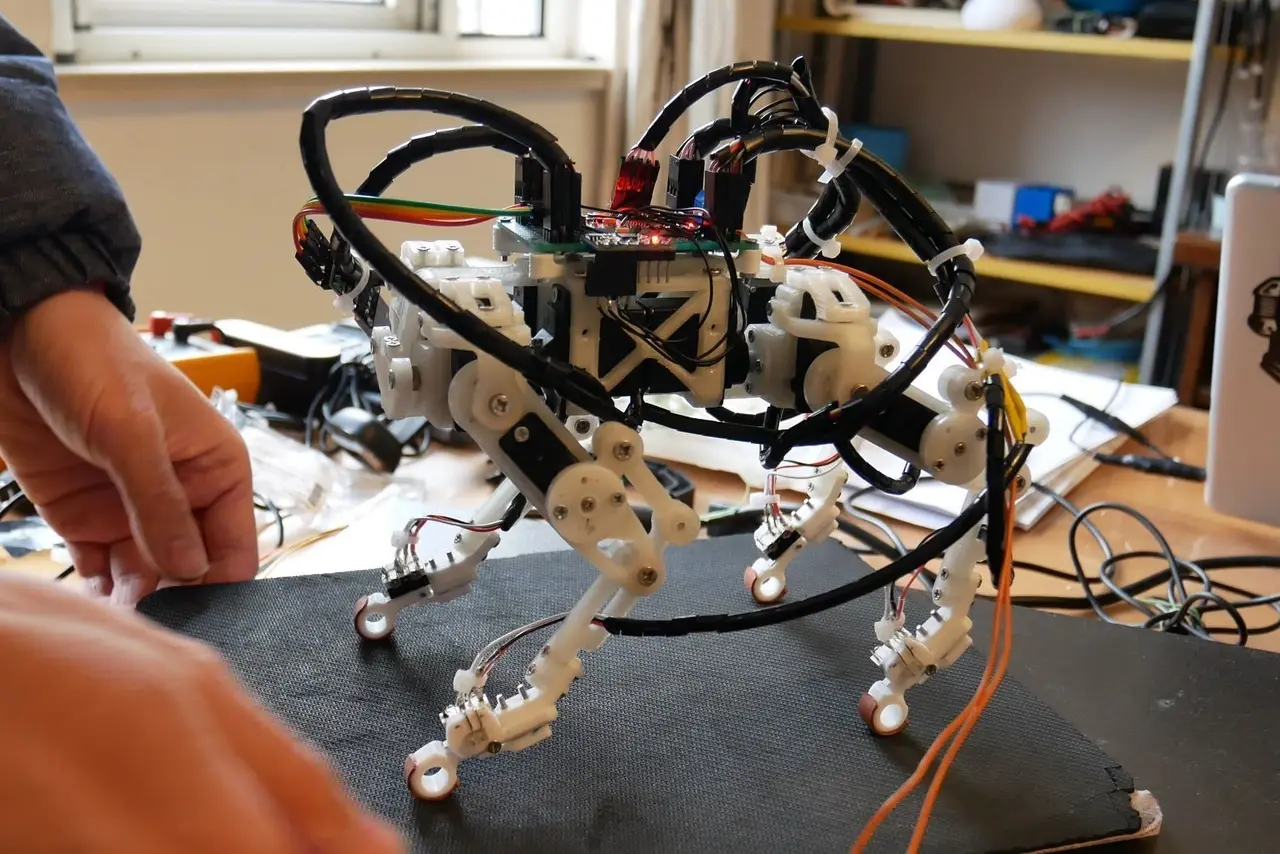
Low-cost 3D-printed robot dog with twelve micro servos, bushing joints, MPU-6050 balance and an Arduino Nano trot gait.
Licencia
Uso comercial permitidoPuedes usarlo, modificarlo y venderlo manteniendo el aviso de copyright del autor.
Al descargar aceptas respetar la licencia y dar crédito a TomKnox.
Archivos (27)
- leg_link_1.stl STL · 228 KB
- hip_joint_holder_1.stl STL · 157 KB
- pcb_holder.stl STL · 188 KB
- leg_link-1_MIR.stl STL · 83 KB
- leg_tip.stl STL · 136 KB
- leg_2.stl STL · 165 KB
- body_bridge_1.stl STL · 105 KB
- leg_2_MIR.stl STL · 165 KB
- leg_1.stl STL · 422 KB
- feet_sensor_leg_tip_sensor.stl STL · 115 KB
- hip_holder_2.stl STL · 232 KB
- servo_holder_1_MIR1.stl STL · 339 KB
- feet_sensor_leg_tip_sensor2.stl STL · 168 KB
- body_frame_1.stl STL · 555 KB
- servo_holder_1.stl STL · 339 KB
- body_frame_2.stl STL · 304 KB
- leg_link-1.stl STL · 83 KB
- leg_1_2_MIR.stl STL · 226 KB
- leg_link_1_MIR.stl STL · 228 KB
- hip_joint_holder_1_MIR.stl STL · 157 KB
- joint_ab_holder.stl STL · 121 KB
- leg_1_MIR.stl STL · 422 KB
- feet_sensor_sensor_shelf.stl STL · 67 KB
- leg_tip_MIR.stl STL · 136 KB
- hip_holder_2_MIR.stl STL · 232 KB
- Quadruped Bai Servo Robot Dog - Build Guide.pdf PDF · 66 KB
- Quadruped Bai Servo Robot Dog - Bill of Material.pdf PDF · 83 KB
- Categoría
- Tecnología
- Formatos
- STL, PDF
- Descargas
- 42
- Publicado
Sobre este modelo
A small four-legged walking robot driven by twelve micro servos. Each leg has three joints (abduction, hip and knee), every joint turns on a self-lubricating bushing, and an IMU keeps the body level while the legs trot. An Arduino Nano runs the inverse kinematics and the gait on board, so the robot walks with no PC attached. Updated for modern use: an Arduino Nano build with off-the-shelf modules, one purchase list, a print list with counts and one build guide in build order. What you build - 12 EMAX ES08A II micro servos, three per leg - Bushing joints: an SF-1 0305 bushing in every joint hole, M3 joint screws and M2 servo screws - A printed body frame with bridges, board holders and an 18650 battery holder underneath - Arduino Nano and MPU-6050 IMU on a prototype carrier board with 12 servo headers - Optional foot switches so the gait knows when each foot touches down
Files - All 25 print-ready STL files: body frame and bridges, board and joint holders, hip and servo holders, legs, links, foot tips and optional foot-sensor parts - Build guide PDF: print list, parts, servo calibration, leg and body assembly, wiring and firmware - Bill of Material PDF with quantities, notes and a shop link for every off-the-shelf part
Print settings PETG or PLA at about 70% infill. Orient each part for strength along its long axis and add supports where needed. Most parts come as a left and a mirrored right version; print two of each. Print leg_1_2_MIR four times, two of them mirrored in the slicer. Electronics - Arduino Nano compatible board (ATmega328P, 5 V) - MPU-6050 (GY-521) IMU module for roll and pitch correction - TPS61088 boost converter set to 5.5 V for the servo rail - One 18650 high-drain Li-ion cell in a holder, with an XT30 plug
Bill of Material Every part you need to buy, with quantities, notes and shop links, is in the Bill of Material PDF in the files of this model. About 20 M2 x 26 mm screws come from a metric fastener supplier, because this length is rarely sold in mixed kits. The original custom controller and boost boards are optional; order them from PCBWay or another PCB assembly service. The build guide lists both. Software Install the Arduino IDE and the FlexiTimer2 library, open the gait sketch from the source files, select Arduino Nano and upload over USB. Adjust the servo zero offsets until all four legs stand symmetric, then try the trot gait on a flat, grippy surface. Skill level Intermediate. You calibrate servos before fitting the horns, press bushings into the joints, solder a carrier board with 12 servo headers and upload an Arduino sketch. Full build guide and source The build guide, source and all project files: https://github.com/ToolKnox/hawkridge-quadruped-bai-servo-12dof-robot (Code > Download ZIP). Safety Li-ion cells can deliver very high current. Use protected cells or a protected holder, insulate the wiring and charge cells outside the robot. Set the boost converter to 5.5 V before plugging in the servos.
Descripción original del autor, publicada en Printables.