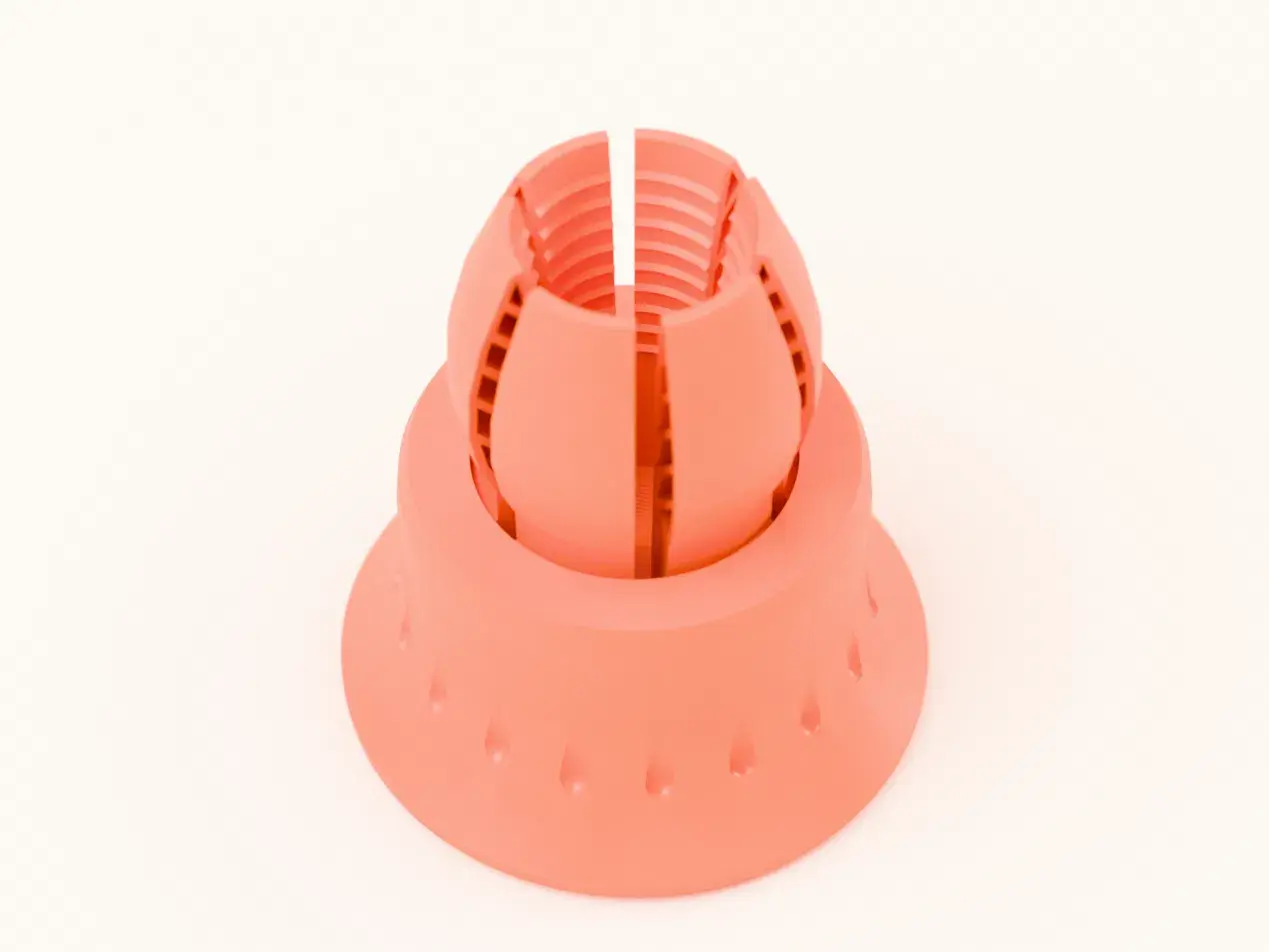
Print-in-Place Fin Ray Vise Holds Any Shape
por Navya Singla en Printables
One-piece print-in-place PETG vise. Fin ray petals wrap any shape; twist to lock. No supports, no hardware.
Licencia
Uso comercial permitidoPuedes imprimirlo, modificarlo y venderlo dando crédito al autor.
Al descargar aceptas respetar la licencia y dar crédito a Navya Singla.
Archivos (1)
- Categoría
- Herramientas
- Formatos
- STL
- Descargas
- 19
- Publicado
Sobre este modelo
A vise with no jaws. Six fin ray petals wrap around whatever you drop in: eggs, crystals, miniatures, pens, small electronics. Twist to lock it in place. It prints in ONE piece, in ONE material, with NO supports, NO screws, NO glue and NO assembly. It comes off the bed already assembled and working. HOW IT WORKS The model is two interlocked parts printed together: - Base: a wide bell-shaped stand with a threaded hole in its floor and a narrow ring (lip) at the top. - Head: a threaded stem with six fin ray petals that pass up through the lip. Fin ray petals have a useful property: when something presses on their inner face, they curl TOWARD it instead of bending away, so they hug the shape of the object. Drop your part in and twist the petals clockwise. The head screws upward (4 mm per turn), and a ramp on each petal rides into the lip, squeezing all six petals inward. Grip starts after about 1/3 of a turn and gets tighter as you keep turning. Twist back to release. SPECS - Size: 92 x 92 x 96 mm - Grip range: about 20-30 mm objects - Weight: about 100 g of PETG - Print time: about 6-8 hours (depends on printer) - Clearance between moving parts: 0.44 mm minimum - Supports: none PRINT SETTINGS - Material: PETG (recommended). PLA works but the petals may crack after repeated flexing. - Nozzle: 0.4 mm - Layer height: 0.2 mm - Walls: 3 - Infill: 15-20% (gyroid or grid) - Supports: OFF - Brim: optional, outer edge only - Elephant foot compensation: 0.1-0.2 mm (important, this keeps the parts from fusing at the bed) - Cooling: 30-50% fan for PETG - Outer wall speed: slow it down a little for clean thread surfaces - Orientation: print exactly as exported, wide base flat on the bed - Bed: textured PEI is ideal. On smooth PEI, use glue stick as a release layer (PETG can bond too strongly). BEFORE YOU PRINT - Do not scale it smaller than 100%: that shrinks the gaps between the moving parts and they may fuse. Scaling up (110-130%) is fine. - In your slicer's layer preview, scroll through heights of 2-18 mm. You should see a clean empty ring between the threaded stem and the base on every layer. If you see it, the parts will move freely. - Turn off any "close holes" or "fill gaps" option. AFTER PRINTING (NO ASSEMBLY NEEDED) 1. Let it cool fully before removing it from the bed. 2. Hold the base firmly and twist the petals. A little crunching at first is normal: that is PETG stringing breaking free. 3. Twist back and forth a few times until it turns smoothly. 4. Optional: a tiny drop of silicone grease on the thread makes it even smoother. HOW TO USE 1. Twist the petals counter-clockwise to fully open. 2. Drop your object into the center between the petals. 3. Twist clockwise until it is held firmly. Don't over-tighten. 4. Twist back to release. GREAT FOR Painting miniatures and figures, decorating eggs, holding crystals and gemstones, jewelry work, soldering small modules, gluing small parts, engraving, holding pens or rods, and any oddly shaped object a normal vise can't grab. NOT DESIGNED FOR Hammering, sawing or heavy filing. It is a plastic holder for light, careful work. TROUBLESHOOTING - Parts fused: check the elephant foot setting and your flow calibration. Over-extrusion closes the gaps. - Too stiff: keep working it back and forth, it loosens up after a few turns. - Not gripping tight enough: keep turning, the grip increases the further you screw it up.
Descripción original del autor, publicada en Printables.