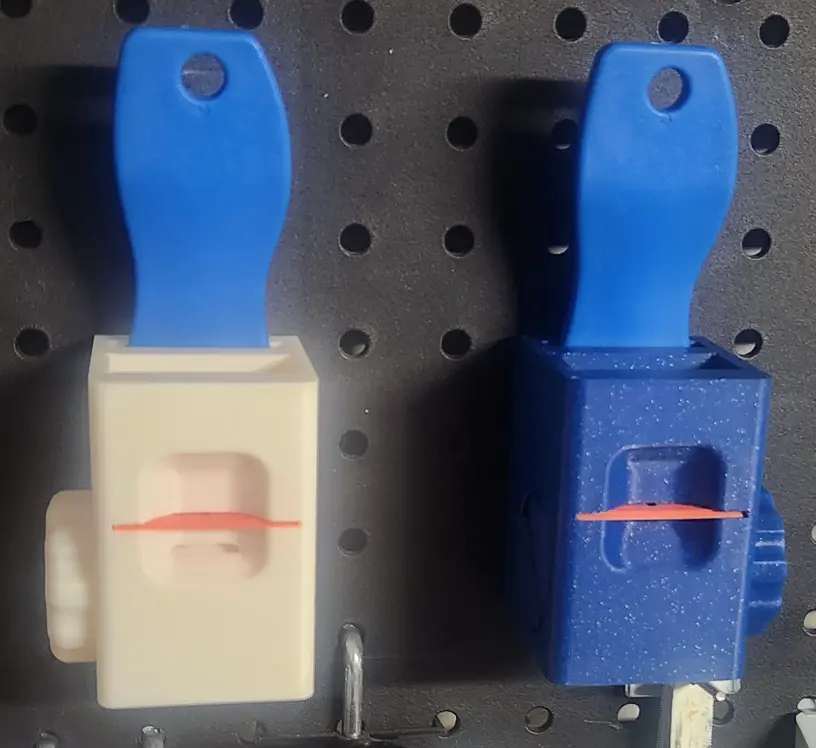
Plastic Razor Blade Holder and Dispenser
por Imagine&Create en Printables
Plastic Razor Blade Holder and Dispenser
Licencia
Solo uso personalCC BY-NC 4.0 — Atribución, no comercial
Puedes imprimirlo y modificarlo para uso personal dando crédito. No se permite vender las impresiones.
Al descargar aceptas respetar la licencia y dar crédito a Imagine&Create.
Archivos (10)
- PlasticRazorBladeDispenser.step STEP · 879 KB
- BladeDispenserWheel_Snap-In.step STEP · 545 KB
- Pin-Uppder_Pegboard.step STEP · 39 KB
- Pin-Straight.step STEP · 19 KB
- SkadisHooks.step STEP · 191 KB
- PlasticRazorBladeDispenser.3mf 3MF · 164 KB
- BladeDispenserWheel_Snap-In.3mf 3MF · 323 KB
- Pin-Straight.3mf 3MF · 18 KB
- Pin-Uppder_Pegboard.3mf 3MF · 65 KB
- SkadisHooks.3mf 3MF · 159 KB
- Categoría
- Organización
- Formatos
- STEP, 3MF
- Descargas
- 0
- Publicado
Sobre este modelo
Plastic razor blade holder and dispenser designed to attach to 1/4" pegboard, or the skadis pegboard systems. These plastic razor blades are great for helping remove stubborn printed parts from your build plate, or remnants from nozzle probing/purging. Holds a plastic razor blade handle and its blades, ready for easy dispensing. The dispenser knob can be installed on the left or right side of the holder as desired. The features on the side of the knob simply need to be lined up with the cutouts in the holder and then it slides in and snaps into place. There are pins for both 1/4" hole pegboard, as well as the skadis style pegboard systems. They can be glued into the holder with any super glue. The blades must be loaded facing down in order to be properly dispensed (so that the blade side is closest to the bottom of the dispenser). Skadis Version:
1/4" Pegboard Version:
Link for Parts: The blades below or any similar style of plastic blade and handle should work with this design. Plastic Razor Blades and Handles
Tips: Depending on your printing materials, print settings, etc. you may find that you need to slightly file the thin opening where the razor blades are dispensed from. A thin jeweler file works well or even some sand paper would work to slightly enlarge the opening. After the first blade is loaded the remaining blades slide into place more easily. Supports are required for these prints.
Descripción original del autor, publicada en Printables.