Phone Tripod v2
por SubSite en Printables
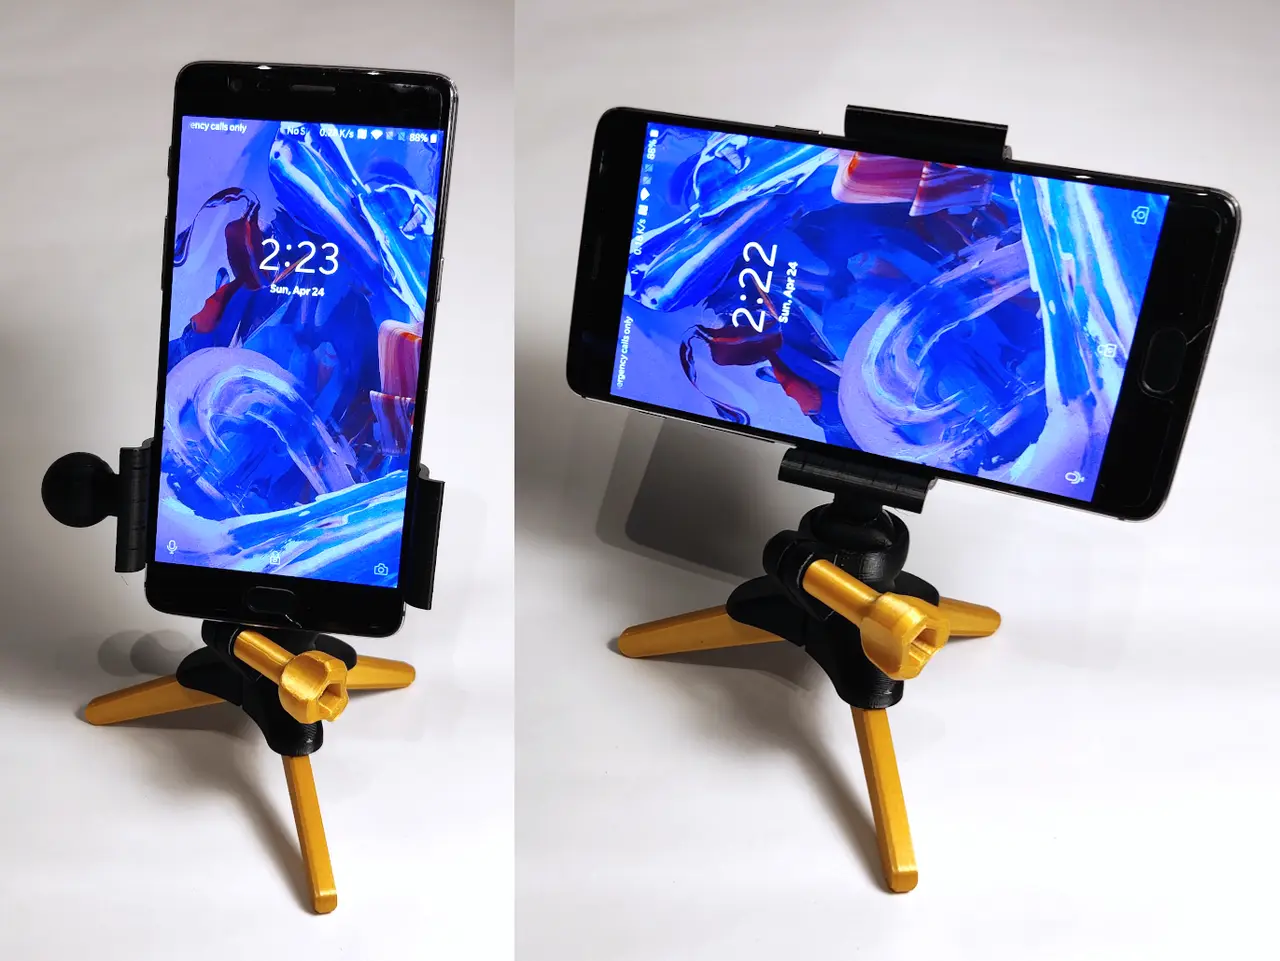
An updated version of my ball jointed phone tripod. Now with both portrait and landscape mode!
Licencia
Solo uso personalCC BY-NC 4.0 — Atribución, no comercial
Puedes imprimirlo y modificarlo para uso personal dando crédito. No se permite vender las impresiones.
Al descargar aceptas respetar la licencia y dar crédito a SubSite.
Archivos (14)
- Tripod base.3mf 3MF · 243 KB
- Tripod Leg.3mf 3MF · 19 KB
- Tripod Thumb Screw.3mf 3MF · 108 KB
- Phone Clamp 61-63mm.3mf 3MF · 125 KB
- Phone Clamp 64-66mm.3mf 3MF · 124 KB
- Phone Clamp 67-69mm.3mf 3MF · 116 KB
- Phone Clamp 70-72mm.3mf 3MF · 114 KB
- Phone Clamp 73-75mm.3mf 3MF · 118 KB
- Phone Clamp 76-78mm.3mf 3MF · 118 KB
- Phone Clamp 79-81mm.3mf 3MF · 112 KB
- Phone Clamp 82-84mm.3mf 3MF · 219 KB
- Phone Clamp 85-87mm.3mf 3MF · 218 KB
- Phone Clamp 88-90mm.3mf 3MF · 209 KB
- Phone Clamp 91-93mm.3mf 3MF · 208 KB
- Categoría
- Tecnología
- Formatos
- 3MF
- Descargas
- 1,946
- Publicado
Sobre este modelo
A ball jointed printable tripod. This is a new version with the following updates: - Now supports both landscape and portrait! - Legs are slightly longer for better stability - The tripod base is more streamlined with less sharp edges - Improved ball joint design
Info for remixers: The ball diameter is 22 mm in case you want to use parts of this design for other projects! Instructions: - Measure the width of your phone (or google for its specs), and select the closest size Phone Clamp. If you use a phone case or something, make sure to use the total width including the case. Note that using PETG, it will flex quite a bit, so if in doubt, go with a smaller size. - Print (at least) the Phone Clamp in PETG (or other material that's springy, and doesn't deform over time). This part must be printed with supports. Use some sandpaper to smooth out the support interface area on the ball if needed. - Print three of the Tripod Leg (PLA is fine for this)
An M5 x 40mm bolt is needed for assembly (longer works too, but it will stick out and look ugly). Assembly: Fasten the legs first, as this can require a bit of force. Place the tripod base upside down on a flat surface. Be sure to align the notches of each leg witch the small bumps inside of the grooves for the legs. Press straight down, but be careful so you don't hurt yourself if something slips. Using leather gloves might be a good idea. - The ball-joint should connect without excessive force, if needed you can use a screwdriver to slightly widen the gap while pushing it into place. - Side the M5 bolt through the printed screw. If it's difficult to get the last bit of the bolt head seated, use an M5 nut on the other end to pull the bolt through. - The bolt hole is threaded in the design, but depending on your printer settings, it might be a bit tight. You can put a small amount of grease on the very end of the bolt for smoother operation.
Please post a Make if you make one!
Descripción original del autor, publicada en Printables.