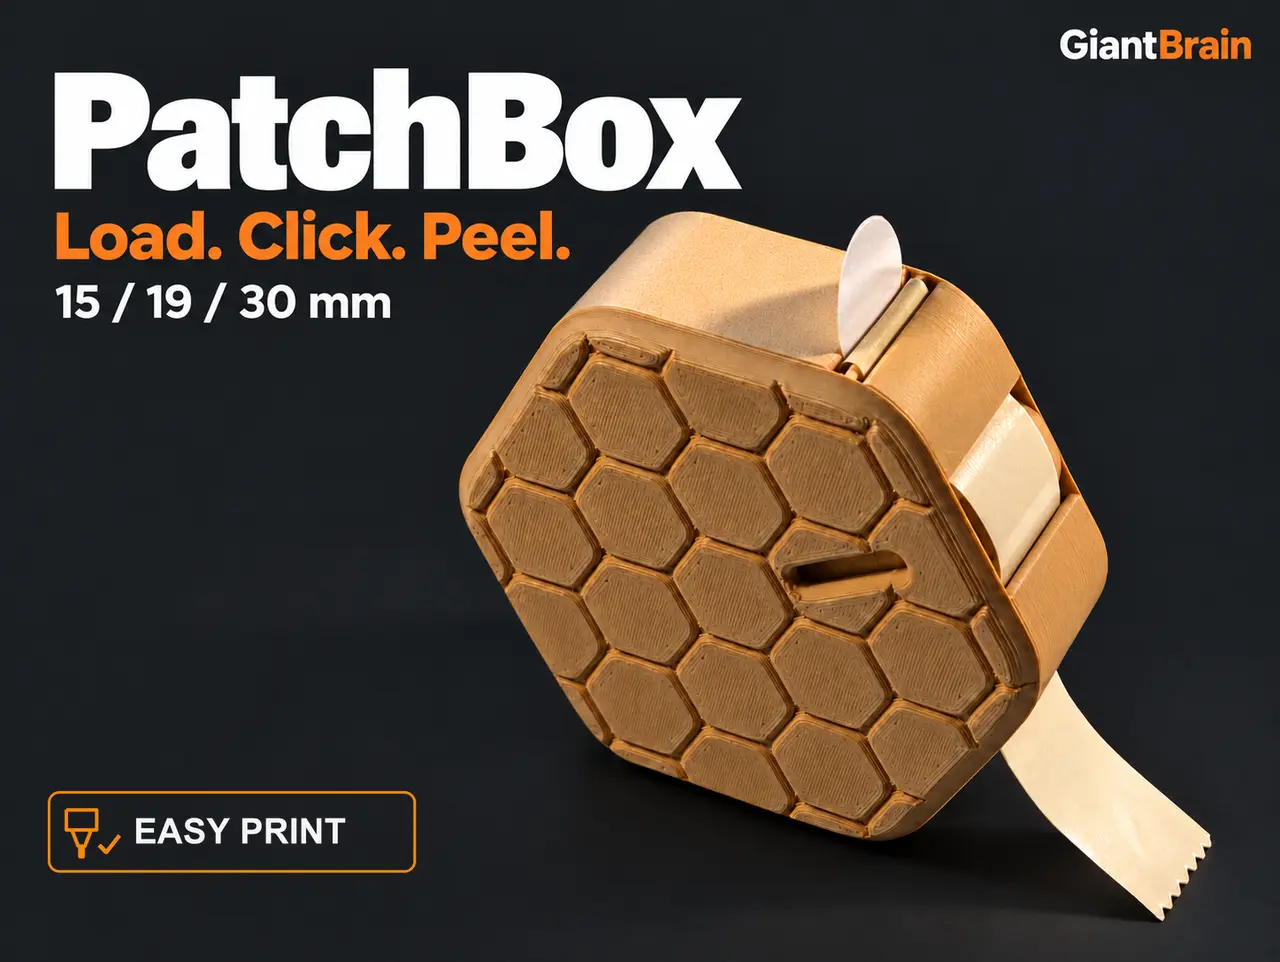
PatchBox – Target Patch Dispenser / Schusspflasterspender | 15 / 19 / 30 mm
por GiantBrain en Printables
Refillable target patch dispensers for 15, 19 and 30 mm patches. Snap-fit lid, inspection slot and tear edge.
Licencia
Solo uso personalCC BY-NC-SA 4.0 — Atribución, no comercial, compartir igual
Uso personal dando crédito; sin fines comerciales y las modificaciones con la misma licencia.
Al descargar aceptas respetar la licencia y dar crédito a GiantBrain.
Archivos (3)
- Categoría
- Jardín
- Formatos
- 3MF
- Descargas
- 34
- Publicado
Sobre este modelo
PatchBox · 15 / 19 / 30 mm Load. Click. Peel. Keep your target patches together and dispense them directly from a refillable box. The rounded housing features a distinctive hexagonal surface. - Snap-fit lid: no screws needed.
- Refillable: easy to open and reload.
- Integrated tear edge: tear off used backing paper at the serrated outlet.
See it in action
Photos and video show PatchBox 19. Details that work The inspection slot shows the roll without opening the box. See the assembly and use instructions below. Choose your version - PatchBox 15 · 15 mm patches Backing paper: up to 19 mm Roll compartment: Ø 52 mm · spindle: Ø 12 mm (nominal).
- PatchBox 19 · 19 mm patches Backing paper: up to 24 mm Roll compartment: Ø 65 mm · spindle: Ø 15 mm (nominal).
- PatchBox 30 · 30 mm patches Backing paper: up to 34 mm Roll compartment: Ø 91 mm · spindle: Ø 21 mm (nominal).
Paper limits allow 1 mm total clearance. Before choosing, measure your roll: its diameter must be smaller than the compartment and its centre hole larger than the spindle. Reference roll: PatchBox 19 has been tested with 19 mm patches on 23 mm backing paper. Print setup Each included 3MF contains the housing and lid, arranged for printing. All three files use the same saved profile for a Prusa CORE One, 0.4 mm high-flow nozzle and Prusament PLA. Setting Included profile
Layer height / first layer 0.20 / 0.20 mm
Perimeters 3
Infill 15% Gyroid
Top / bottom solid layers 5 / 4
Supports / brim Disabled / none
Nozzle / bed 230 °C / 60 °C, including first layer
Orientation: keep the arrangement in the 3MF, with the exterior faces toward the build plate. For another printer, nozzle or filament, select matching profiles and slice again. Snap-fit tolerances depend on material and printer calibration. Ready in three steps - Load: place the roll over the central spindle.
- Feed: guide the backing paper through the dispensing path shown in the photos. Check that a patch separates at the outlet.
- Click: align the lid and press it into place until it clicks shut.
Use: pull the backing paper to present the next patch, remove the patch, and tear off excess backing paper at the serrated edge. Refill: open at the thumb recess. If needed, carefully use a flat-blade screwdriver in the opening slot, then replace the roll. Deutsch · Kurzanleitung Die PatchBox hält deine Schusspflasterrolle zusammen und gibt Pflaster direkt aus der Box aus. Gehäuse und Deckel werden ohne Schrauben zusammengeklickt. Sichtfenster, Öffnungsmulde und Abreißkante für verbrauchtes Trägerpapier sind integriert. Welche Größe passt? - PatchBox 15 · 15-mm-Pflaster Trägerpapier: bis 19 mm Rollenfach: Ø 52 mm · Achse: Ø 12 mm (nominal).
- PatchBox 19 · 19-mm-Pflaster Trägerpapier: bis 24 mm Rollenfach: Ø 65 mm · Achse: Ø 15 mm (nominal).
- PatchBox 30 · 30-mm-Pflaster Trägerpapier: bis 34 mm Rollenfach: Ø 91 mm · Achse: Ø 21 mm (nominal).
Die Papiergrenzen berücksichtigen insgesamt 1 mm Spiel. Vor der Auswahl die Rolle messen: Ihr Durchmesser muss kleiner als das Rollenfach und ihre Kernöffnung größer als die Achse sein. Referenzrolle: PatchBox 19 wurde mit 19-mm-Pflastern auf 23 mm breitem Trägerpapier getestet. Drucken 3MF-Profil: Prusa CORE One, 0,4-mm-High-Flow-Düse, Prusament PLA. - Schichthöhe / erste Schicht: 0,20 / 0,20 mm
- 3 Perimeter · 15 % Gyroid · 5 Deck- / 4 Bodenschichten
- Ohne Support und Brim
- Düse: 230 °C · Bett: 60 °C, auch für die erste Schicht
Ausrichtung aus der 3MF beibehalten, Außenseiten zum Druckbett. Für andere Drucker oder Filamente passende Profile wählen und neu slicen. Montage und Nutzung - Rolle auf die Achse setzen.
- Trägerpapier wie auf den Fotos durch die Ausgabe führen.
- Deckel ausrichten und zuklicken.
Am Trägerpapier ziehen, Pflaster entnehmen und überschüssiges Trägerpapier an der gezahnten Kante abreißen. Zum Nachfüllen an der Daumenmulde öffnen; bei Bedarf vorsichtig einen flachen Schraubendreher in der vorgesehenen Aussparung verwenden. Share your make · Zeig deinen Druck Printed a PatchBox? Share a photo with your printer, filament and roll dimensions. Zeig deinen Druck als Make – gern mit Drucker, Filament und Rollenmaßen. License · Lizenz CC BY-NC-SA 4.0: attribution required, noncommercial use only, shared adaptations under the same license. For commercial use, contact GiantBrain for a separate license. Namensnennung erforderlich, nur nichtkommerzielle Nutzung; Bearbeitungen unter derselben Lizenz teilen. Für kommerzielle Nutzung eine separate Lizenz mit GiantBrain vereinbaren. Designed by GiantBrain.
Descripción original del autor, publicada en Printables.