
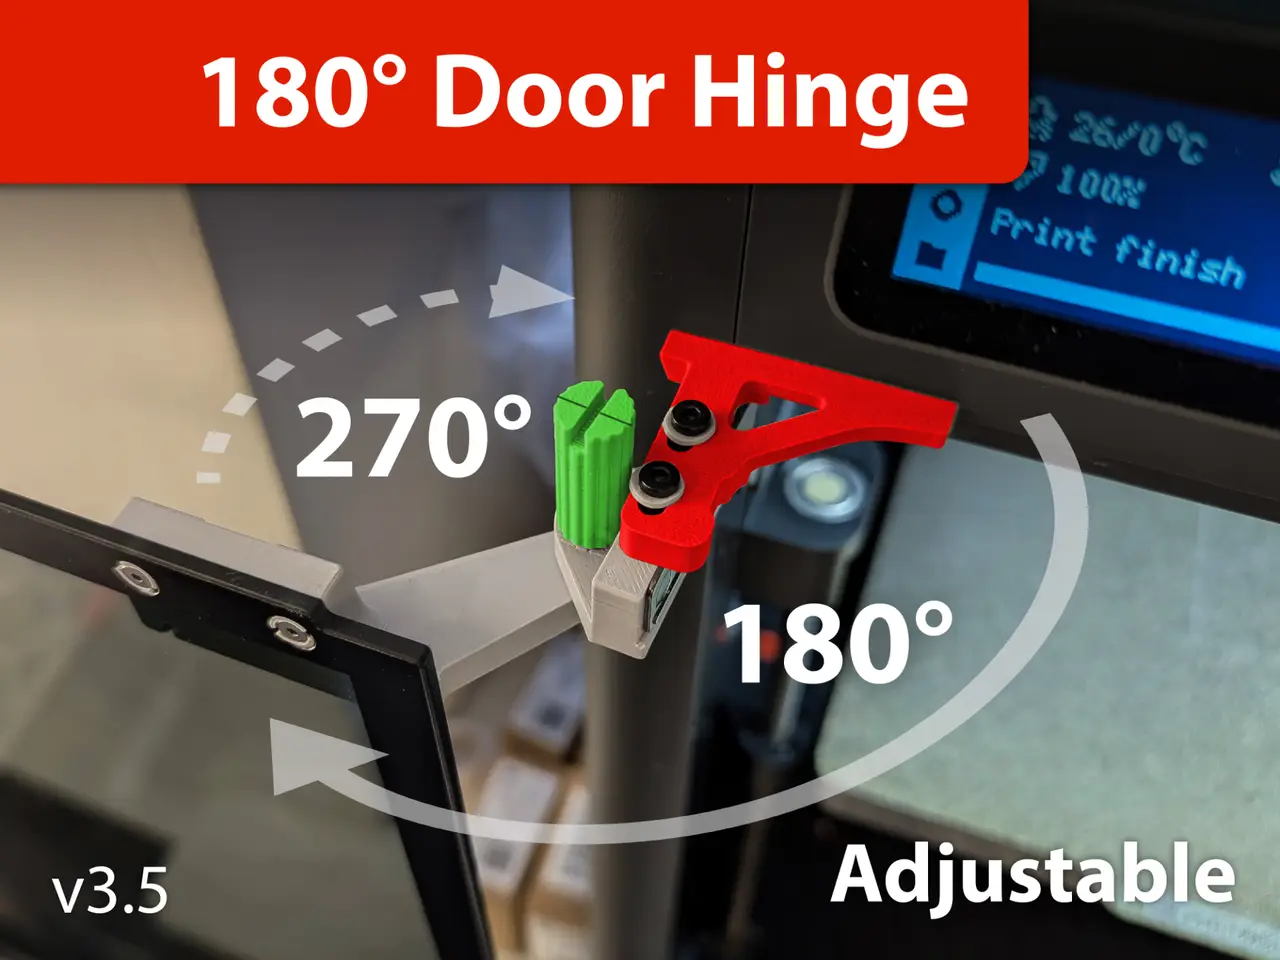
P1S/X1 Door hinge 180/270° - V3 adjustable
por jakadels en MakerWorld
With this add-on you will be able to open your printer door fully by 180° or even 270°.
MakerWorld entrega los archivos a usuarios con cuenta gratuita
Licencia
Solo uso personalStandard Digital File License
Licencia estándar de archivos digitales: solo uso personal. No se permite compartir, revender ni subir el archivo a otros sitios, ni vender las impresiones.
Al descargar aceptas respetar la licencia y dar crédito a jakadels.
Archivos (14)
- Conus inserts for glass - M25 Flat Head Cap Machine Screws FHCS.stl STL · 111 KB
- OLD Conus for Wooden screws.stl STL · 166 KB
- Washer.stl STL · 60 KB
- Hinge stopper clip - Bottom.stl STL · 201 KB
- Bottom Hinge to glass door - for M25 Flat Head Cap Machine Screws FHCS.stl STL · 475 KB
- Hinge stopper clip - Top.stl STL · 188 KB
- Pin Screw Top V3.5 S2.stl STL · 376 KB
- Pin Screw Top V3.5 S1.stl STL · 379 KB
- Pin Screw Bot V3.5 S2.stl STL · 343 KB
- Pin Screw Bot V3.5 S1.stl STL · 342 KB
- square_pin.stl STL · 1 KB
- To metal hinge Bot V3.5.stl STL · 865 KB
- Top Hinge to glass door - for M25 Flat Head Cap Machine Screws FHCS V35.stl STL · 1,0 MB
- To metal hinge Top V3.5.stl STL · 239 KB
- Categoría
- Para tu impresora
- Formatos
- STL
- Descargas
- 20,404
- Publicado
Sobre este modelo
With this add-on you will be able to open your printer door fully by 180° or even 270°.
Small V3.5 update: Big screws are printed horizontally from 2 parts to make them stronger. And with coarser thread, for easy printing.
Version 3 update includes some updates users asked about: - Hinge stopper to be able adjust doors sideways, to remove gap on left side. - The (to metal part) hinge have more space for adjusting glass in/out - Longer top screw (easier to hold and tighten) - Use of screws from Makers Supply
Here is video manual:
Hinge is attached to original Bambu hinge metal part, so you don't need to disassemble anything, just remove 4 original screws with rubber gaskets from glass doors. Assembly will take no more than 5 minutes, and if you don't like it, you can turn back to original in no time.
P.S. As some users say, the newer models have glass door glued to the metal hinge with double sided tape, so you need to cut it off carefully with thin paper knife or gillette.
I tested this hinge with PETG and PETG-CF. With 3 walls and 20% infill all the fillaments are tough enough for those parts. For PETG and PETG-CF use your own settings or use my attached profile. I'm using filament and printing settings from this link ← those are BEST settings for printing PETG ever! Im using those for months now and they are THE BEST. (Thanks Donnie)
Additionally to printed parts you need some screws - look in parts list.
It's easy to assemble it without any documentation, just look for TOP and BOT writing on parts. Or use attached assembly guide. Use hand screwdriver not electric one to feel the tightening force.
Boost MeIf you think this is a useful print - press Boost Me :)
Descripción original del autor, publicada en MakerWorld.



