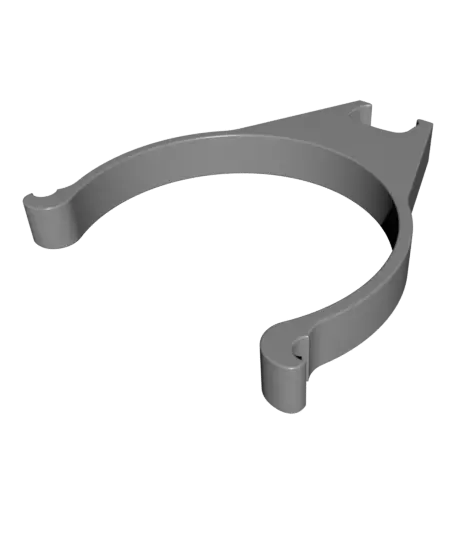
Navee GT3 E-Scooter - Bottle Holder
Riding while holding a bottle of water can be frustrating, so I designed this bottle holder specifically for the Navee GT3 series (compatible with the GT3 Pro and GT3 Max). This is my first upload, and I hope it helps anyone who has had the same experience. There aren’t many 3D‑printed accessories a
Thangs entrega los archivos a usuarios con cuenta gratuita
Licencia
Solo uso personalSin licencia indicada
El autor no indicó una licencia: todos los derechos le pertenecen. Úsalo solo para imprimir en casa y consulta al autor para cualquier otro uso.
Al descargar aceptas respetar la licencia y dar crédito a Frans T.
Archivos (5)
- Navee GT3 CupHolder - Bottle Bottom.stl STL · 5,0 MB
- Navee GT3 CupHolder - Bottle Claw.stl STL · 5,5 MB
- Navee GT3 CupHolder - Bracket A.stl STL · 118 KB
- Navee GT3 CupHolder - Bracket B.stl STL · 33 KB
- Navee GT3 CupHolder - Dowel.stl STL · 751 KB
- Categoría
- Varios
- Formatos
- STL
- Descargas
- 0
- Publicado
Sobre este modelo
Riding while holding a bottle of water can be frustrating, so I designed this bottle holder specifically for the Navee GT3 series (compatible with the GT3 Pro and GT3 Max). This is my first upload, and I hope it helps anyone who has had the same experience. There aren’t many 3D‑printed accessories available for Navee scooters, so I’m happy to contribute something useful to the community.
I recommend printing this in ABS, ASA, or PETG — mine is printed in PETG.
You will need: - 3 × cable ties (3.6 × 150 mm) - Glue — I used 5‑minute epoxy (CA glue may not hold well) - Hair elastic / rubber band
Assembly Steps: - Glue Dowel inplace with epoxy to the Bottle Bottom. - Glue Upright to Bottle Bottom - Slide Bottle claw in place (This is adjustable) - so it must be moveable - Glue Bracket A to Uprtight. - Unscrew the lower screw from your OEM Hook - Place the bottle holder over the exsisting screw hole and rescrew the hook screw in place. - Take Barcket B and aliagn to fit with Barcket A (can only go one way) - Use the Cable ties and clamp Bracket A to Bracket B - Use the Last Cable tie so add support for the Upright Stem and Bracket A. - Take rubberband/hair elastic and place over the hooks.
Enjoy!
Should you want to make adjustment see Onshape Link. https://cad.onshape.com/documents/247f0d8edce079f140e746d6/w/ab8eaff1bbca931c40bc9ae2/e/7eea174ccdee3cc476f06eef
Descripción original del autor, publicada en Thangs.