
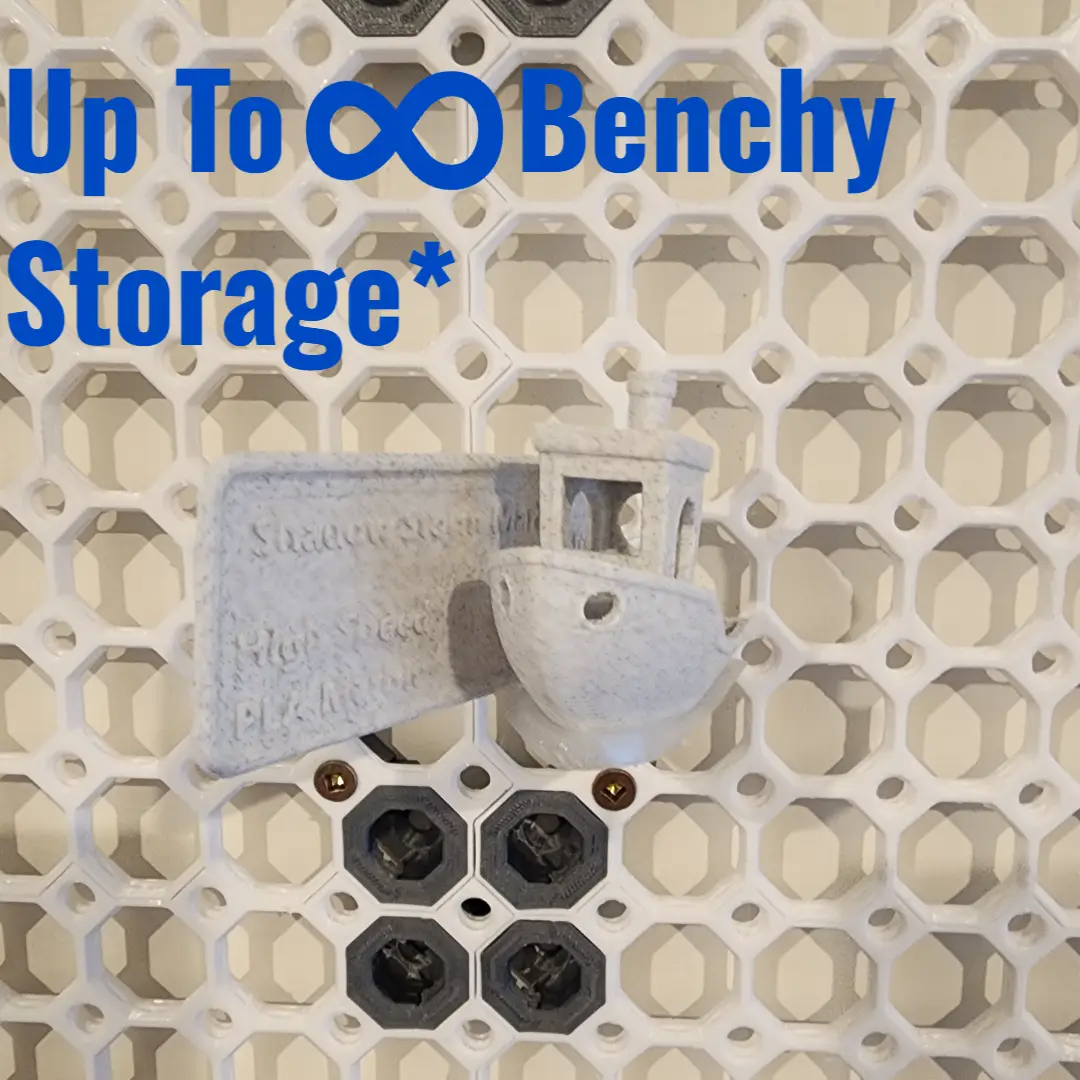
MultiBoard Benchy and Filament Sample Swatch Holder Display
por Tetomater en Printables
Benchy and Filament Sample Holder for Multiboard - only 4.15g
Licencia
Solo uso personalCC BY-NC-SA 4.0 — Atribución, no comercial, compartir igual
Uso personal dando crédito; sin fines comerciales y las modificaciones con la misma licencia.
Al descargar aceptas respetar la licencia y dar crédito a Tetomater.
Archivos (4)
- V0.2 Small Thread MultiBoard Benchy and Filament Swatch Display .stl STL · 354 KB
- V1.0 Push-Fit MultiBoard Benchy & Filament Sample Holder.stl STL · 295 KB
- Small Thread Benchy Display V0.2_0.4n_0.2mm_PLA_COREONE_14m.bgcode BGCODE · 523 KB
- Benchy Display V1.0 Push-Fit_0.4n_0.2mm_PLA_COREONE_16m.bgcode BGCODE · 563 KB
- Categoría
- Hogar
- Formatos
- STL, BGCODE
- Descargas
- 0
- Publicado
Sobre este modelo
Benefits - Easy to print
- Designed for no supports, no brim
- Minimal Filament at ~4.15g (V0.2)
- Tested in both PETG and PLA
- Easily prints 18x on a Core One build plate (~74g and 3h 19m) with auto arrange in PrusaSlicer
Printing Instructions Choose Attachment Style - Small Thread (
- Push-Fit + Snap
Default profile - 0.2mm Balanced 0.4mm nozzle - 0.2mm layer height
- 0.45mm Extrusion width
- 15% infill
- 2 perimeters
- no supports
- no brim
Installation It is technically "tile-able" in that it can be installed next in line to the previously installed ones even when holding a Benchy and Filament Sample. It is designed on a 2x2 MU Spacing Step 1 Small Threaded Recommend offsetting the rows by one MU I find taking off the surrounding Benchys is helpful and . V0.2 can be overtightened past horizontal but holds very steady when positioned level
Push-Fit (Recommended) As these are slightly more consistently aligned you can have them either offset or on a square 2x2MU grid. It is still easier to place Benchys on and off if aligned in the offset pattern you will need to insert your snap then into that press the Push-Fit section into it. Step 2 Add Filament Sample Align the filament sample through the guide and clip it into place by firmly pushing in the same direction Add Benchy it just sits in it. Step 3 Admire your new display
Descripción original del autor, publicada en Printables.



