
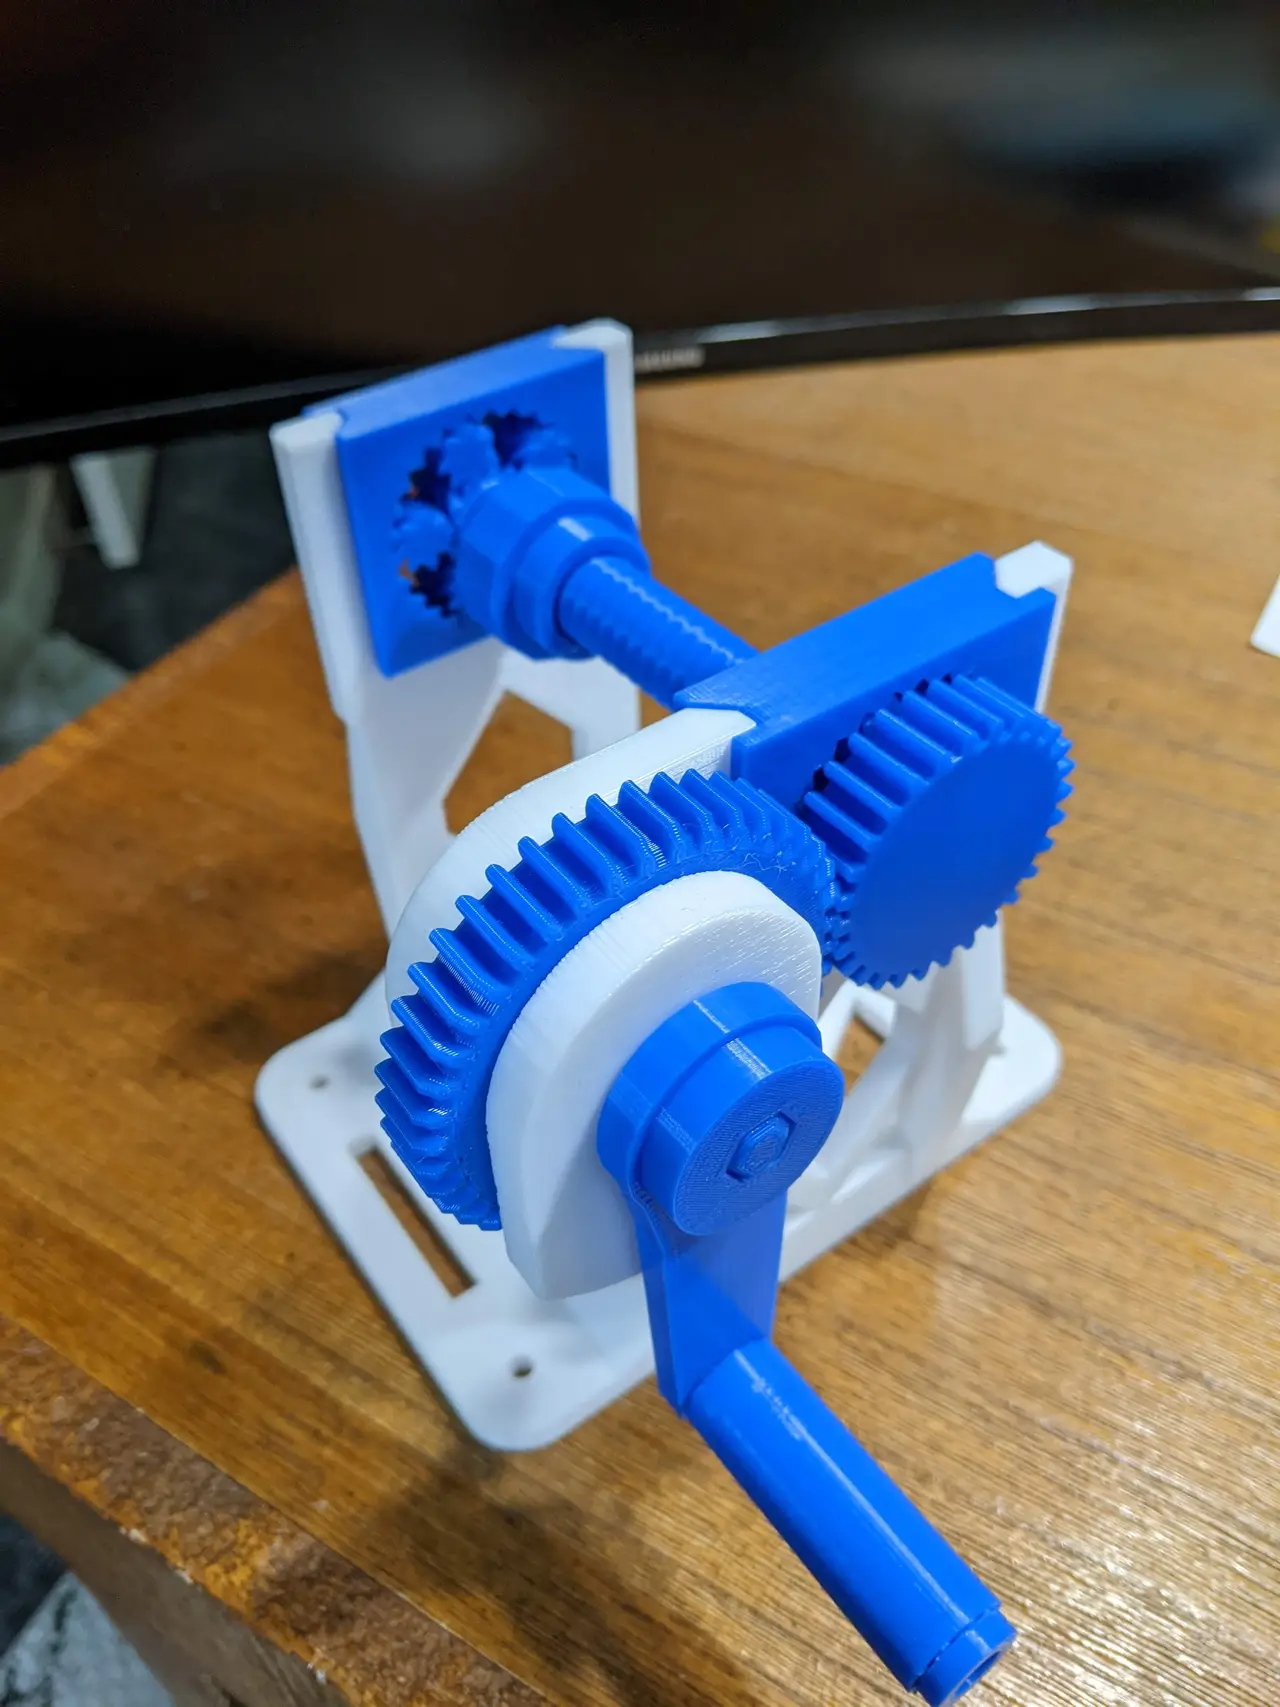
MUCH Improved Spool Winder - Helical Gears
por SDHayes en Printables
A vastly improved model, with smooth running helical bearings, stiffer/prettier frame and tighter tolerances
Licencia
Uso comercial permitidoCC BY-SA 4.0 — Atribución, compartir igual
Puedes usarlo y modificarlo dando crédito; las versiones modificadas deben compartirse con la misma licencia.
Al descargar aceptas respetar la licencia y dar crédito a SDHayes.
Archivos (17)
- 1 Helical - crank axle and pin.stl STL · 38 KB
- 4 Helical - frame.stl STL · 134 KB
- 5 Helical - spool gear and pin.stl STL · 239 KB
- 8 Helical - spool nut.stl STL · 254 KB
- 2 Helical - crank gear.stl STL · 534 KB
- 3 Helical - crank handle.stl STL · 554 KB
- 6 Helical - spool shaft and crank side helical gear.stl STL · 2,1 MB
- 50 disc.stl STL · 330 KB
- 60 disc.stl STL · 355 KB
- 55 disc.stl STL · 318 KB
- 30 layer parts.3mf 3MF · 80 KB
- 20 layer parts.3mf 3MF · 146 KB
- 4 Helical - frame.3mf 3MF · 73 KB
- 6 Helical - spool shaft and crank side helical gear.3mf 3MF · 536 KB
- 7 Helical - spool off side helical gear and pin REV2.stl STL · 1,3 MB
- 7 Helical - spool off side helical gear and pin ALT VER2.3mf 3MF · 329 KB
- 70 disc.stl STL · 297 KB
- Categoría
- Para tu impresora
- Formatos
- STL, 3MF
- Descargas
- 3,387
- Publicado
Sobre este modelo
Version Two of my reimagined spool winder. Les Kaye's model is really nice, but as I mentioned in my previous remix I ran into several issues (some mechanical and some cosmetic) that I felt could be improved, hence my Reimagined Spool Winder Version One. Well, once it was done, I found some additional shortcomings that need to be addressed, so Version Two. In this version I have completely revamped the frame to be stiffer (the other one wobbles a bit too much) and more geometrically pleasing. I've also reworked the forks to accept the completely redesigned spool-side assembly utilizing Gamma4D's helical gear model mixed onto the spool assembly and fork inserts. I've combined as much as possible, so there are a total of 8 parts and only two bits that glue up for final assembly. You glue #3 Crank Handle onto #1 Crank Axle & Pin, and you glue #5 Spool Gear & Pin onto #6 Spool Shaft & Helical Gear. That's it, you're done. You put an adapter on the shaft, then the spool, another matching adapter, thread on #8 snug, slip gear #7 into the end of the spool shaft and drop the whole assembly into the frame forks. Then you're good to go. The helical gears are a 1000% improvement, perfectly smooth, no binding and no heating/melting of the shaft like the V1 suffered. The reworked frame is much stouter and won't wander around, also a great improvement and the square side forks keep the spool seated with no lifting whatsoever. In the last pic you can see how I chopped the crank off of my V1 (and mounted it on a board aligned with the V2) to use as the dumb side spool holder. It works great for that. I've included 3 sizes of the spool adapter centering discs, you still need those and I've resized the mating faces so the old ones won't work anymore. They obviously work on the dumb side spool holder if you go that route. ****WARNING**** I highly recommend that you use the provided 3mf files AT LEAST for #6 and #7 because I have built in some modifiers to address the special printing requirements of the print in place helical gears. If you print those parts without the adjustments included in the project files you may end up with wonky gears that might even be frozen. For more info on that if you want to slice your own parts you can go to Gamma4D's design. The frame has it's own project file due to size and the rest of the parts not mentioned in the special section above are broken up into two plates….one with 0.20 layer parts and the other for faster 0.30 layers on parts where detail isn't necessary.
Descripción original del autor, publicada en Printables.



