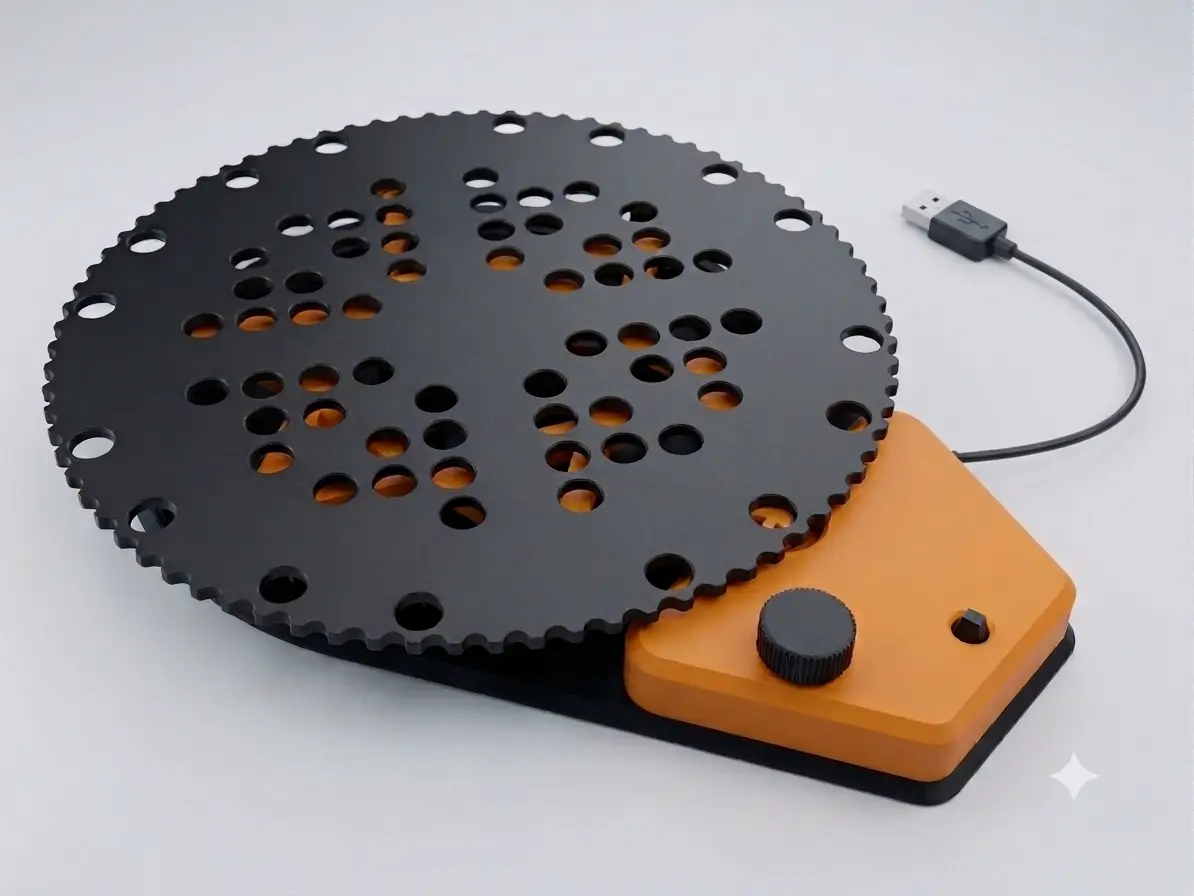
Motorised heavy duty rotating platform
por Dantak en Printables
Motorised rotating platform for photography, video and etc
Licencia
Solo uso personalCC BY-NC 4.0 — Atribución, no comercial
Puedes imprimirlo y modificarlo para uso personal dando crédito. No se permite vender las impresiones.
Al descargar aceptas respetar la licencia y dar crédito a Dantak.
Archivos (12)
- platform.stl STL · 3,2 MB
- cover_v2.stl STL · 470 KB
- gear.stl STL · 233 KB
- motor_mount.stl STL · 124 KB
- 6_wheel v2.stl STL · 175 KB
- 3_wheel v2.stl STL · 92 KB
- base_smallPrinter.stl STL · 315 KB
- base.stl STL · 337 KB
- bearing_clip.stl STL · 63 KB
- central_bolt_v2.stl STL · 535 KB
- knob.stl STL · 450 KB
- onoff.stl STL · 837 KB
- Categoría
- Tecnología
- Formatos
- STL
- Descargas
- 259
- Publicado
Sobre este modelo
Stable rotating platform if you need one( tugboat from example - 4kg) No soldering required - designed from Bambu parts(motor,board, potenciometr because that was what I had from another project) and 3 or 6 x 608 bearings as wheels for smooth ride, but you can use printed ones, they will be fine for this application. 10mm holes in the top plate if you need to print/design any accessories
Changelog: 15.09.2026 - added cover_v2 with dedicated power cord zip tie anchor point
BOM: 3 or 6pc 608 bearing Power distribution board On/Off switch Potenciometr N20 Motor Self tapping screws 2x8 Zip tie USB power source ( old phone usb charger, power bank or just laptop or pc) and maybe USB extension cable if you need one
Printing: Supports: just for base Tested with PETG, 0.2 layer, 4 walls, 5 top and bottom layers, 20% gyroid infill, use 6 walls for screw
Assembly: Pull USB cable through the cover(it's tight fit, you will have to push it in) and secure it inside with zip tie around the anchor point between screw holes Connect it to the input of power distribution board, prepare wires for motor, on/off switch and potenciometr and connect them to the board in this order SW0 - on/off switch SW1 - potenciometr CH1 - motor You can tidy the wires before you connect them Secure the boards with 2mm screws. Push the gear on the motor, connect it and install to the base, then attach the cover with 4 screws from the bottom.
Install bearings to the middle carriage and use clips to secure them. Screw platform to the base with bearing ring in the middle. Add on/off switch button and potenciometr knob. Troubleshooting: You can move motor a little in and out if you have troubles with gear alignment.
-----------------------
Do you like what we do ? Give us download and like. We burn a lot of plastic in prototypes so you don't have too. Thx :)
Descripción original del autor, publicada en Printables.