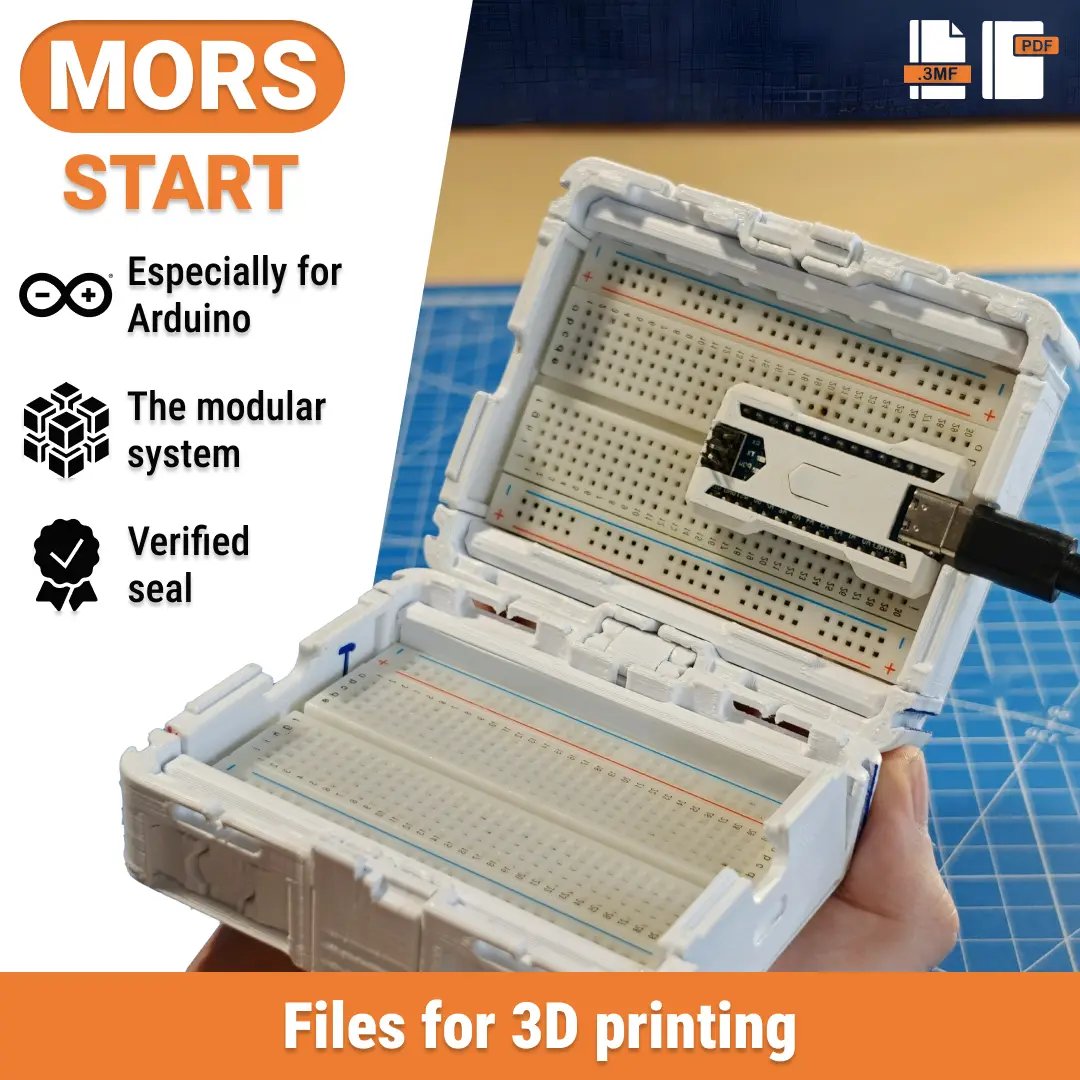
MORS v26 Start - Enclosures for electronics
por Artem en Thingiverse
"Storing and exchanging electronics under development is simple and convenient like never before" Modular pOrtable woRk caSes, abbreviated as MORS, are designed to improve the electronics development experience, for example for Arduino boards and their accessories. What's not a great gift for both..
Licencia
Uso comercial permitidoCC BY-SA 4.0 — Atribución, compartir igual
Puedes usarlo y modificarlo dando crédito; las versiones modificadas deben compartirse con la misma licencia.
Al descargar aceptas respetar la licencia y dar crédito a Artem.
Archivos (2)
- Categoría
- Tecnología
- Formatos
- ZIP, STL
- Descargas
- 325
- Publicado
Sobre este modelo
"Storing and exchanging electronics under development is simple and convenient like never before"
Modular pOrtable woRk caSes, abbreviated as MORS, are designed to improve the electronics development experience, for example for Arduino boards and their accessories. What's not a great gift for both beginners and more experienced microcontroller programmers? The special feature of this series is: - Modularity - Documentation - Openness to additions - Ergonomic and user-friendly design - 100% 3D printer fabrication - Minimum tools for assembly
The START kit has been compiled for the purpose of familiarization before further purchase. However, based on the available sizes and .step files, you can supplement it yourself and upload your work online. PRINT SETTINGS The values are recommended, and the settings for your case may vary. ParameterValue Material:PLA+; Fan speed:100%; Printing speed:80 mm/s; Nozzle temperature:215 °C; Table temperature:50 °C; Wall thickness:3 mm; Filling density:10%; Support:sometimes; Contact reinforcement:only for lateral 2s; Layer height:0.25 mm; Nozzle diameter:0.30 mm. THE ORDER OF ASSEMBLY Detailed instructions are provided in the attached document. - Prepare and print all the necessary models. It is recommended to apply the parameters specified in the description to the details. - Use wire cutters to remove all unnecessary technological elements from the workpieces (fringes, supports, burrs, threads, etc.). - Prepare the 0f body parts by knocking the cams out of the stationary state with a hammer. Next, if necessary, install the hinged covers 0f.00.01 on the sides. - Assemble the 1s segment parts together with the electronic components. Assemble the side 2s and end 3e parts. Use a hammer if necessary. - For 5k sets, half of which have a height of 2 or more, it is necessary to install the segment parts 1s in advance in the lower parts of the frames 0f. - Use a hammer to install the finished side 2s and end 3e parts into the frame. - Install the 1s parts in accessible places inside the 0f frame parts. - Your case is ready! Further preparation is limited to the installation of communications, breadboards and other components.
Descripción original del autor, publicada en Thingiverse.