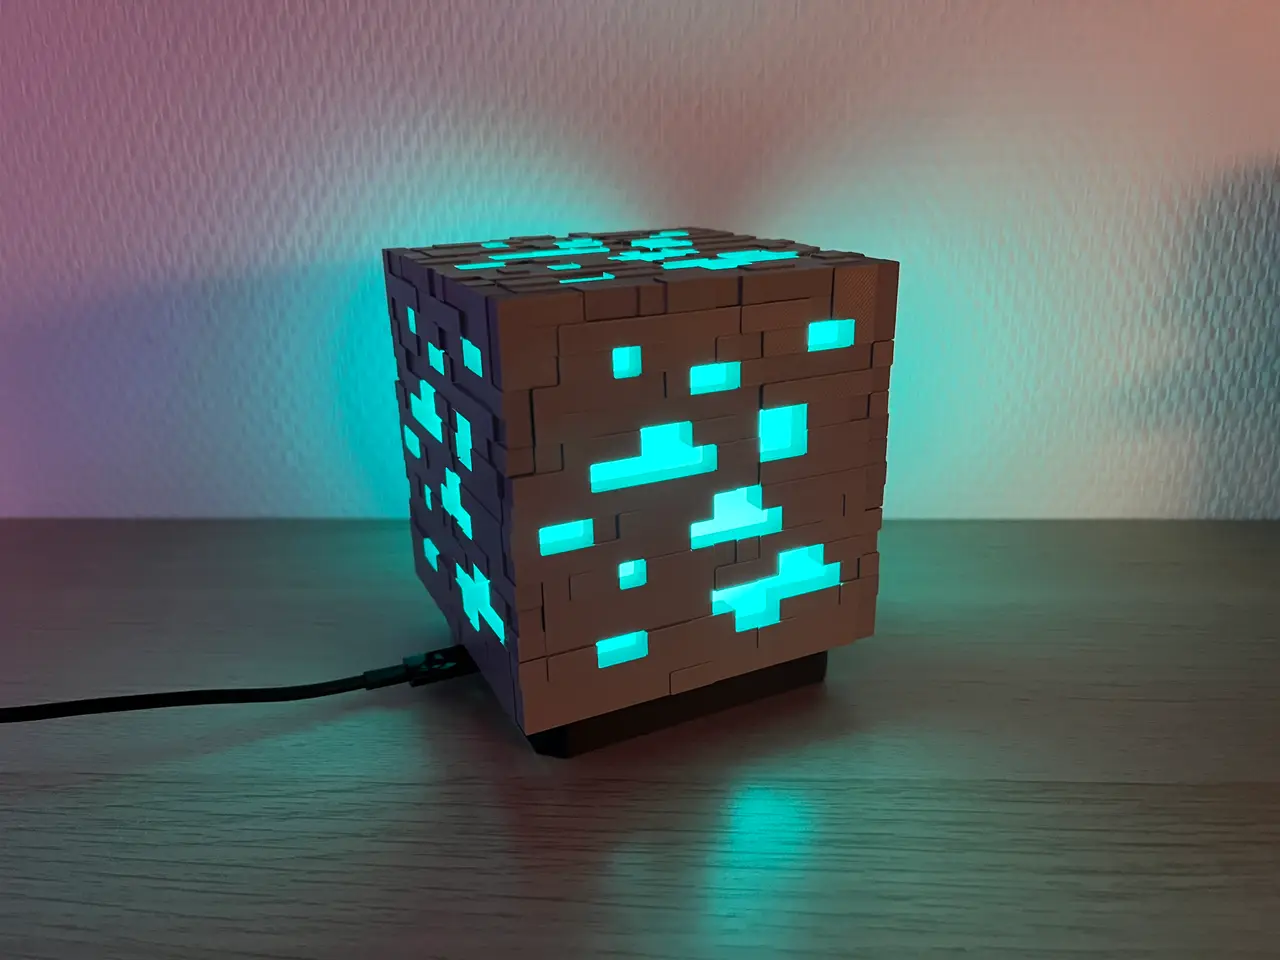
Minecraft Ore Lamp (WLED / ESP32 D1 Mini USB-C)
por Rauks en Printables
A Minecraft Ore Lamp powered by a USB-C ESP32 D1 Mini and a WS2812B LED Ring, running WLED.
Licencia
Uso comercial permitidoPuedes imprimirlo, modificarlo y venderlo dando crédito al autor.
Al descargar aceptas respetar la licencia y dar crédito a Rauks.
Archivos (8)
- Categoría
- Hogar
- Formatos
- 3MF, STEP
- Descargas
- 3,051
- Publicado
Sobre este modelo
A Minecraft Ore Lamp powered by a USB-C ESP32 D1 Mini and a WS2812B LED Ring, running WLED for full RGB lighting control. Bill of Materials The lamp was designed to perfectly fit the following components: - USB-C ESP32 D1 Mini from AZ-Delivery - 50mm WS2812B LED Ring from AZ-Delivery
You’ll need to solder the LED ring to the ESP32 using three short wires.
A small amount of glue is required to assemble the ore block. If you prefer to use a Micro-USB ESP32 30pins DevKit, an alternative base is available here: Alternative Lamp Base (ESP32 30pins Micro-USB DevKit) for Minecraft Ore Lamp
Instructions 1. Electronics Solder the LED Ring to the ESP32 as follows: - LED Ring GND → ESP32 GND - LED Ring 5V → ESP32 5V - LED Ring DI → ESP32 IO16 (as recommended by the WLED documentation)
Then follow the official WLED documentation to install WLED on your ESP32: - WLED installer site (recommanded method) - WLED documentation
If your ESP32 is not recognized (no COM port), you may need to install the CP210x USB to UART driver. 2. Lamp Base First, assemble the LED Ring holder: Then mount the ESP32 into the base. Insert the USB-C connector first, then gently push the antenna side past the retaining clips. If you need to remove the ESP32, you can push it out through the bottom access hole (a pen works well). Finally, clip the LED Ring to the base. 3. Ore Block The ore block consists of four side faces and one top face. The four side faces are interchangeable, but designed to match the ore block texture on the top face if you care about details.
Faces 3 and 4 have minor visual differences: - Face 3: slightly lower top-right edge. - Face 4: slightly higher pixel on the top-left edge.
Use a tip of glue to assemble all faces. You can use the diffuser as a guide (it is designed to slide inside the block and will help to keep all faces aligned): Push the diffuser fully in, leaving a small ~2 mm groove visible. 4. Lamp Place the ore block on top of the lamp base, and you’re done! Power it up and chose if you want it to be diamonds, redstone or anything else! 5. Bonus: Home-Assistant Automations This lamp can easily be integrated into Home Assistant or any WLED-compatible automation setup. You might be especially interested in: - The official WLED integration - The official Minecraft Server integration
For example, my own lamp lights up automatically when players are connected to my Minecraft server.
Descripción original del autor, publicada en Printables.