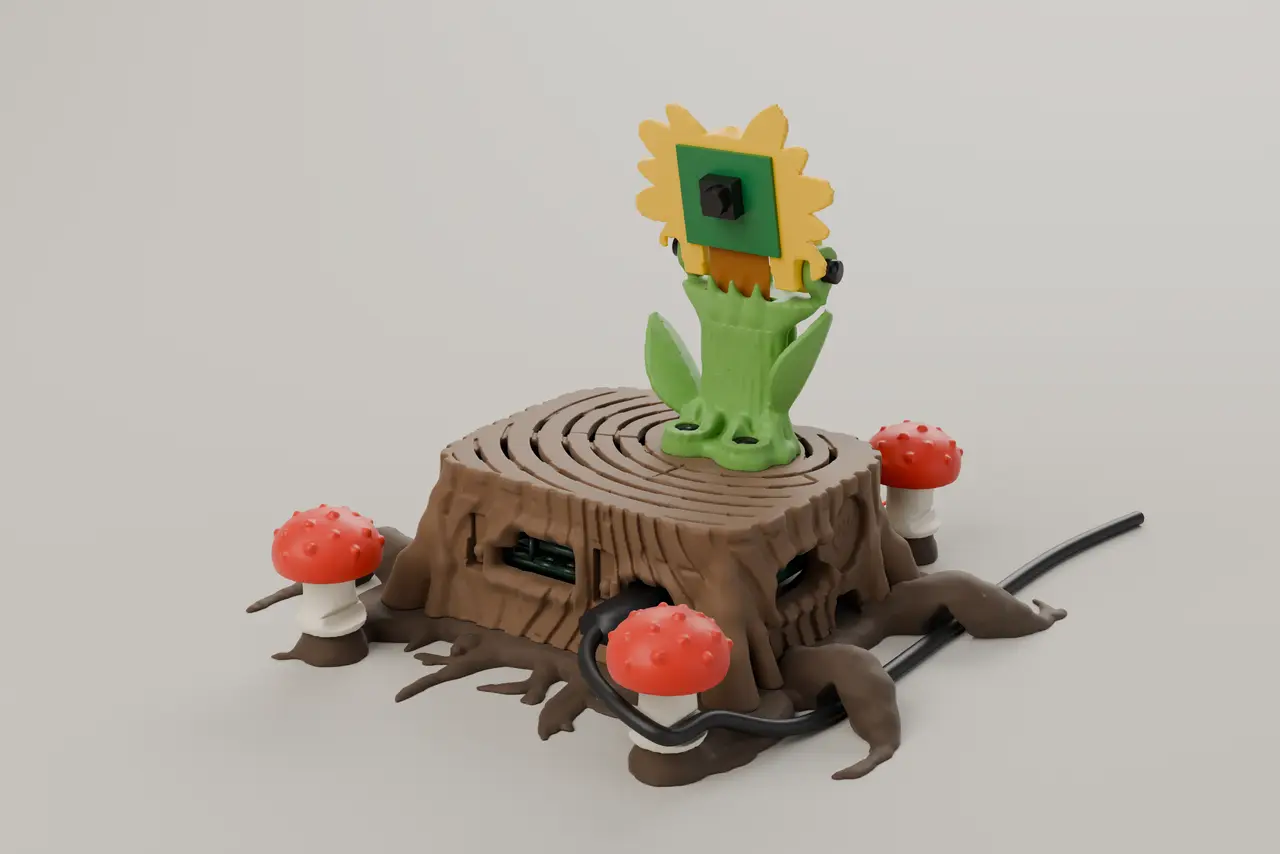
MANGROVE – Tree-Stump Case for the Synaptics Coralboard
por fabgla en Printables
Tree-stump case for the Coralboard: root stand with cable tunnels, fan mount and a sunflower camera mast.
Licencia
Solo uso personalCC BY-NC-SA 4.0 — Atribución, no comercial, compartir igual
Uso personal dando crédito; sin fines comerciales y las modificaciones con la misma licencia.
Al descargar aceptas respetar la licencia y dar crédito a fabgla.
Archivos (6)
- Categoría
- Tecnología
- Formatos
- STL
- Descargas
- 0
- Publicado
Sobre este modelo
MANGROVE – mangroves grow where coral reefs begin. The Coralboard lives inside a sawn-off tree stump. Its roots spread across your desk and guide the cables, fly agaric mushrooms clip them in place, and a sunflower grows out of the heart of the stump to hold the camera – with the camera ribbon cable hidden inside its stalk. FEATURES • Root base: carries the board on four root posts with M3 heat-set inserts. The roots form pointed cable tunnels on both sides and at the back. Two keyholes underneath for wall mounting. • Tree-stump lid: deep bark texture, annual rings on top double as vents. Every port sits in a "knot hole" (USB-A + Qwiic, USB-C, microSD, side JST + battery, GPIO). Both board buttons are pressed through flexible bud-shaped tongues in the bark. Screwed on invisibly from below. • Fan mount: a 30 x 30 x 7 mm 5 V fan snaps in tool-free under the annual rings, right above the SoC. Fresh air enters through three arched openings at the base of the stump. • Sunflower camera mast: the OV5647 camera module (25 x 24 mm) sits in the flower head. The flat ribbon cable runs through an 18.5 x 2.4 mm channel inside the stalk and comes out right in front of the CSI connector – no loose cable. The tilt hinge (-15° to +30°) sits behind the cable, so the ribbon passes through the middle without being pinched. • Mushroom cable clips: three fly agarics screw onto root knobs; snap channels in the stems hold cables up to 5 mm. LITTLE DETAILS • A heart with initials carved into a debarked patch on the right flank (fully customizable) • A fairy door with an open door leaf and a round window at the back cable exit, with stepping stones in front • A ladybug on the ground • Signature engraved under the base BOARD Designed around the official Coralboard STL: PCB 73 x 58 mm, mounting holes on a 65 x 48 mm grid. Every connector stays accessible. PRINTING (Prusa MINI fits everything, no supports needed) Part / qty / orientation: • Root base – 1x – flat as exported • Tree stump – 1x – UPSIDE DOWN (annual rings on the bed) • Sunflower stalk – 1x – standing on its foot, 5 mm brim • Sunflower head – 1x – camera side down • Mushroom stem – 3x – upright • Mushroom cap – 3x – upright on its flat rim All STLs are already in print orientation – just import, don't rotate. Settings: 0.4 mm nozzle, 0.2 mm layers (0.15 mm for the flower and mushrooms if you like), 3 perimeters, 15 % gyroid, supports OFF. Approx. 140–170 g PLA. Suggested colours: dark brown base, wood/brown stump, green stalk, yellow flower, red caps (paint the warts white or use a colour change), bone-white stems. HARDWARE • 15x M3 heat-set insert, short (e.g. M3 x 5.7, 4.0 mm hole) • 4x M3 x 10 socket head (board) • 8x M3 x 8 socket head (4x stump from below, 2x stalk foot, 2x tilt hinge) • 3x M3 x 14 socket head (mushroom stems) • 4x M2 x 5 self-tapping (camera module) • optional: 30 x 30 x 7 mm 5 V fan (5 V / GND on the GPIO header) ASSEMBLY 1. Melt in all heat-set inserts (board posts: push down to the step 2.5 mm below the top). 2. Screw the board onto the root base (4x M3 x 10). 3. Optional: snap the fan into the cradle inside the stump. 4. Screw the stalk onto the stump (2x M3 x 8) before attaching the flower. 5. Push the camera ribbon from inside the stump up through the slot and the stalk, then plug it into the camera. 6. Mount the camera on the flower (4x M2), attach the flower to the hinge (2x M3 x 8), set the tilt and tighten. 7. Plug the other end of the ribbon into the CSI connector, place the stump over the board and screw it on from below (4x M3 x 8). 8. Screw the mushroom stems onto the root knobs (M3 x 14), press on the caps and clip your cables in. NOTES • Camera holder made for the 25 x 24 mm OV5647 module (hole grid 21 x 12.5 mm). • A mikroBUS HAT may stick out max. ~11 mm above the board.
Descripción original del autor, publicada en Printables.