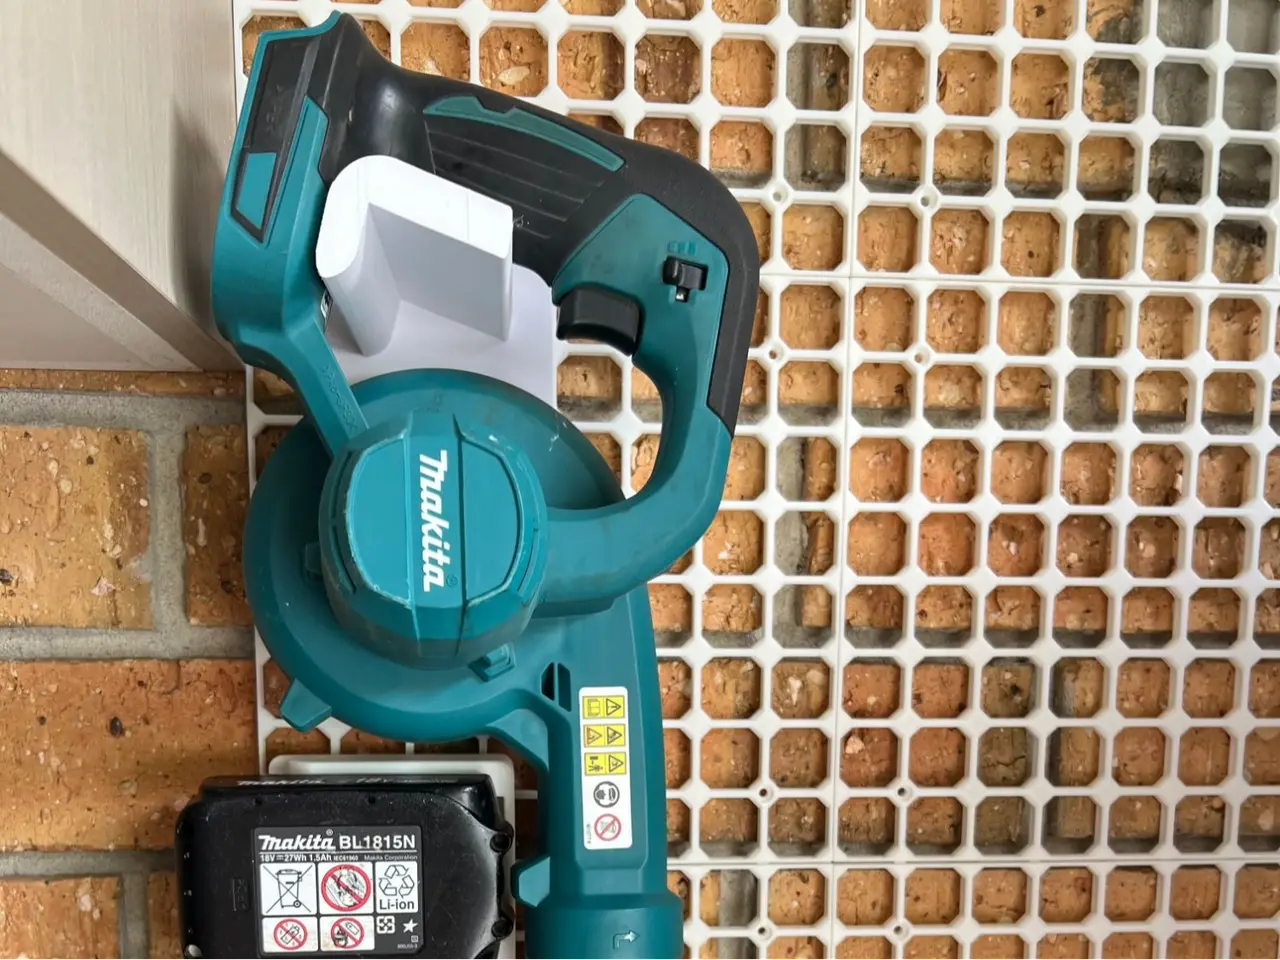
Makita DUB185 Blower Holder - openGrid
por Sound.Wave en MakerWorld
Got sick of my DUB185 pulling and openGrid hook off the garage openGrid wall, so I made a proper holder for it.
MakerWorld entrega los archivos a usuarios con cuenta gratuita
Licencia
Uso comercial permitidoPuedes imprimirlo, modificarlo y venderlo dando crédito al autor.
Al descargar aceptas respetar la licencia y dar crédito a Sound.Wave.
Archivos (3)
- Makita DUB185 Blower Holder (openGrid) - Holder (PETG).stl STL · 1,1 MB
- Makita DUB185 Blower Holder (openGrid) - Supports (PETG).stl STL · 345 KB
- Makita DUB185 Blower Holder (openGrid) - Support Interface (PLA).stl STL · 343 KB
- Categoría
- Herramientas
- Formatos
- STL
- Descargas
- 0
- Publicado
Sobre este modelo
Got sick of my DUB185 pulling and openGrid hook off the garage openGrid wall, so I made a proper holder for it. The blower hangs nozzle down, motor side out, on a shelf that slides through the handle. The shelf is shaped to the underside of the grip and the corner where the grip meets the body, so it hangs straight and stays clear of the trigger (about 6 mm). Mounting – 5 full openGrid snaps (4 corners + 1 in the middle) on an 84 x 84 plate. My first one had 9 and it was a pain to clip on. 5 holds it fine. Made for the full board (6.8 mm), not Lite. Fit – the grip is contoured so it's not a perfect match, but it slides on and off smoothly. Supports – they're modelled into the file, so leave slicer supports off. PETG for the holder and the support blocks, with 2 layers of PLA in between. You'll need an AMS (or some other 2 filament setup). It prints on its edge so the load runs along the layers, not across them. Settings These are all set in the 3MF already. If you're setting it up yourself, go through it in this order:
- Plate – textured PEI, give it a wash with dish soap first (PETG lets go on a greasy plate). Smooth PEI works but put glue stick on it, PETG can stick too hard to it. Not SuperTack, it won't slice PLA + PETG
- Filaments – PETG HF or PETG Basic, and PLA Basic, in the AMS. Holder and supports on PETG, the interface part on PLA
- PLA filament settings – nozzle 230 for first layer and other layers. Leave the PETG at default
- Bed temp – PETG 70, PLA 60. The bed goes off the PETG since it's on the first layer. Mine lifted at the front at 60, 70 fixed it
- Flushing volumes (button next to the filament list) – set PETG -> PLA and PLA -> PETG to at least 600 mm³. Bambu sets flush by colour, so if your PLA and PETG are the same colour it barely flushes and the interface sticks
- Quality – 0.2 mm layers, 0.4 nozzle. Don't use variable layer height, the PLA layer is exactly 2 x 0.2 mm
- Strength – 4 walls, 6 top/bottom, 25% gyroid. My first one was 6 walls / 40% and that's way overkill. If yours is going to get thrown around, go back to that
- Support – off
- Others – Brim type: Painted. Then open the Brim Ears tool (top toolbar), set the diameter to 15 and click an ear onto each corner of the plate's edge on the bed, so 4 ears. Leave Brim-object gap at 0.1. Flush into objects' infill off (turn on Advanced to see it)
- Slice and check – about 44 filament changes and around 34 g purged (roughly 0.8 g per change). If purge is way under that, go back to step 5
- X1/P1 – take the top cover off before you hit print so the PLA doesn't cook. Keep the door shut if you can, less draft on the bed means less warping
Mine sliced at 44 changes, 5 h 47 min, 163 g total (115 g model, 34 g purge, 14 g prime tower). Time and grams are based on PLA Basic and PETG HF. Getting the supports off
- Shelf – the support underneath is 5 short blocks. Twist them off one at a time, a small flat screwdriver fits in the gaps
- Snaps – each pad slides out towards the tip of the snap. Stick a small flat screwdriver in the V under the lip and twist. It pushes on the solid part of the snap, not the flex arm
- Brim ears – the 4 small discs at the ends of the plate bend off with your fingers
- Any thin PLA left behind just peels off
Mine's printed with exactly these settings and mounted, holds the blower solid. Let me know how you go. Remix Remixed from openGrid by David D (CC BY): openGrid on MakerWorld. The holder and plate are my own design. The 5 snaps are his official openGrid Bare Snap from the snap modelling files, joined onto my plate so it clips straight onto an openGrid board.
Descripción original del autor, publicada en MakerWorld.