Mac mini M6 / M4 Stand with Drawers & Pen Holder
por 3dcodelabs en Printables
Mac mini M6 / M4 Stand with Drawers & Pen Holder
Licencia
Solo uso personalCC BY-NC-ND 4.0 — Atribución, no comercial, sin derivadas
Solo para uso personal, sin modificarlo y dando crédito. No se permite vender ni redistribuir cambios.
Al descargar aceptas respetar la licencia y dar crédito a 3dcodelabs.
Archivos (6)
- Categoría
- Tecnología
- Formatos
- STL
- Descargas
- 1
- Publicado
Sobre este modelo
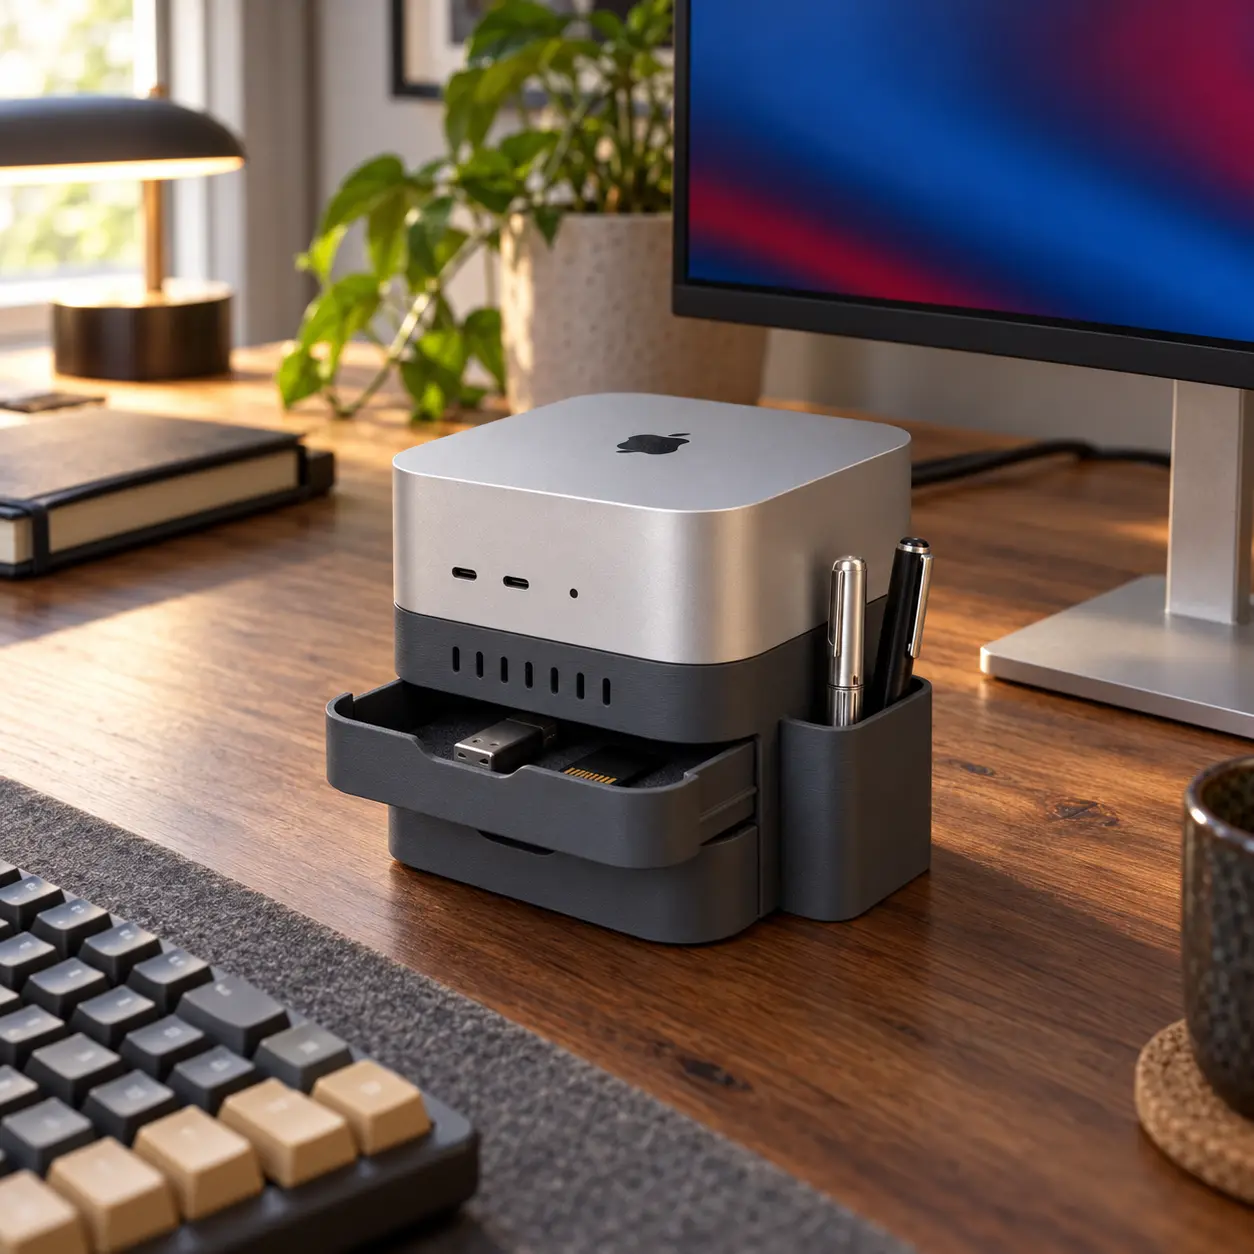
Designed for the Mac mini M4, this desk organizer combines two drawers, an integrated pen holder and a power button lever that provides access without lifting the computer. Rounded contours, vertical front slots and closely spaced rear perforations complement the device’s minimalist appearance. The lower drawer offers 25 mm of internal height and the upper drawer 20 mm, providing storage for USB drives, SD cards and small accessories. The stand measures 84 mm in overall height and consists of six printed parts, with no screws or glue required. This listing contains digital 3D model files, not a physical product. Assembly : Remove burrs from all mating surfaces. Align the deeper drawer with the lower side channels and the shallower drawer with the upper channels, then slide them in from the front. Place the alignment ring on the cabinet’s upper seat and position the upper module with the power button section at the rear left. Align the power button lever’s side pins with their bearing seats and press gently downward until seated. Check that the lever moves freely before placing the Mac on the stand. The drawers are fully removable, and the upper module is not locked in place. Hold both sections together when carrying the stand. 3D printing settings. Suggested starting settings are PETG or PLA, a 0.4 mm nozzle, 0.20 mm layers, four walls, five top/bottom layers and 20% gyroid infill. Use 0.16 mm layers and 100% infill for the power button lever. Keep the supplied print orientations and place seams away from sliding and mating surfaces. Use your calibrated filament profile for temperature and cooling. Avæoid filling the rail channels with automatic supports; inspect the upper module's bridges and power lever bearings in the slicer preview and add local supports only where needed. Use a 3–5 mm brim if additional bed adhesion is required. Print the included small rail-fit samples with the same settings before printing the complete model. These are starting recommendations; fit may vary with your printer and filament.
Descripción original del autor, publicada en Printables.