
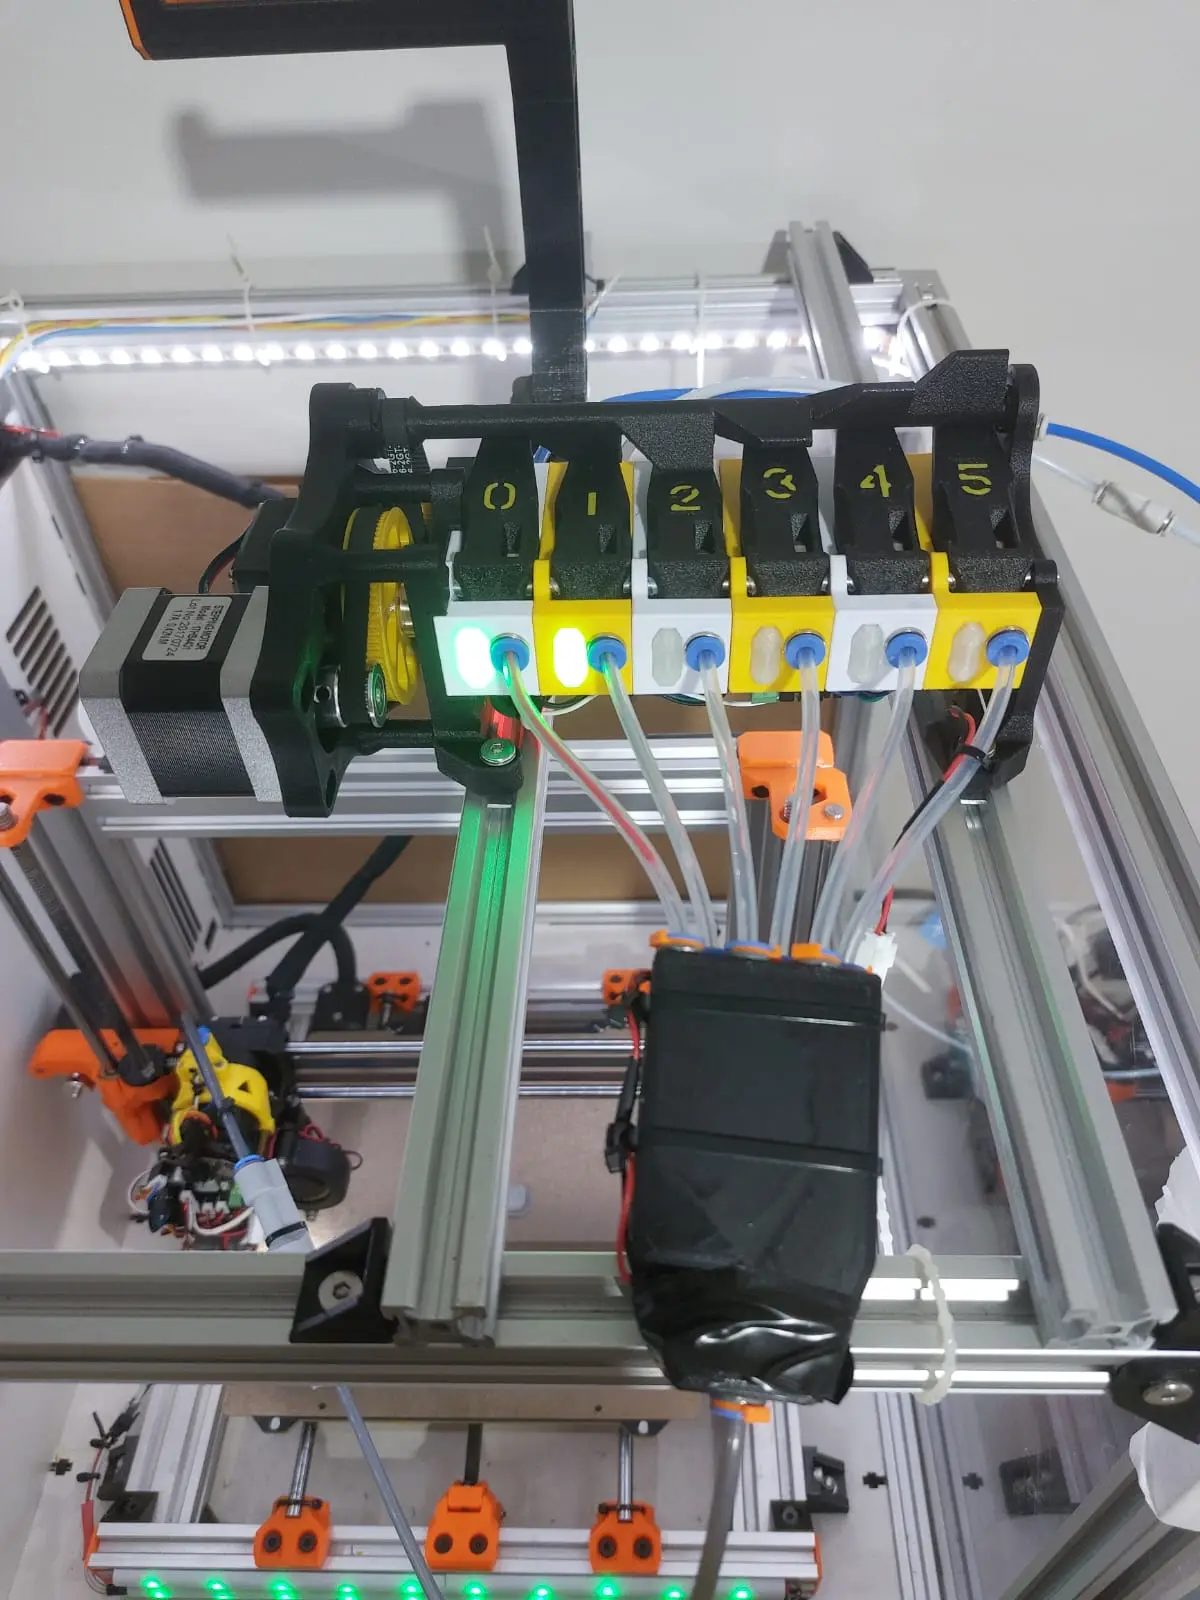
Low Rider MMU V2.0 Feeder Body High Clearance
por Valter F.C. en Printables
I modified the feeder bodies by increasing the tolerances for some of the holes and adjusted the LED
Licencia
Solo uso personalCC BY-NC 4.0 — Atribución, no comercial
Puedes imprimirlo y modificarlo para uso personal dando crédito. No se permite vender las impresiones.
Al descargar aceptas respetar la licencia y dar crédito a Valter F.C..
Archivos (6)
- feeder-body-high-clearance.fcstd FCSTD · 47,1 MB
- feeder-body-slotted-high-clearance.fcstd FCSTD · 47,7 MB
- feeder-body-slotted-high-clearance.stl STL · 1,8 MB
- feeder-body-high-clearance.stl STL · 1,8 MB
- feeder-body-high-clearance.step STEP · 26,6 MB
- feeder-body-slotted-high-clearance.step STEP · 26,8 MB
- Categoría
- Para tu impresora
- Formatos
- FCSTD, STL, STEP
- Descargas
- 0
- Publicado
Sobre este modelo
I modified the feeder bodies by increasing the tolerances for some of the holes and adjusted the LED mount to fit the specific model I have. I’ve highlighted the areas I changed in green in the photo. I have included the FreeCAD source files, as well as STEP and STL files, for both the "feeder-body-slotted" and "feeder-body" versions. I didn’t have the original source files, so I had to import them; as a result, the file sizes are quite large—apologies for that. Instead of using the LM2596, I used a UBEC set to 6V. I made the M3 threaded rods approximately 163mm long (160mm also works) and glued locking nuts onto them with super glue, effectively turning them into long bolts. I had to modify the gates to accommodate my LEDs and improve the tolerances of some of the other holes. I am currently fine-tuning the test prints, but the Low Rider MMU v2.0 is fully functional. I added a dual-belay system and a hub/merger with a switch, which has made the system more reliable. I ran into issues, primarily with the switch on gate 0; after many hours of troubleshooting, it finally started working once I updated the Klipper host software. When the gates weren't functioning, I disabled each one using the command "MMU_SENSORS SENSOR=mmu_entry_0 ENABLE=0," allowing the hub to take over the task of filament detection. For the led_hex.stl files, I used a 0.6mm line width (with a 0.4mm nozzle), 0% infill, 2 wall loops, and 2 top and bottom shell layers; using fluorescent PETG filament, the lighting effect turned out really well.
Descripción original del autor, publicada en Printables.



