Loud-ESP32-S3 Wi-Fi Speaker with Touch Buttons
por 9and3r en MakerWorld
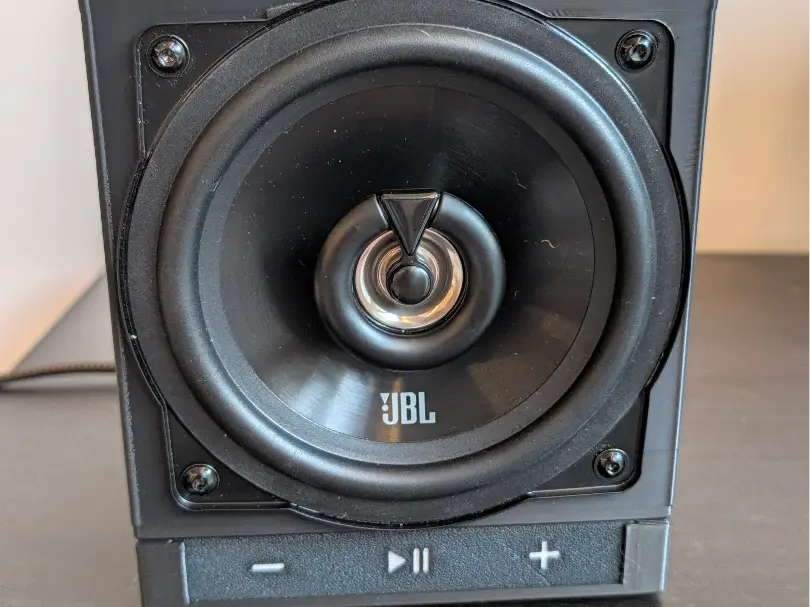
A small sealed-box speaker built around Sonocotta's Loud-ESP32-S3 board and a 5.25" (13 cm) car coaxial speaker (designed for the JBL Stage2 55F). It runs ESPHome with Sendspin, so it plays in perfect sync with other rooms through Music Assistant, and it has three capacitive touch buttons…
MakerWorld entrega los archivos a usuarios con cuenta gratuita
Licencia
Solo uso personalCC BY-NC-SA 4.0 — Atribución, no comercial, compartir igual
Uso personal dando crédito; sin fines comerciales y las modificaciones con la misma licencia.
Al descargar aceptas respetar la licencia y dar crédito a 9and3r.
- Categoría
- Varios
- Descargas
- 0
- Publicado
Sobre este modelo
A small sealed-box speaker built around Sonocotta's Loud-ESP32-S3 board and a 5.25" (13 cm) car coaxial speaker (designed for the JBL Stage2 55F). It runs ESPHome with Sendspin, so it plays in perfect sync with other rooms through Music Assistant, and it has three capacitive touch buttons (volume –, play/pause, volume +) hidden behind a two-color printed plate. No mechanical buttons, no grille, no glue. It sounds much better than you would expect from a car speaker in a small box, especially with a little EQ (see below). FEATURES - Sealed speaker chamber printed in one piece (~1.0 L internal), designed to print upright without supports. - Separate base that holds the Loud board upside down, captured on pins – no screws on the board. - Captive button plate: slides into a slot from the top, black icons via a filament change at 0.6 mm. - Recesses for 4 silicone feet. - All fasteners are M4 into heat-set inserts. - Size: speaker box 135 × 135 × 85 mm, base 135 × 85 × 22 mm. PARTS - 1 × Sonocotta Loud-ESP32-S3 (rev G or later, amp enable on GPIO17) - 1 × 5.25" coaxial car speaker, 4 Ω – designed for JBL Stage2 55F: 129 mm square flange, mounting holes on a 100 mm square, 54.4 mm depth - 8 × M4 heat-set inserts, M4 × 8.1 × 6.3 (4 for the speaker, 4 for the base) - 8 × M4 × 10 flanged button-head screws, ISO 7380-2 (4 speaker, 4 base) - EVA foam tape 5 × 1 mm (gasket under the speaker flange) - Copper tape 15 mm (touch pads) - 4 × silicone bumper feet 12.7 × 3.5 mm - Polyester fill (pillow stuffing), 15–25 g - 2-core speaker wire (22 AWG) and 3 thin wires for the pads - USB-C power supply for the Loud PRINTING - PLA or PETG. The speaker box prints upright (front facing you), no supports. - The button plate is a single body: change to a contrasting filament at 0.6 mm for the icons. - The washers for the board pins are separate small parts. - The speaker chamber must be airtight ASSEMBLY 1. Install the heat-set inserts (190–210 °C): 4 in the front, 4 in the base. Keep the front ones flush – there is only ~3 mm of plastic behind them. 2. Pass the speaker wire through the hole in the bottom of the box and seal it with silicone. 3. Add the polyester fill loosely. 4. Put the EVA gasket under the speaker flange, connect the wires (mark the negative) and tighten the 4 screws crosswise, a little at a time. 5. Airtightness check: push the cone gently – it should return slowly. 6. Stick the copper pads behind each icon of the button plate and solder the wires to the Loud's W5500 header: RST (GPIO5) = vol –, INT (GPIO6) = play/pause, CS (GPIO10) = vol +. Slide the plate into its slot from the top. 7. Place the Loud upside down on the pins (USB-C to the back), add the washers and connect the speaker. 8. Fit the base under the box and tighten the 4 screws from below. 9. Stick the feet into the recesses. 10. Calibrate the touch buttons with everything closed (see firmware notes). FIRMWARE (ESPHome + Sendspin) The attached loud-speaker-esphome.yaml is a self-contained config (Sonocotta's packages are inlined). Copy secrets.yaml.example to your ESPHome secrets and fill in your Wi-Fi and API key. Things I learned the hard way: - Keep the amp always on (dac_enable_restore_mode: ALWAYS_ON, without Sonocotta's sendspin_addon_dac_enable package). Whenever the amp stops, the touch pads on GPIO10/GPIO6 jump by tens of thousands and stay "pressed", which slowly turned the volume up on its own. With the amp always on there is only a very faint hiss with your ear on the cone. - Calibrate your own pads: set the logger to DEBUG and setup_mode: true, then read the values at rest, with your finger hovering, and when touching. Each pad needs its own threshold. - One volume step per touch (no auto-repeat), so a stuck pad can never run the volume up. SOUND TUNING (Music Assistant DSP) A car speaker in a ~1 L sealed box gets a boomy bump around 150–250 Hz and has nothing useful below ~80 Hz. Good starting point in Music Assistant → Player settings → DSP: - Input gain –3 dB - High-pass 85 Hz, 12 dB/oct - Parametric EQ: peak at 180 Hz, –4 dB, Q 1.2 - Safety limiter –2 dB Fine-tune by ear where the speaker will live.
CREDITS - Loud-ESP32-S3 by Sonocotta – the board and the original ESPHome packages: https://github.com/sonocotta/esp32-audio-dock - ESPHome (https://esphome.io), Sendspin (https://www.sendspin-audio.com) and Music Assistant (https://www.music-assistant.io)
Descripción original del autor, publicada en MakerWorld.