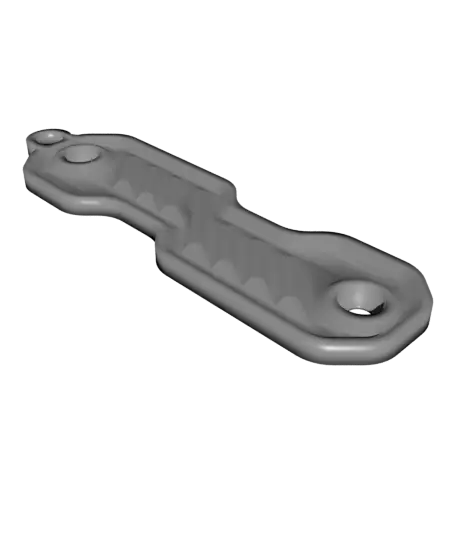
Keyper (Keep you keys in a stylish way!)
por GlennovitS 3 en Thangs
Updates
Thangs entrega los archivos a usuarios con cuenta gratuita
Licencia
Revisa las condicionesStandardDigitalFileLicense
El autor usa su propia licencia. Revisa sus condiciones en la página original antes de compartir, modificar o vender.
Al descargar aceptas respetar la licencia y dar crédito a GlennovitS 3.
Archivos (5)
- Back_rounded_keyring.stl STL · 140 KB
- Back_rounded.stl STL · 134 KB
- Front_rounded_keyring.stl STL · 151 KB
- Front_rounded.stl STL · 145 KB
- Keyper - Model files.zip ZIP
- Categoría
- Herramientas
- Formatos
- STL, ZIP
- Descargas
- 200
- Publicado
Sobre este modelo
Updates
11. nov 2023 - Added versions of all styles for M3 screws after suggestions in the comments :-)
21. oct 2023 - Added versions with hole for keyring attachment - as suggested in the makes/comments :-) Thanks for the feedback everyone!
Description
If you love the outdoors, folding pocket knifes and things like that, you might consider printing this awesome key-holder - the Keyper! After a quick print an assembly, your everyday keys are now foldable and stylized for the outdoors! Enjoy!
Note: this a new design for a printables design contest - so if you got feedback and suggestions for improvements - please let me know in the comments!
Styles
There are 4 versions of the Keyper (for now…) - Default: 100x30 mm - Narrow: 98x28 mm - Rounded: 100x30 mm (with rounded corners) - Rounded + Narrow: 98x28 mm (with rounded corners)
Every style comes with symmetric design as on the pictures or in an updated version with a hole for a keyring. All styles are now also available for both M3 or M4 bolts, depending on your available hardware and the size of the holes in your keys. All sizes keep 2 keys pr. ‘layer’ (one in each end) - meaning 2, 4, 6 or… x keys total.
What you need
You need the following for this assembly: - 2x M3/M4 screws (length depending on the amount of keys) - 2x M3/M4 bolts (If your hardware doesnt fit the above specifications for the print - please let me know, and I’ll try to upload an adjusted model)
Of printet items, you need: - 1x Front - 1x Back - 2x Spacers + 2x Spacers for every layer of keys (2 keys) (This means that for 2 keys = 4 spacers. For 4 keys = 6 spacers and so on..)
Assembly
Get the above mentioned hardware and printed files. Assemble with a spacer between everything (meaning: Front, Spacer, Key, Spacer, Back - also a Spacer between multiple layers of keys) Screw the front screw together with the bolt in the back, through the holes of the keys. Note: if you have an uneven number of keys, you can scale 1 Spacer (in the Z-direction only) to the same thickness as a key (around 3 mm) - and insert it instead of a key. This would make both sides around the same thickness.
Descripción original del autor, publicada en Thangs.