Johnny Silverhand's Malorian Arms 3516
por MachineDynamics en Printables
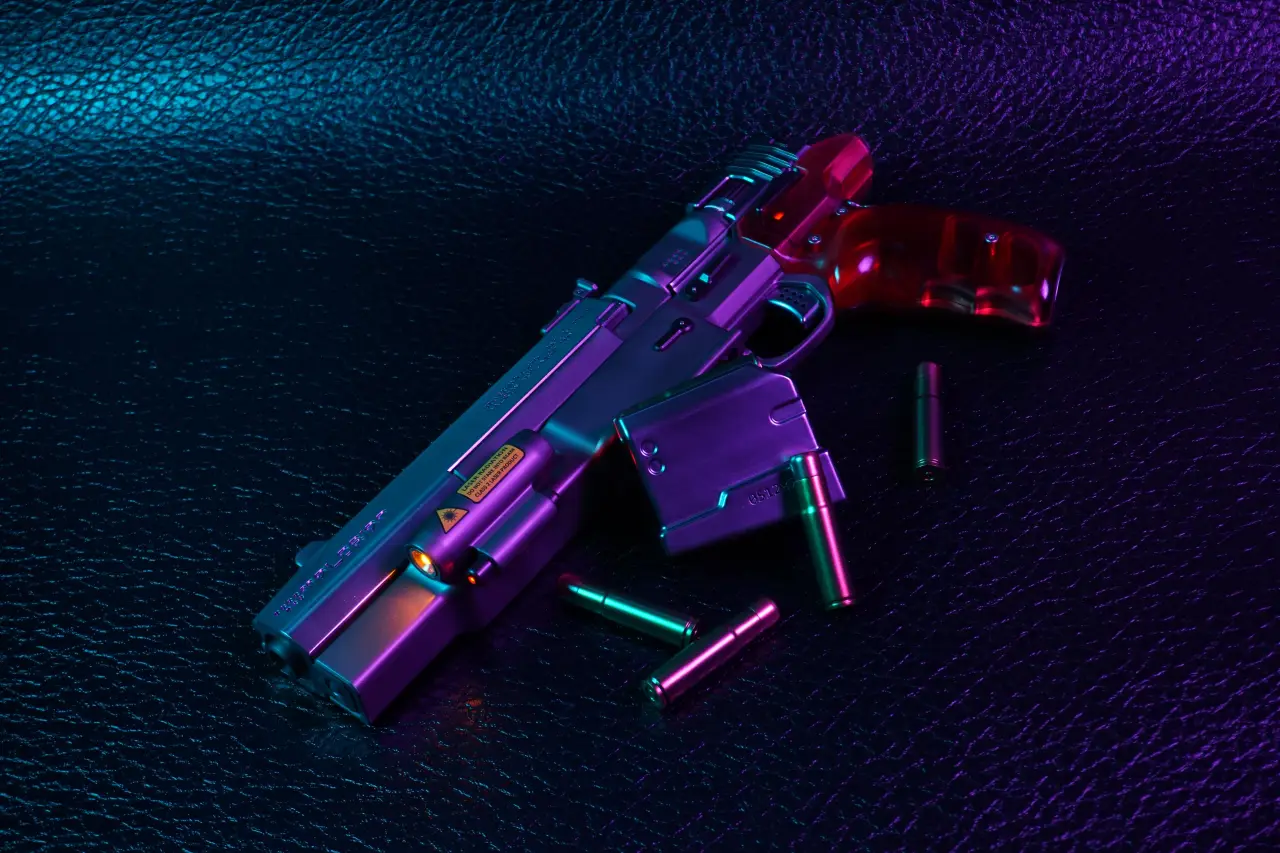
This is a replica of Johnny's pistol from Cyberpunk 2077. Intended to be printed in resin.
Licencia
Solo uso personalCC BY-NC-SA 4.0 — Atribución, no comercial, compartir igual
Uso personal dando crédito; sin fines comerciales y las modificaciones con la misma licencia.
Al descargar aceptas respetar la licencia y dar crédito a MachineDynamics.
Archivos (34)
- Barrel rear.stl STL · 109 KB
- Frame ornament 2.stl STL · 78 KB
- Front sight.stl STL · 101 KB
- Feed.stl STL · 144 KB
- Bullet.stl STL · 1,2 MB
- Bullet shell.stl STL · 1012 KB
- Side pod 5mm LED front.stl STL · 658 KB
- Frame rear.stl STL · 2,6 MB
- Grip outer.stl STL · 4,6 MB
- Rear frame detail.stl STL · 523 KB
- Grip rear ornament.stl STL · 4,4 MB
- Mag release.stl STL · 173 KB
- Rear sight.stl STL · 423 KB
- Frame ornament 1.stl STL · 65 KB
- Hammer.stl STL · 1,9 MB
- Rear knob.stl STL · 666 KB
- Side pod main body.stl STL · 1,5 MB
- Slide main.stl STL · 861 KB
- Safety.stl STL · 252 KB
- Frame front.stl STL · 1,7 MB
- Side pod cover.stl STL · 305 KB
- Trigger.stl STL · 831 KB
- Rifling.stl STL · 349 KB
- Slide rear LED 2.stl STL · 518 KB
- Barrel.stl STL · 1,7 MB
- Side pod 3mm LED rear.stl STL · 580 KB
- Slide rear LED 1.stl STL · 125 KB
- Magazine.stl STL · 2,5 MB
- Side pod 3mm LED front.stl STL · 534 KB
- Grip bottom.stl STL · 963 KB
- Slide knurling.stl STL · 681 KB
- Grip frame.stl STL · 2,5 MB
- Step files.zip ZIP · 5,6 MB
- Warning decal.pdf PDF · 194 KB
- Categoría
- Cosplay y props
- Formatos
- STL, ZIP, PDF
- Descargas
- 3,716
- Publicado
Sobre este modelo
These files are for printing a replica of Johnny's pistol from Cyberpunk 2077. All parts were designed to be printed in resin. A mid size printer such as a Saturn or Mono X are required for some of the larger parts. The finished prop measured approximately 36cm in length. The paints used for the pictures of my build are Alclad stainless steel over gloss black for the bright silver parts, Alclad magnesium over gray for the light gray parts, Alclad steel over gray for the darker accent parts, Jumpwind brass and copper over gloss black for the bullets. The following parts are symmetric on each side of the prop and should be printed twice, once in their default orientation, and once mirrored: - Grip outer - Safety - Mag release
Two copies of slide rear LED 2 should be printed Required hardware: - 2mm steel pins. these are used throughout the build for aligning pieces that need to be glued together. They they are also used as cosmetic accents in the rear sight, mag release, and frame ornament pieces. https://www.amazon.com/uxcell-100Pcs-Stainless-Support-Elements/dp/B07MR2J61Q/ - m3 15mm standoffs. These go into the grip frame and are what the screws that hold the grip outer thread into. https://www.amazon.com/gp/product/B08HL7Y8YM/ - 3mm LEDs. Red for the small LEDs on the side pod, red for the light that shines through the grip, and yellow for the back of the slide. https://www.amazon.com/HiLetgo-Light-Package-Colors-100pcs/dp/B00MEKU6GW - 5mm LED. Yellow for the large front side pod light. https://www.amazon.com/MCIGICM-Circuit-Assorted-Science-Experiment/dp/B07PG84V17 - CR2023 battery holder. This powers the side pod lights, and can just fit in the frame in the space in front of the magazine. https://www.amazon.com/ALMOCN-Battery-CR2032-Container-3V-Black/dp/B0B79TZ68S - CR1220 battery holder. This fits in the frame for the grip LED, and on shelf on the slide knurling part to power the respective lights. https://www.amazon.com/gp/product/B07GXTQN75 - Small switches. For the grip and slide lights. https://www.amazon.com/gp/product/B07FVM3XYR - Resistors of your choice for controlling LED brightness. - 3mm x 6mm disc magnets. These are used to hold in the magazine, temporarily attach the hammer to the slide knurling to that the hammer can be removed to access electronics for the slide LEDs, and to provide a slight detent keeping the slide in the forward position. https://www.amazon.com/FINDMAG-Magnets-Magnetic-Whiteboard-Refrigerator/dp/B08M3YP56J - 1mm x 5mm disc magnets. This goes in the slide and matches with the 3x6mm magnet in the frame to keep the slide in the forward position. https://www.amazon.com/HHOOMY-Multi-Use-Magnets-Refrigerator-Whiteboard/dp/B088TC7NSK - Two m3 x 16mm screws, and four m3 x 12mm screws. These are used for screwing the grip onto the grip frame. Button heads screws work, but will sit slightly above the surface of the grip. Low profile screws will sit flush with the surface. https://www.aliexpress.us/item/3256802274787187.html - One M5 button head screw, any length. This is purely cosmetic and is glued into the front of the frame. - Two M2 countersunk screws, any length. These are purely cosmetic, cut the heads off with a rotary tool and glue them into the countersunk holes on the front and rear sights. Can be replaced with 2mm pins depending on preference.
Descripción original del autor, publicada en Printables.