
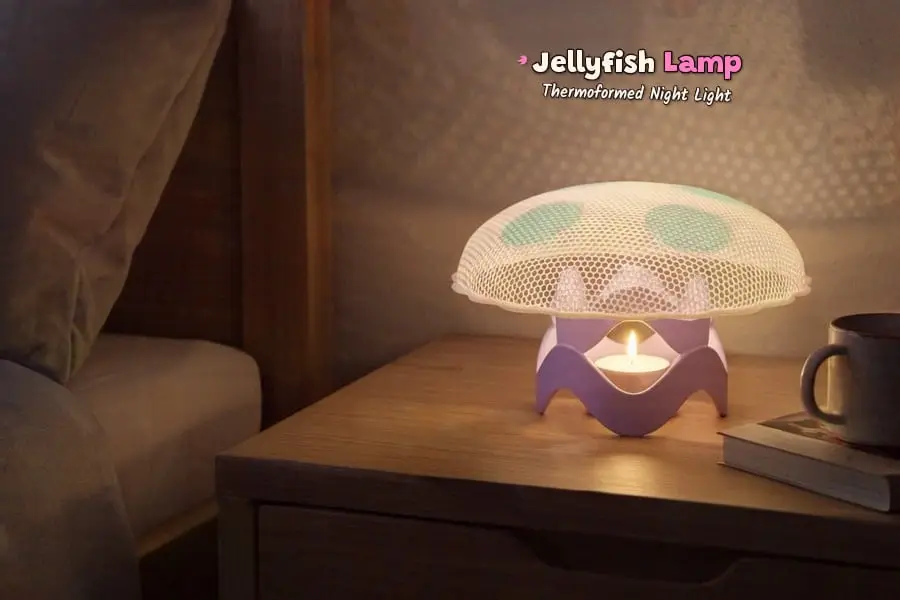
Jellyfish Lamp – Thermoformed Night Light
por Elizabeth Ridoutt en Thingiverse
Want to sell prints of this model? A commercial license is available on my Patreon: https://www.patreon.com/Elizabeth3D Like my free models? Support me on Ko-fi: https://ko-fi.com/elizabeth3d The Thermoformed Jellyfish Lamp is a honeycomb night light: a moon jellyfish whose bell prints flat and is..
Licencia
Solo uso personalCC BY-NC 4.0 — Atribución, no comercial
Puedes imprimirlo y modificarlo para uso personal dando crédito. No se permite vender las impresiones.
Al descargar aceptas respetar la licencia y dar crédito a Elizabeth Ridoutt.
Archivos (9)
- Thermoformed-Jellyfish-Lamp.3mf 3MF · 9,1 MB
- jellyfish-base.stl STL · 10,5 MB
- jellyfish-mold-bottom.stl STL · 12,1 MB
- jellyfish-mold-top.stl STL · 11,3 MB
- jellyfish-sheet.stl STL · 1,1 MB
- jellyfish-spot-1.stl STL · 19 KB
- jellyfish-spot-2.stl STL · 19 KB
- jellyfish-spot-3.stl STL · 19 KB
- jellyfish-spot-4.stl STL · 19 KB
- Categoría
- Hogar
- Formatos
- 3MF, STL
- Descargas
- 39
- Publicado
Sobre este modelo
Want to sell prints of this model? A commercial license is available on my Patreon: https://www.patreon.com/Elizabeth3D Like my free models? Support me on Ko-fi: https://ko-fi.com/elizabeth3d The Thermoformed Jellyfish Lamp is a honeycomb night light: a moon jellyfish whose bell prints flat and is shaped with a hair dryer between two printed molds. Design Concept The bell starts as an open white honeycomb sheet with a solid white rim and four aqua spots. Warmed and pressed, it becomes a dome that rests on a lavender base of wavy tentacles, with an LED tea light inside. Purpose A night light that glows on your table. The light comes through the mesh and draws the honeycomb on the walls around it. How It Works - The sheet is about 120 mm across and 0.8 mm thick (4 layers), with no top or bottom layers, only honeycomb infill and its rim, so it stretches when it is warm. - The molds leave a 1.0 mm gap for it, and the rim drops into a groove around the cavity that holds it while you press. - The molds print in PETG: hot PLA does not stick to PETG, so the dome comes off clean. - Not happy with the shape? Warm it and press it again.
What You Need - One battery LED tea light, standard size (about 38 mm wide; the centering ring is 38.7 mm inside), with the switch underneath. - A hair dryer. Not a heat gun: too much heat tears the mesh. - Never a real candle: PLA softens at around 60 °C.
Print Settings - One 3MF file with everything set, in 4 plates: the sheet, the two molds and the base, each with its own filament and settings. Open it with File > Open Project, not Import - Printer: Creality SPARKX i7, 0.4 mm nozzle, 0.20 mm layers. Print everything at 100%: the 1.0 mm gap between the molds is made for the 0.8 mm sheet - Plate 1, sheet: PLA, 2 walls, 0 top and 0 bottom layers, honeycomb infill 30%. The sheet and its rim in white, the four spots in aqua (layers 5 and 6: 2 color changes, already set for the CFS). - Plates 2 and 3, molds: PETG, 3 walls, 15% grid infill, 7 top and 4 bottom layers, no supports. Plate 2: the bottom mold in lavender. Plate 3: the top mold in pale aqua. - Plate 4, base: lavender PLA, about 80 x 80 x 66 mm, 2 walls, 15% lightning infill, tree supports that you remove by hand. - If the sheet looks solid in the slicer preview, its honeycomb settings did not load: select it and set top and bottom shell layers to 0, the infill to Honeycomb 30% and the infill anchor to 400% (max 20 mm), which ties the mesh to its rim. A solid sheet will not stretch - STL files: the sheet and its four spots share the same coordinates. Import them together as one object, or simply open the 3MF
Assembly - Put the bottom mold on the table, cavity up. Turn the flat sheet over (spots facing down) and lay it on the mold, so the rim drops into the groove. Try the top mold once without heat: it should go down to its flange without rubbing. - Warm the sheet with the hair dryer about 5 cm away, moving it in circles, more on the center than on the rim, for about 5-10 seconds. Stop as soon as the mesh starts to sag; if the cells in the center open wider, it is too hot. - Take the heat away and press the top mold straight down, slowly and evenly, until its flange sits flat on the bottom mold. If it stops, warm it a few seconds more and press again. - Hold it for about 30 seconds, until the sheet has cooled, then lift the top mold and take the jellyfish out: the spots are now on the outside of the dome. - Stand the LED tea light on the table and put the base over it, so the tea light sits inside the centering ring. Rest the dome on the four tips of the base. - To switch it on or off, lift the base: the switch is under the tea light.
LightChallenge
Descripción original del autor, publicada en Thingiverse.



