
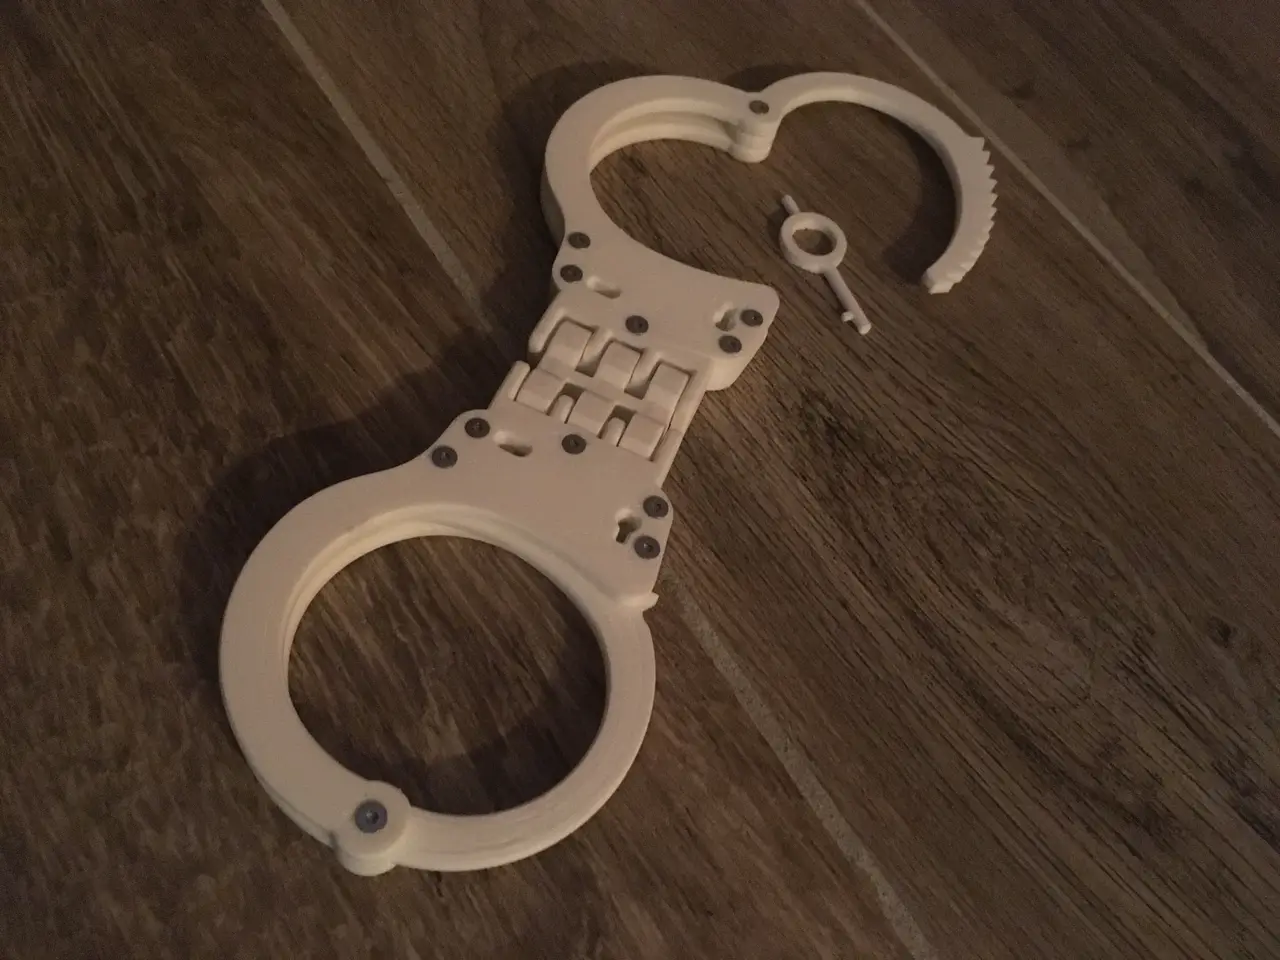
Hinged Handcuffs | Realistic
por Stone More en Thingiverse
Printable Hinged Handcuffs These are a clone of the S&W hinged handcuffs from a tracing of a picture online. I was inspired by the many handcuff designs on thingiverse, especially this one: https://www.thingiverse.com/thing:2487050 Warning If you print these with a high infill, they are really...
Licencia
Uso comercial permitidoPuedes imprimirlo, modificarlo y venderlo dando crédito al autor.
Al descargar aceptas respetar la licencia y dar crédito a Stone More.
Archivos (10)
- Bodies_x1.STL STL · 1,7 MB
- Shackle_Right_x1.STL STL · 273 KB
- Shackle_Left_x1.STL STL · 273 KB
- Key_Long_1x.STL STL · 126 KB
- Key_Short_x3.STL STL · 136 KB
- Top_Cover_Right_x1.STL STL · 352 KB
- Top_Cover_Left_x1.STL STL · 352 KB
- Dowel_Pin_x2.STL STL · 19 KB
- Locking_Bar_x2.STL STL · 13 KB
- Pawl_x2.STL STL · 34 KB
- Categoría
- Para tu impresora
- Formatos
- STL
- Descargas
- 14,318
- Publicado
Sobre este modelo
Printable Hinged Handcuffs These are a clone of the S&W hinged handcuffs from a tracing of a picture online. I was inspired by the many handcuff designs on thingiverse, especially this one: https://www.thingiverse.com/thing:2487050 Warning If you print these with a high infill, they are really freaking strong. Don't put them on alone, the hinge is very restrictive and depending on the key hole direction, you might have trouble getting out. They're almost not a toy.. ask me how I know... Features - Double lock
- Printed spring
- Guide groove and boss on the shackle that will keep the shackle from flexing when locked or double locked, giving it really good strength.
- Skin-contact edges are filleted for your comfort
- Bodies and hinge are printed in a single piece without any supports.
- There is a small barrier on the bottom body as well as the top cover to make picking more tricky for the lucky wearer.
- The short version of the key is too short for the wearer to use. The long version of the key is usable only if the keyholes are facing down.
Printing tips - Part quantities are listed in the file names. Note that the shackles and covers have left and right hand versions.
- I printed the locking bar out of PETG as PETG seemed to last longer before the springiness was gone. PLA seems to work but eventually creeps.
- Make sure to print the dowel pin on its side. Printing it vertically will not work very well.
- Print the key separately, on its side, using support pattern lines with .5 line spacing with a .1 layer height.
- The key should be printed at 100% infill and a warm temperature to ensure good layer adhesion. Don't print the key vertically, it will not be strong and will break off in the lock. ask me how i know..
- At 15% and 4 perimeters, 4 tops and bottoms layers, these are really strong. If you want extra strength of course 100% is an option :)
Finishing Tips - Make sure the pawl and locking bars are really smooth on the top and bottom surfaces. They are thinner than the body to prevent them from sticking, but use some sand paper or a file to get those surfaces really smooth.
- Chase the screw holes with a drill bit to make sure the screws don't thread on the plastic. If the screws bite on the plastic it can make getting the nuts installed tricky.
- Make sure to deburr the edges that come in contact with skin, especially if you have elephants foot on the first layer.
- Some of the smaller parts may need slight filing and deburring to operate smoothly.
- If the shackle is between notches, the double lock will not engage. If you're having trouble engaging the double lock, just pull on the shackle to make sure it's not between teeth.
Hardware - 12X #2-56 x .5" screws. M2 screws would probably fit. I used torx for extra security :D https://www.mcmaster.com/92703a114 - To eliminate the need for support in the nut recesses, a thin layer of material covers the holes. Remove this material with a drill bit or just shove the screws through.
- 12x #2-56 nuts https://www.mcmaster.com/90480a003 - If the nuts are too tight in the recesses, use a soldering iron to heat set them.
- Put a dab of super glue in the nuts
Versions - 2018-11-14: Initial Release - 2018-11-15: Reduced the thickness of the pawl and locking bar so they move freely if the body screws are tight.
Descripción original del autor, publicada en Thingiverse.



