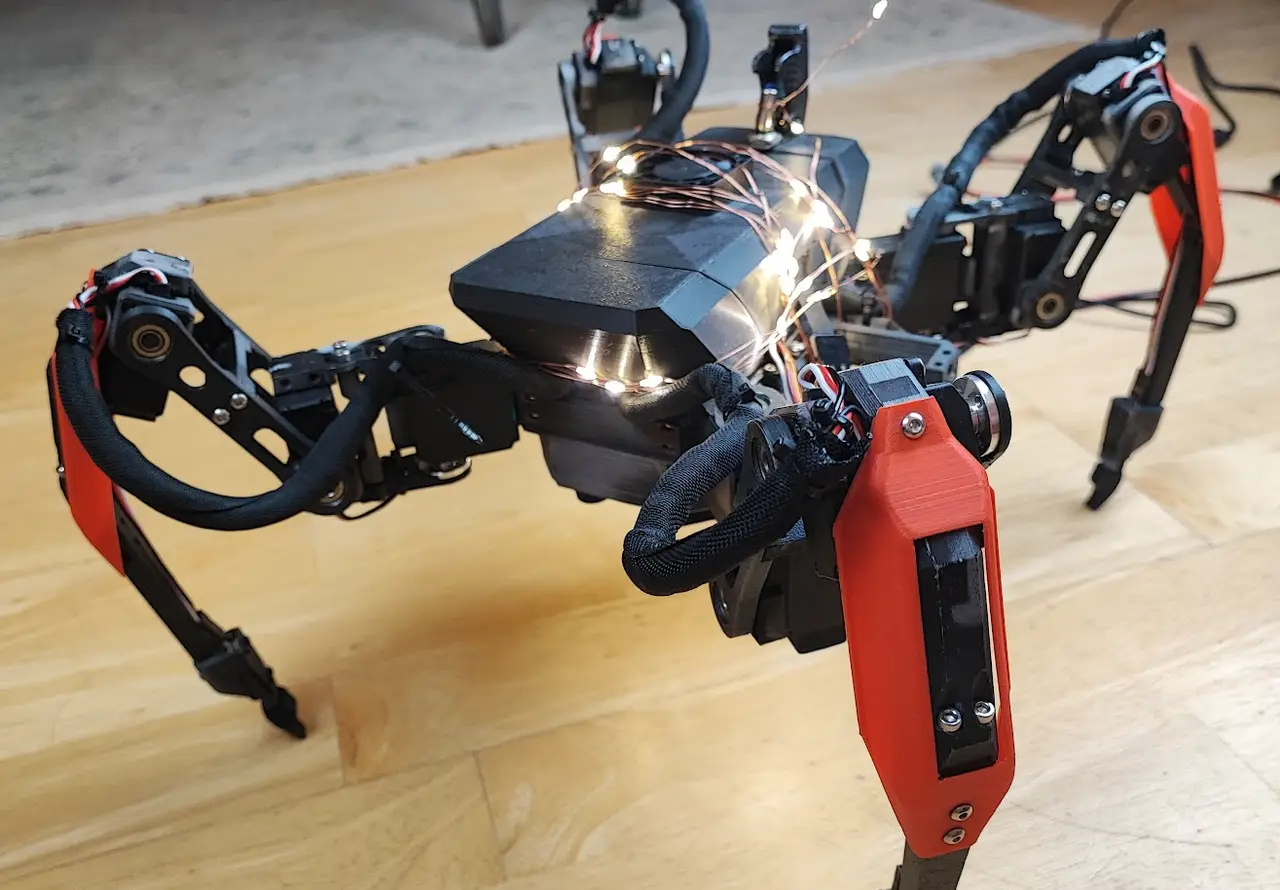
Hexapod Spider Robot
por Robert Meisner en Thingiverse
Spiderbot STLs: 3D-Printed Hexapod Spider Robot Build Guide Star it on GitHub Follow Spider Robot build tutorials Introduction This repository contains STL files, 3D printing instructions, and build documentation for SpiderBot, a 3D-printed spider robot. Here you'll find all you need to build your..
Licencia
Uso comercial permitidoPuedes imprimirlo, modificarlo y venderlo dando crédito al autor.
Al descargar aceptas respetar la licencia y dar crédito a Robert Meisner.
Archivos (25)
- LegShield.stl STL · 37 KB
- SwitchCover.stl STL · 47 KB
- PowerCompDoor.stl STL · 54 KB
- CarapaceBack.stl STL · 234 KB
- Stand.stl STL · 151 KB
- ControllerPlate.stl STL · 147 KB
- TibiaTop.stl STL · 190 KB
- StandLeg.stl STL · 138 KB
- FrameCenterServoHolder.stl STL · 247 KB
- CoxaSide2_8holes.stl STL · 232 KB
- ServoJoint.stl STL · 423 KB
- FrameSideServoHolder.stl STL · 249 KB
- CarapaceFront.stl STL · 195 KB
- TibiaBottomLong.stl STL · 269 KB
- LegRib.stl STL · 328 KB
- CarapaceMid.stl STL · 378 KB
- PowerCompartment.stl STL · 344 KB
- FemurSide2_8Holes.stl STL · 446 KB
- Frame.stl STL · 415 KB
- Tip.stl STL · 727 KB
- MicroswitchHolderRound.stl STL · 584 KB
- FemurSide1_625ZZ.stl STL · 689 KB
- ElectronicsPlate.stl STL · 654 KB
- CoxaSide1_625ZZ.stl STL · 580 KB
- Claw.stl STL · 2,6 MB
- Categoría
- Varios
- Formatos
- STL
- Descargas
- 2,104
- Publicado
Sobre este modelo
Spiderbot STLs: 3D-Printed Hexapod Spider Robot Build Guide Star it on GitHub Follow Spider Robot build tutorials Introduction
This repository contains STL files, 3D printing instructions, and build documentation for SpiderBot, a 3D-printed spider robot. Here you'll find all you need to build your own SpiderBot, whether you're a beginner or an experienced robotics enthusiast. Acknowledgments While the MakeYourPet project served as an initial inspiration, the 3D parts used in this Hexapod Spiderbot Model are not from their official designs. Special credit goes to 'amelendez8', a Discord server user from MakeYourPet's community. I have adapted and modified his design for the purpose of this project. You can find his original work here. Disclaimer This project is intended for educational purposes. Please exercise caution and read all safety guidelines when working with electronics and 3D printers. We are not responsible for any damage caused during the build. Pre-requisites - 3D printer with PLA filament - Basic knowledge of electronics - Soldering kit - [Optional] CAD software like Fusion 360 for customization
Installation Clone this repository using the following command: git clone https://github.com/robs-workbench/hexapod_spiderbot_model.git It's a part of the youtube series:
Components Body Parts Part NameDescription3D Printing InstructionsCountPhotoLink to STL FrameServes as the robot's central structure.Layer height: 0.2mm, Fill: 20%, No supports needed1Frame Frame Center Servo HolderHolds the servo motor in the central part of the frame.Layer height: 0.2mm, Fill: 30%, Supports: No2 - for hexapodFrame Center Servo Holder Frame Side Servo HolderHolds the servo motors on either side of the frame.Layer height: 0.2mm, Fill: 30%, Supports: No4Frame Side Servo Holder CarapaceConsists of 3 parts: Front, Mid, Back. Design with tongue and groove technique for easy assembly comming soon.Layer height: 0.2mm, Fill: 20%, Supports: Yes1 setCarapace Front Carapace Mid Carapace Back Power compartmentHolds the 2S LiPo Battery securely.Layer height: 0.2mm, Fill: 30%1Power compartment Power compartment doorDoor for the power compartment. Future improvement: snap-fit design.Layer height: 0.2mm, Fill: 20%, Supports: No1Power compartment door Electronics plateSits between the Power compartment and the Frame, holding electronics in place.Layer height: 0.2mm, Fill: 20%1Electronics plate Controller plateDesigned to hold controllers like Raspberry Pi or Servo 2040. Can be attached to the Electronics plate or Carapace (middle).Layer height: 0.2mm, Fill: 20%1Controller plate Leg Parts Part NameComments3D Printing InstructionsCountPhotoLink to STL Servo jointConnects servo to leg components3 per legServo joint Leg ribAdds structural integrity to the legs2 per legLeg rib Coxa Side 1Upper part of the leg, connects to the servo jointLayer height: 0.2mm, Fill: 30%1 per legCoxa Side 1 Coxa Side 2Companion to Coxa Side 1, forms the upper leg part.Layer height: 0.2mm, Fill: 30%1 per legCoxa Side 2 Femur side 1Middle segment of the leg1 per legFemur side 1 Femur side 2Companion to Femur side 1, forms the upper leg part.1 per legFemur side 2 Tibia topLower leg part connecting to femurLayer height: 0.1mm, Fill: 30%1 per legTibia top Tibia bottomEnd segment of the leg1 per legTibia bottom Leg shieldCovers and protects leg mechanics1 per legLeg shield Micro switch holderHolds the micro switch in place for leg feedback1 per legMicro switch holder Micro switch coverCovers the micro switch for protection1 per legMicro switch cover Leg tipEnd tip for the legs, provides better grip1 per legLeg Tip ClawUse soft material tip for better grip and silent movementMaterial: TPU1 per legClaw Other Parts Part NameComments3D Printing InstructionsCountPhotoLink to STL Spiderbot standConsists of 2 separate pieces: a stand and a leg. This allows for airborne testing of the robot. The leg can be attached to a stable object like a tripod or weights for added stability.Layer height: 0.3mm, Fill: 40%. For a taller stand, scale the leg in the Z direction.1 set (1 stand, 1 leg)Leg ------ Stand Contribution Contributions are welcome! Please read the Contribution Guidelines for more information. License This project is licensed under the MIT License - see the LICENSE.md file for details.
Descripción original del autor, publicada en Thingiverse.